You can train most pet birds to perch on your shoulder reliably, but it takes a specific progression: hand taming first, then step-up on command, then gradually raising your hand to shoulder height, and finally building duration with reinforcement. Skipping any of those steps is why most people run into trouble. The whole process takes anywhere from a few days with a tame, confident bird to several weeks with a fearful or untouched one, and that's completely normal.
How to Train a Bird to Stay on Your Shoulder Safely
Clara Hayes
20 May 2026
Is your bird ready? Readiness and suitability checks
Before you start shoulder training, do a quick honest assessment of where your bird is right now. A bird that isn't ready for shoulder work will just learn to associate your shoulder with stress, which makes everything harder down the line.
First, check temperament and taming stage. Your bird should already be comfortable with you standing close, reaching into the cage, and ideally stepping onto your hand or a stick on command. If your bird still flattens against the back of the cage when your hand enters, shoulder training is premature.
Work on hand-targeting and step-up first, which are covered in detail in guides on how to train a bird to sit on your hand and how to train a bird to step on your finger. If you specifically want a bird to land on your hand, focus on step-up and hand-targeting first, then build duration until it chooses to step onto you reliably guides on how to train a bird to sit on your hand.
Second, check for stress or illness. A bird showing any of the following signs should see a vet before any training begins: open-mouth breathing, tail bobbing with each breath, wheezing, panting, wings held away from the body, raised head feathers, or a sudden increase in biting and lunging. Birds hide illness well, so behavioral changes that seem like stubbornness are often pain or sickness. Training a sick or stressed bird is both ineffective and unkind.
- Bird steps onto your hand or a stick without backing away (ideal baseline)
- Bird is alert and curious, not puffed, hunched, or lethargic
- No tail bobbing, wheezing, or open-mouth breathing at rest
- No recent sudden increase in biting that hasn't been assessed
- Bird accepts treats from your fingers without lunging or grabbing frantically
- Bird has been seen by a vet in the past year and is current on basic health checks
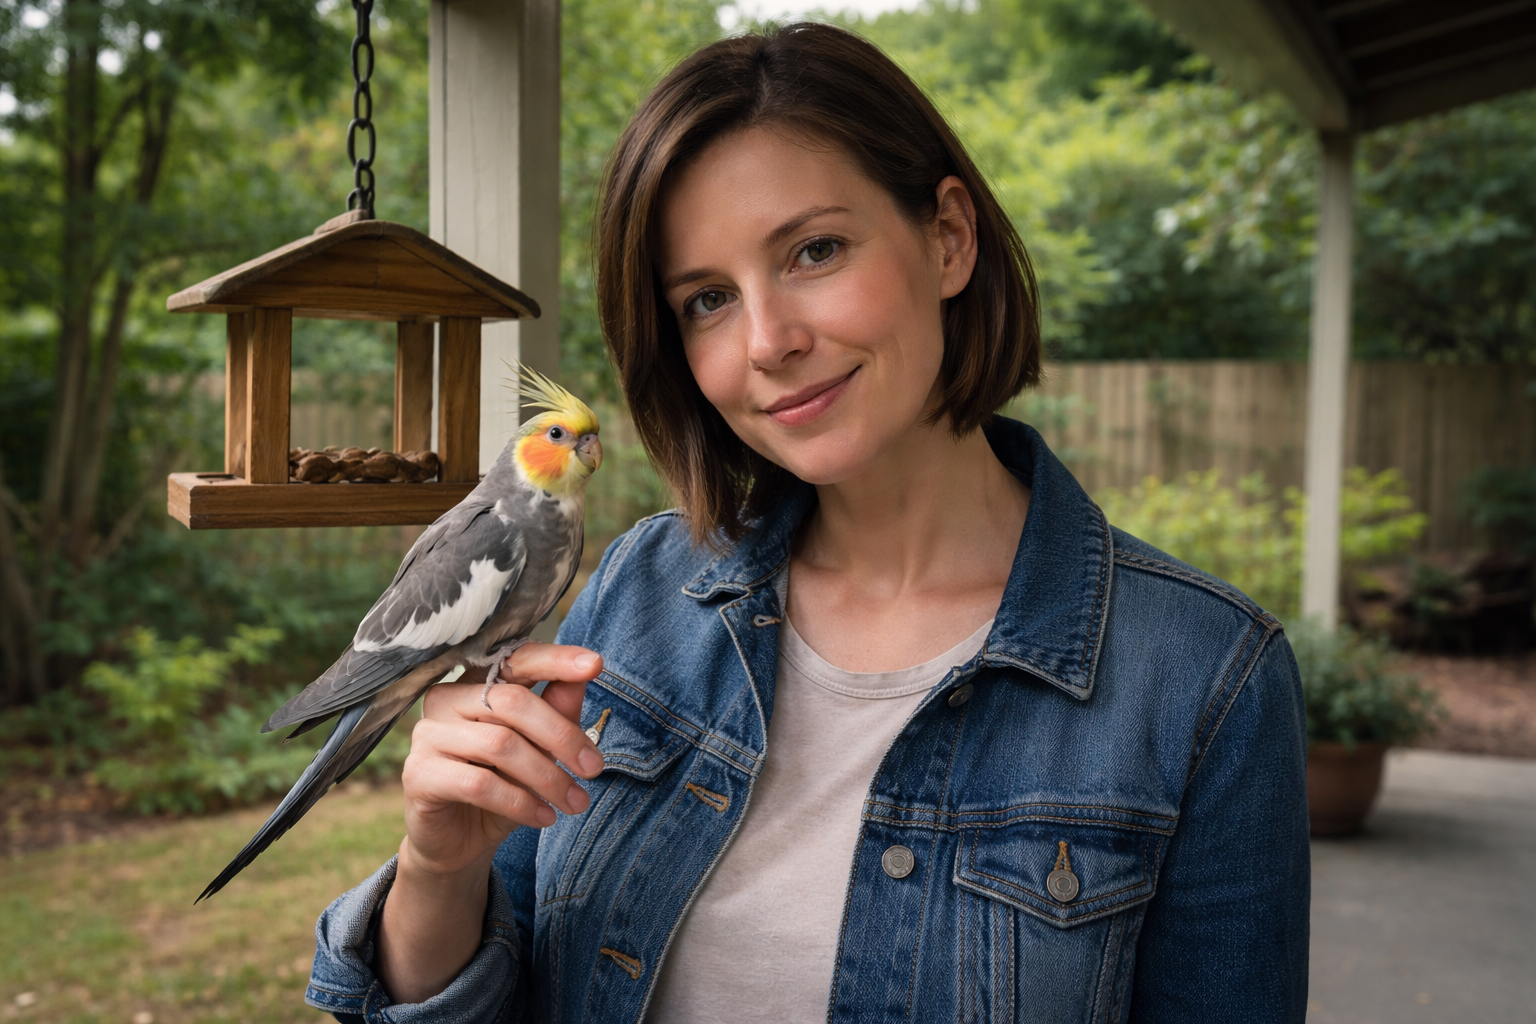
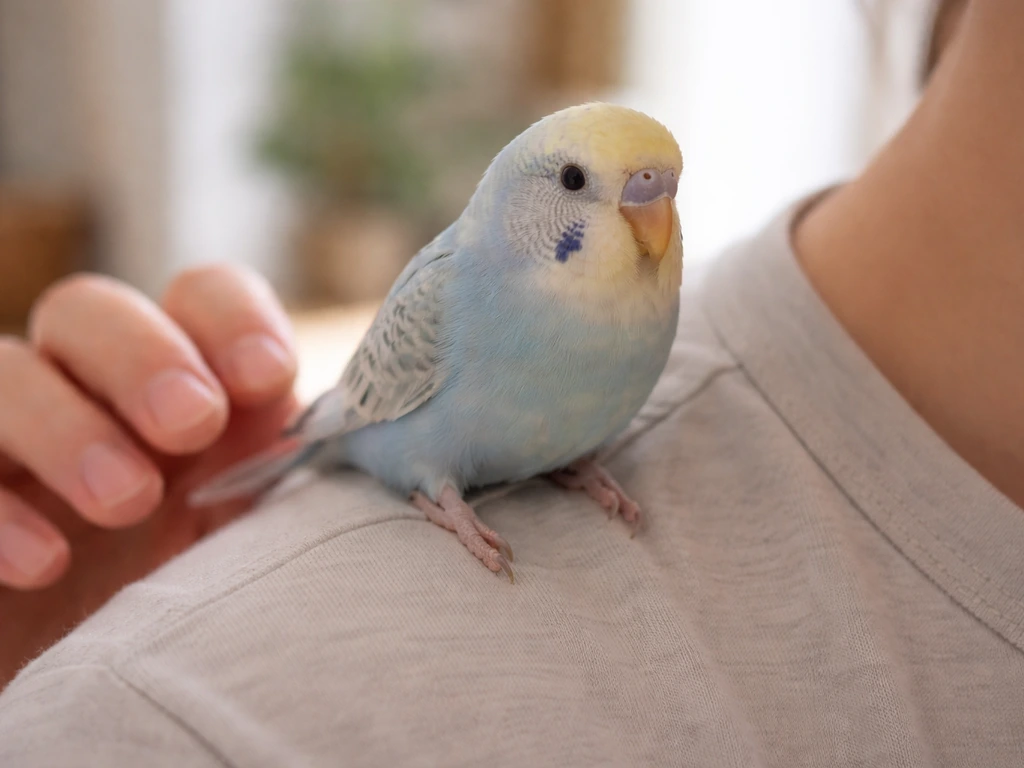
Species suitability matters too. Parrots, cockatiels, and budgies are natural candidates for shoulder training. Finches and canaries generally aren't, because they're not hands-on birds by nature. Wild birds are a separate category entirely, with legal limits that matter a lot, which I'll cover at the end.
Safety basics before your bird goes anywhere near your shoulder
Shoulder perching puts a bird right next to your face, ears, neck, and eyes. That changes the risk profile compared to hand training, so get these safety points sorted before your first session.
Hazards in the room

Do every training session in a bird-proofed room with closed windows and doors, ceiling fans off, and other pets removed or secured. Unsupervised flying around the house is a real hazard, and a bird spooked off your shoulder in an open room can collide with windows or escape through gaps. The CDC specifically recommends against allowing pet birds to roam or fly unsupervised, and that's especially relevant when you're working on a behavior that involves free perching.
Keep the air clean. Cooking fumes, aerosol sprays, air fresheners, scented candles, cleaning products, and especially nonstick cookware heated above roughly 400°F produce fumes that can kill a bird quickly. PTFE-coated pans (Teflon and similar) are the most commonly cited hazard. Run training sessions away from the kitchen, and don't spray anything in the room beforehand.
Bite and fall prevention
Shoulder perching puts your face in bite range. Until you fully trust your bird's behavior on your shoulder, keep sessions short, watch your bird's body language, and don't bring your face close to theirs. If your bird tends to bite during overstimulation or gets nippy near your ear, wear your hair up and keep your ear out of range. For larger parrots especially, a bite to the ear or eyelid can cause real injury. That's not a reason to avoid shoulder training, but it's a reason to progress slowly.
Protect against falls too. Work low to the ground during early sessions, or sit down. If a bird loses balance or spooks, falling from a person's standing shoulder height to a hard floor can injure a small bird. Sitting on a low couch or on the floor during the first few weeks of shoulder training is a simple way to reduce that risk.
Children and other pets
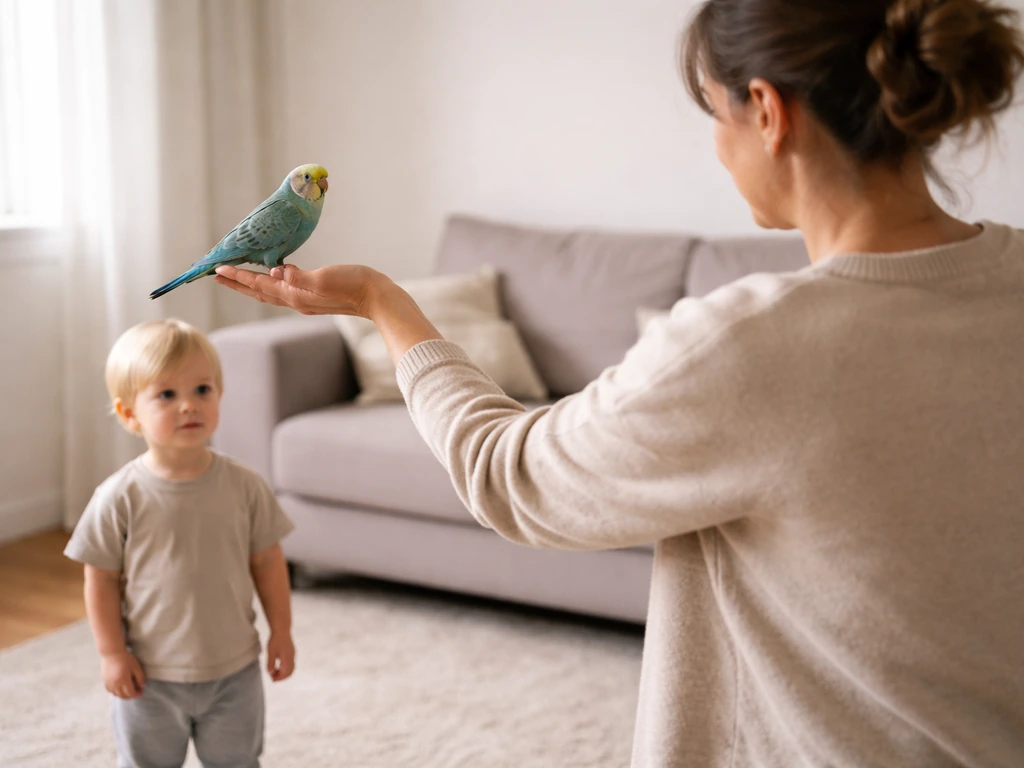
Closely supervise any interactions involving children and a bird on your shoulder. The bird is in a vulnerable position, and sudden grabs or movements can cause defensive biting or falls. Keep dogs, cats, and other predator-type pets out of the room entirely during training. Even a well-behaved dog staring across the room can spike a bird's stress enough to ruin a session.
Step-by-step training plan: from hand to shoulder
This is a five-stage progression. You can use the same basic hand-taming steps and click-and-treat timing to learn how to get a bird on your finger before you ask it to perch on your shoulder. Work at your bird's pace, not a calendar. Each stage should feel easy and comfortable before you move on. If a stage feels shaky, go back one step rather than pushing through.
- Stage 1 — Build the step-up on a perch or stick. If your bird isn't already stepping up reliably, start there. Hold a stick or dowel horizontally at the bird's chest level and say 'step up' in a calm, consistent tone. The moment the bird steps onto the stick, mark it (with a click or a short word like 'yes') and deliver a small, high-value treat. Practice this 5 to 10 reps per session, keeping sessions to about 5 minutes. Once the bird steps up on the first or second cue consistently, you're ready for Stage 2.
- Stage 2 — Transfer step-up to your hand. With the same calm cue and same mark-and-treat timing, replace the stick with your finger or closed fist. Some birds make this leap immediately; others need a few sessions where you hold the stick and gradually shift your fingers closer to the bird's landing point. Never force the bird onto your hand by pushing into its chest hard enough that it has to grab on to avoid falling. That creates resentment, not trust.
- Stage 3 — Introduce targeting. A target stick (a thin dowel or chopstick with a small ball or tape mark at the tip) lets you guide your bird's movement without pushing or reaching. Touch the target near the bird, click and treat when the bird touches it with its beak, then use the target to guide the bird from its perch to your hand. Targeting is a powerful tool for the shoulder step specifically because you can use it to invite the bird to walk up your arm rather than lifting it.
- Stage 4 — Raise your hand slowly to shoulder height. Once your bird steps onto your hand consistently, begin raising your hand a few inches higher each session while keeping the same calm demeanor. Let the bird walk up your forearm toward your shoulder if it wants to. Don't rush it there or place it on your shoulder manually until it has naturally explored that height at least a few times. Use the target stick to guide it up your arm if needed.
- Stage 5 — Build duration and association on the shoulder. Once your bird reaches your shoulder willingly, your job is to make that spot feel like the best place in the room. Offer treats, speak softly, stay still, and keep the session to one to two minutes at first. End the session before the bird gets restless by asking for a step-down back to the hand, marking and treating that too. Gradually extend shoulder time over days and weeks.
Keep training sessions short, especially early on. Five minutes of focused, positive interaction beats thirty minutes of frustration every time. The mark-and-treat timing is everything: the click or verbal marker needs to land at the exact moment the bird does the right thing, not a second later. Delayed markers teach the wrong lesson.
Desensitization, reinforcement, and building trust over time
Shoulder perching asks your bird to be comfortable with things it wouldn't naturally choose: fabric moving under its feet, your head turning, your breathing and voice at close range, and sudden environmental sounds. Desensitization means exposing your bird to these things so gradually that it never gets stressed, building positive associations at every step.
Desensitizing to clothing and movement
If your bird is fidgety on your shoulder or flies off when you move, start by practicing with it on your hand and making slow, deliberate body movements while treating. Turn your head slowly, shrug your shoulders, shift your weight. Pair every movement with a treat. Once the bird stays calm during hand-level movement, transfer to the shoulder and repeat. Wearing a consistent textured shirt or jacket for training can help, since birds often prefer a grippy surface like a denim or cotton shoulder to a slippery one.
Reinforcement schedule and treat selection
Use the highest-value treat your bird will work for: a small piece of nutriberry, a pine nut, a sunflower seed, or a sliver of fruit all work depending on the species. Deliver treats frequently in early training (every 10 to 20 seconds on the shoulder), then gradually stretch the intervals as the bird gets comfortable. This is how you build duration without the bird becoming restless or anxious. Over time, you can shift from food treats to other reinforcers your bird loves, like head scratches, verbal praise, or a favorite toy, though food tends to work fastest in new behaviors.
Building trust through predictability
Birds trust what they can predict. Training at the same time of day, using the same cues, and ending sessions before the bird shows signs of wanting to leave all build that predictability. Watch for early exit signals: shifting weight, looking around rapidly, feathers slicking down tight, or crouching. When you see those signals, ask for a step-down back to the hand and end the session positively. Never let a session deteriorate to the point where the bird flies off in frustration, if you can help it. Calm endings matter.
A Look-at-That style approach also works well for birds that are distracted by environmental triggers during shoulder sessions. When your bird fixates on something startling (a dog walking past, a noise outside), instead of trying to redirect by force, cue your bird to look at you and treat the calm attention. You're rewarding the bird for noticing a thing and choosing to look back at you rather than reacting, which builds confidence over time.
Species-specific tips and realistic expectations
| Species | Natural tendency for shoulder perching | Realistic timeline | Key tips |
|---|---|---|---|
| African Grey / Amazon / Large parrots | High, but can be nippy near face | 1 to 4 weeks from solid step-up | Progress slowly on face proximity; watch for overstimulation; stick training first if nippy |
| Cockatiel | High, naturally social and perch-oriented | A few days to 2 weeks | Crest position tells you mood; flat crest = relaxed, raised = alert or startled |
| Budgie (parakeet) | Moderate; varies a lot by individual | 1 to 4 weeks from hand taming | Small and fast; work low to the ground; short sessions work best |
| Finch / Canary | Low; not hands-on birds by nature | May never be appropriate | Handling stresses most finches; shoulder training is not recommended for these species |
| Wild bird (yard species) | Not applicable for intentional training | Not applicable | Legal and ethical limits apply; see ethics section below |
Parrots (larger species)
Larger parrots like African Greys, Amazons, Eclectus, and macaws can be wonderful shoulder birds, but they're also the ones most likely to bite near your face if startled or overstimulated. Use stick training as a foundation if your bird has any history of biting, so you can direct and retrieve without putting your hand in bite range. Once trust is solid, transition to hand. These birds also go through hormonal phases (usually spring) where shoulder behavior can change suddenly, so reassess seasonally and don't take it personally if your reliably calm bird gets unpredictable for a few weeks.
Cockatiels
Cockatiels are probably the easiest shoulder birds. They're social, they love warmth, and they naturally gravitate toward high perches near their favorite person. Read the crest: a relaxed, slightly lowered crest means your bird is content. A suddenly erect crest paired with wide eyes means something startled it, and you should stay still and calm until it settles. Cockatiels are also big whistlers, so be prepared for some enthusiastic sounds right next to your ear.
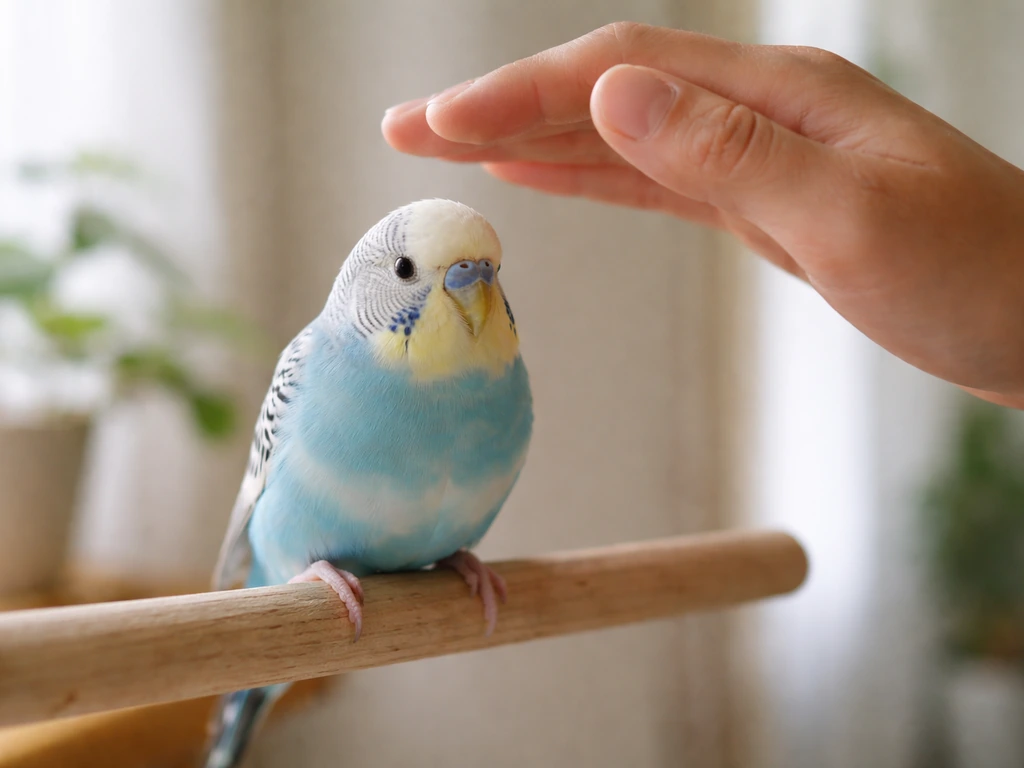
Budgies
Budgies are small and quick, which means falls from shoulder height matter more proportionally. Sit down during training. Budgies also tend to be more variable individually: some are fearless from the start, others take weeks to stop flinching at your hand. Single budgies are generally easier to hand train than those kept in pairs or groups, since a flock buddy competes with you for the bird's attention. Keep sessions to 3 to 5 minutes and use millet spray as a high-value treat.
Finches and canaries
Be honest here: most finches and canaries are not good candidates for shoulder training. They're prey-response birds that find handling inherently stressful, and their quality of life is better served by enriched aviary environments than by hands-on handling goals. If you have a particularly tame finch that has been hand-raised, you might work on very gentle hand perching, but the shoulder is generally a step too far for this family of birds.
Wild birds in the yard
Wild birds you encounter in your yard, including robins, sparrows, jays, or any migratory species, are protected under the Migratory Bird Treaty Act in the US. You cannot legally train, handle, or condition them to come to you for perching without a federal permit. The rare exceptions (like briefly handling and transporting an injured bird to a licensed rehabilitator) are covered under Good Samaritan provisions, not recreational training. The USFWS explains that the [“Good Samaritan” provision](https://www.
fws. gov/service/3-200-10b-migratory-bird-rehabilitation) allows you to possess a sick, injured, or orphaned migratory bird only to immediately transport it to a permitted rehabilitator. If you're genuinely interested in having wild birds land on you, that's a separate practice covered in guides specifically about attracting wild birds, and it relies on environmental patience, not training in the traditional sense.
If your goal is specifically how to get a wild bird to land on you, follow the attraction guidance and legal considerations for your region rather than using traditional shoulder-training methods.
Troubleshooting: what to do when things aren't working
Bird is fearful and won't approach
- Go back to the earliest comfortable stage, usually just sitting near the cage without reaching in
- Lower your body position: sit on the floor rather than standing over the bird
- Avoid direct staring, hovering, or looming over a fearful bird
- Let the bird come to you rather than moving toward it
- Spend several sessions just offering treats through cage bars without asking for any behavior
- Check your pace: you may be moving to the next stage too quickly
Bird bites when on the shoulder
- Rule out medical causes first if biting is new or suddenly escalated
- Identify the trigger: movement of your head, sounds near your ear, overstimulation from petting?
- Shorten sessions drastically and end before the bite happens
- Watch early warning signs (feathers tightening, eye pinning in parrots, foot shifting) and step the bird down before it escalates
- Never punish a bite by dropping, shaking, or yelling; this breaks trust and often makes biting worse
- If the bite is consistently near your ear, keep that side away from the bird until trust is rebuilt
Bird keeps flying off the shoulder
- The session is too long: end 30 seconds before the bird seems restless
- The treat rate is too low: increase treat delivery frequency to keep the bird engaged
- Something in the environment is triggering flight: reduce distractions
- The bird may need its wings lightly trimmed if safety is a concern (consult your vet about whether a trim is appropriate for your bird's situation)
- Make the step-down-to-hand cue reliable so you have a clean exit option before the bird self-exits
Bird is overstimulated or frantic
- Signs of overstimulation: rapid pacing on your shoulder, excessive vocalizing, frantic head bobbing, fast wing flapping
- Step the bird calmly to a perch and give it a few minutes to settle without interacting
- Reduce session length and reduce the number of people in the room
- Train at a calmer time of day; many birds are calmer mid-morning than at dusk
- Avoid training after any stressful event like a vet visit or a loud household moment
Bird won't step up from the shoulder back to your hand
- Practice step-up from the shoulder as its own trained behavior with its own treat delivery
- Present your hand in front of the bird (not from behind or above) with the step-up cue
- Use a target stick to guide the bird from shoulder to hand rather than reaching up behind it
- Never grab or scruff the bird off your shoulder; that damages trust immediately
- If the bird is territorial about being on your shoulder, practice frequent step-on/step-off cycles during every session so the pattern becomes normal
Ethics and legal considerations: pet birds vs. wild birds
For pet birds, shoulder training is straightforwardly humane as long as you're using positive reinforcement, not forcing, and reading the bird's stress signals accurately. The ethical line is clarity and consent: your bird should be choosing to step up and perch, not being physically placed and held in position. If your bird consistently tries to leave and you keep returning it to your shoulder, that's coercion, not training.
For wild birds, the legal picture is clear in the United States. The Migratory Bird Treaty Act prohibits taking, possessing, or interfering with the vast majority of native wild bird species without a federal permit. This includes intentionally conditioning wild birds to land on or stay on your body. The USDA APHIS also warns against habituation of wildlife to humans, because it can increase harmful interactions and put birds at risk near roads, airports, and predators. If you find an injured or sick wild bird, the legally correct action is to minimize your handling, place the bird in a secure ventilated box, and transport it promptly to a licensed wildlife rehabilitator.
Wildlife rehabilitators who work hands-on with wild birds need both state permits and often a federal migratory bird rehabilitation permit. The federal permit process requires documented hands-on experience (at least 100 hours over a minimum of one year) under a permitted rehabilitator. Casual enthusiasts who want to 'tame' a wild bird they've found are not operating within that framework, and doing so puts both the person and the bird at risk. The humane and legal path is always to get wild birds to professionals who can assess, treat, and release them properly.
The bottom line: shoulder training is a genuinely achievable and enriching goal for most pet parrots, cockatiels, and budgies. It takes patience, the right progression, and a consistent reading of your bird's body language. If you've already worked through hand-targeting and step-up basics (covered in detail in related guides on getting a bird to come to your hand and to land on your hand), shoulder training is the natural next step, and most birds get there faster than their owners expect. If what you want is more than shoulder perching, work on cues that get your bird to come to you reliably in small steps first.
FAQ
What should I do if my bird steps onto my shoulder but immediately tries to leave or panics?
Treat it as a readiness or safety signal, step the bird back down right away, and shorten the next session. If it only happens when you move your head or breathe close, practice those exact movements during hand-level training first, then transfer again only when the bird stays relaxed. Avoid “resetting” by pushing the bird back onto your shoulder, that can teach the shoulder as something you control, not something it chooses.
How long should a shoulder-training session be, and how do I know when to stop?
Keep sessions brief early on, often a few minutes, and end while the bird is still accepting. Use early exit signs as your cutoff, such as rapid looking around, crouching, or feathers flattening. If the bird flies off, stop for the day and run a shorter hand-step-up session later, otherwise you risk turning the shoulder into a place that precedes loss of control.
Do I need to use a clicker, or can I use a verbal marker?
Either works, the key is consistency and timing. If you use a verbal marker, choose one short word and keep your tone steady, then pair it with a treat immediately at the correct moment. Don’t add extra words before the marker (like “good bird”) because the bird can start reacting to the earlier sound rather than the behavior you want.
How can I prevent my bird from biting my face, especially near my ear or eyelid?
Progress more slowly and reduce face proximity until you fully trust the bird. Keep your hair up or use a protective barrier like a lightweight towel draped over your shoulder during early sessions, then remove it once the bird is consistently calm. Also, don’t “reward” nippy behavior by giving attention or talking right when a bite attempt happens, instead wait for a calm moment and reinforce that.
What if my bird only stays on my shoulder when it’s hungry, and won’t perch when treats are gone?
That usually means the bird has learned food dependency rather than comfort and predictability. Gradually reduce treat frequency by keeping the same routine and cues, while switching to lower-value treats at first and adding non-food rewards (head scratches, toy access) once the bird can hold position for longer periods. If you remove treats entirely too fast, the bird may revert to exiting behavior.
How do I handle setbacks when my bird’s behavior suddenly changes (for example, after spring or after a stressful event)?
Reassess readiness instead of assuming the training “stopped working.” Return one or two steps, usually back to hand-level desensitization and shorter duration, and rebuild from easy successes. For seasonal or hormonal changes, expect more startle responses for a few weeks and keep sessions extra short, with slower movements and fewer distractions.
Is it safe to wear certain types of clothing during shoulder training?
Yes, texture matters. A consistent grippy fabric (like cotton or denim) can help the bird feel secure with less slipping. Avoid anything slick, loose ponchos that move unpredictably, or clothing with dangling parts that could snag. Also consider hair, if it covers your ear or face it may reduce accidental “reach” during early sessions.
My bird flaps, panics, or launches off my shoulder when I walk or turn. What’s the best fix?
Start conditioning the bird to movement while it is still on your hand, then transfer gradually. Practice slow shoulder and head turns at the bird’s comfort distance, treating for calm, steady posture. If launching happens during shoulder work, you are likely moving faster than the bird can predict, so slow down and add small movement steps rather than full repositioning.
Can I train multiple birds for shoulder perching at the same time?
It’s usually harder and can increase stress, especially if birds compete for food or attention. If you have more than one bird, train one at a time in a bird-proofed, controlled room. If a flock bird is paired with another bird, you may need to compensate with higher-value treats and more frequent reinforcement for calm focus on you.
Is it ever okay to force a bird to stay on my shoulder to “teach” it?
No. Forcing teaches that your shoulder means restraint and rising stress, which can worsen biting and panic. Instead, use consent-based training: ask for step-up, reinforce calm holding, and always allow a step-down when the bird shows early exit signals. If the bird cannot reliably choose to stay yet, that step is not ready.
What should I do if I’m concerned about nonstick fumes or other air hazards during training?
Use a kitchen-free area and avoid anything likely to aerosolize or heat up, especially scented sprays, candles, and any cooking nearby. Also be cautious about heat sources like ovens preheating or nearby hot appliances, fumes can drift into adjacent rooms. If you smell strong odors or see smoke, stop training and ventilate before resuming.
Are wild birds treated the same as pet birds for shoulder perching training?
No, and you should not attempt traditional shoulder-training with wild birds. In the US, conditioning wild birds to land on or stay on you is generally prohibited without the required federal permits, and wildlife agencies also caution that habituation to humans can increase risk. The humane legal option for sick or injured wild birds is minimal handling and transport to a licensed rehabilitator.
If my goal is not just shoulder perching, but getting my bird to come to me, what should I train next?
Keep shoulder training as a separate skill and build “come to you” behavior in smaller, lower-stakes steps first. A common approach is to train clear cues that reliably bring the bird to your hand or a perch, then gradually increase distance and duration. This reduces the need for close face proximity and can improve safety if shoulder behavior becomes unpredictable.