Yes, you can get a bird to land on your hand, but it almost never happens on the first try, and it should never happen by force. The process is really about building enough trust that a bird decides, on its own, that your hand is a safe and rewarding place to be. Whether you're working with a pet parrot, a skittish cockatiel, or a wild chickadee that visits your yard, the core approach is the same: go slow, use food as a bridge, and let the bird make the choice every single time.
How to Get a Bird to Land on Your Hand Safely
Clara Hayes
9 Apr 2026
Humane safety rules and what not to do
Before anything else, get these ground rules into your head. Breaking them won't just slow your progress, it can genuinely hurt the bird or you.
- Never grab a bird by its legs, wings, or tail. If a pet bird escapes your hand, resist every instinct to snatch at it. Corner the bird calmly and use a soft towel or net if you need to recapture it.
- Don't force a bird onto your hand by pushing your hand into its chest aggressively. A gentle, steady press just below the feet is the correct technique, not a shove.
- Keep towel restraint short if you ever need it. Birds can overheat quickly and become severely stressed within minutes.
- Wear no strong perfumes or hand lotions before a session. Birds have sensitive respiratory systems and are easily put off by unfamiliar smells.
- Wash your hands before and after every handling session. Pet birds can carry bacteria like Chlamydophila psittaci (the cause of psittacosis), and bites or scratches from even small beaks can cause real damage. The CDC recommends basic hygiene precautions whenever you handle birds.
- Never handle a bird near open windows, ceiling fans, hot stoves, or other pets.
- Stop any session the moment the bird shows clear stress signals: feathers slicked tight to the body, fast breathing, repeated lunging, or continuous alarm calls.
The humane principle running through all of this is consent. You want the bird to land on your hand because it wants to, not because it has no choice. Every forced interaction sets trust back further than you might expect.
Set up your space to make landing easy
Your environment does a lot of the work before you even extend your hand. A chaotic, unfamiliar room makes every interaction harder. A calm, bird-friendly setup makes every step of training faster.
Start in a small, quiet room with the door closed and distractions removed. Turn the TV off. Keep other pets out. Dim harsh overhead lights if you can, since softer lighting reduces a bird's general alertness level. For pet birds, do your first sessions in a room the bird already knows, ideally near its cage so it feels anchored to a familiar safe space.
Position matters enormously. Sit or crouch down to the bird's level rather than looming over it from above. Birds are prey animals, and anything approaching from overhead reads as a predator. If the bird is on a perch, position yourself so your hand starts about 30 to 45 centimeters (12 to 18 inches) away. That's close enough for the bird to see what you're offering, but far enough that it doesn't feel cornered.
Timing matters too. Early morning and late afternoon, when many birds are naturally more active and social, tend to work better than midday. Avoid sessions right after stressful events like cage cleaning, vet visits, or loud noises. A well-fed bird is less food-motivated, so training right before a regular meal (not during extreme hunger) gives you the best treat leverage without causing stress.
Build trust first: calm approach and reward foundations
Rushing to the hand-landing step is the single most common mistake people make. Before a bird will land on your hand, it needs to be comfortable with your presence, your movements, and your smell. That foundation takes time, and there are no shortcuts.
Start by simply sitting near the bird's space without interacting. Read a book, work quietly, just exist near the bird without looking directly at it for long periods. Direct eye contact reads as a threat to most birds. Over several days, the bird should start ignoring you and going about its normal behavior (eating, preening, vocalizing) while you're present. That's your green light to move closer.
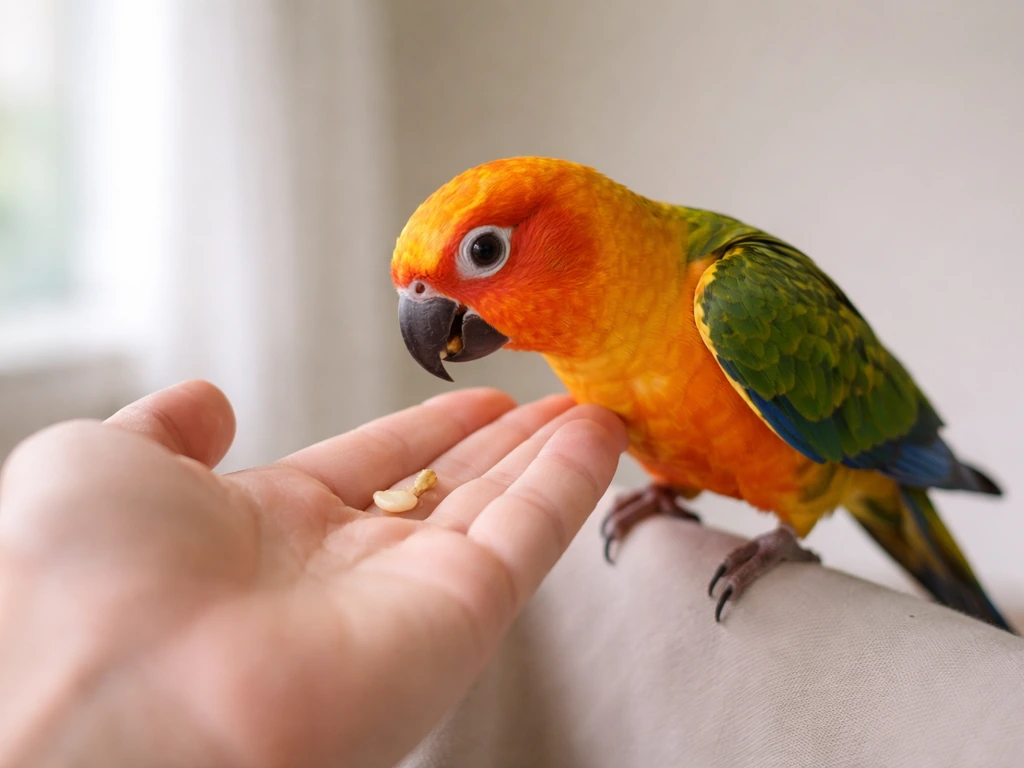
Introduce your hand slowly. Hold it still near the cage or perch with a high-value treat resting on your palm or pinched between two fingers. Don't reach toward the bird. Let the bird come to investigate at its own pace. The moment it approaches or shows curiosity, speak softly and reward it with the treat. Good treat choices include small pieces of millet, sunflower seeds, pine nuts, or whatever the individual bird gets most excited about. Figure out what motivates your specific bird before you start, because a treat the bird is indifferent to won't move the training forward at all.
This approach phase can take anywhere from two days to three weeks depending on the bird's history and temperament. A hand-raised bird that was well socialized as a chick may be comfortable near your hand within a few sessions. A wild-caught bird or a bird with a history of rough handling might need weeks of patient proximity work. If you want to understand how to get a bird to come to you naturally rather than waiting, building that positive association with treats and calm presence is exactly the foundation you'll need.
Teach the behavior: cues, positioning, and the step-by-step landing process
Once your bird is comfortable taking treats from your hand while it's stationary, you're ready to start the actual landing or step-up training. Think of this as teaching a behavior in small, manageable stages rather than one big leap.
Hand and finger positioning
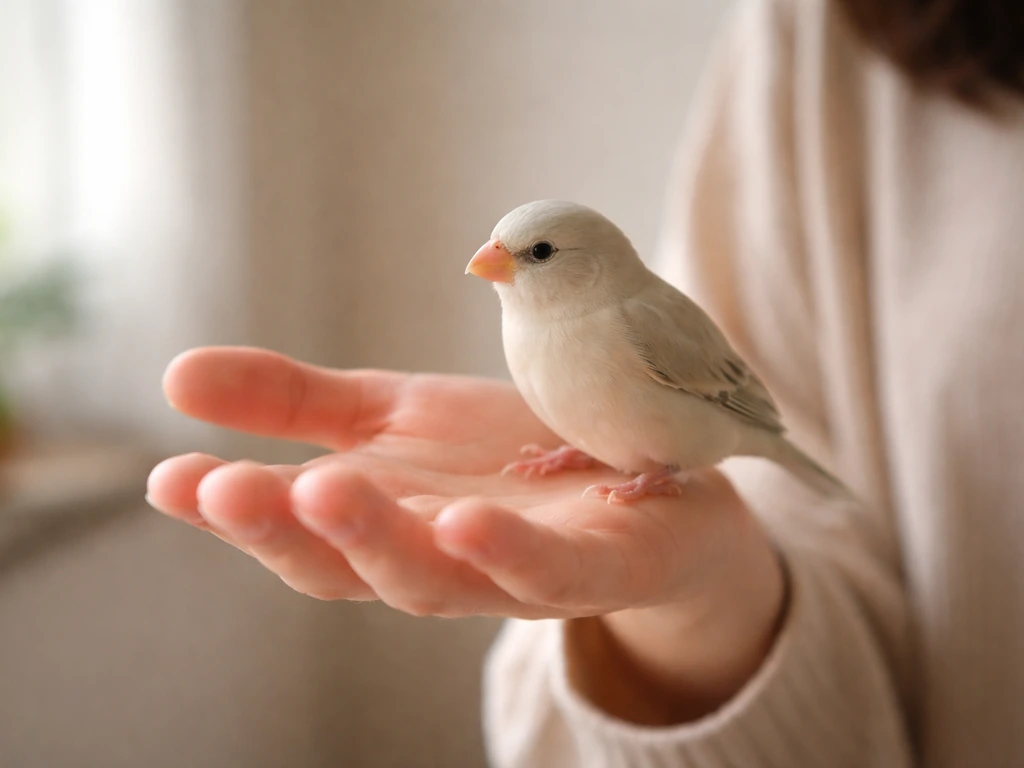
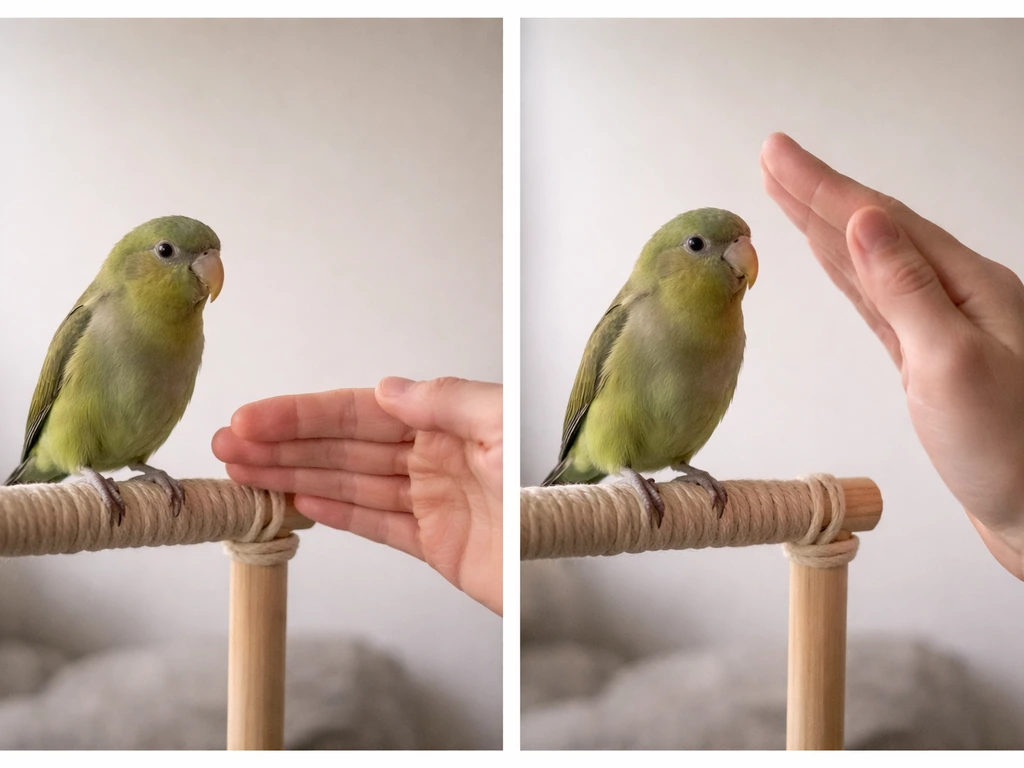
For larger birds (parrots, cockatiels), offer a flat, steady palm or a gently closed fist as a landing platform. For smaller birds (budgies, finches), extend one or two fingers as a perch. Keep your hand completely still when you first offer it. Any wobble or sudden movement will abort the attempt. Think of your hand as furniture, not something alive and unpredictable.
The "step up" position is key: bring the edge of your hand or the side of your index finger up to just below the bird's feet, pressing very lightly against the lower part of its legs. This gentle pressure triggers a natural stepping reflex in most birds. Don't stab the hand forward or push hard. Slow, steady contact just below the ankle joint is all you need. If you want detailed guidance specifically on how to train a bird to step on your finger, that reflex technique is the core of the whole process.
The step-by-step landing process

- Session 1 to 3: Sit near the bird with your hand open and still, treat visible. Don't move toward the bird. Let it approach and eat from your palm.
- Session 4 to 6: Hold the treat slightly further back in your hand so the bird has to move more of its body weight toward you to reach it. The goal is to have the bird put at least one foot on your hand to get the treat.
- Session 7 to 10: Position your hand as a perch just below the bird's feet. Use the gentle step-up pressure described above. The moment one foot lands, reward immediately and enthusiastically.
- Session 11 onward: Build duration. Once the bird is stepping up reliably, reward it for staying on your hand for longer periods before you offer the treat. Gradually increase the time between landing and reward.
- Add a verbal cue: say "step up" or "up" in a calm, consistent tone just before you offer your hand. Over time, the bird will associate the cue with the action.
Keep each session short, ideally 5 to 10 minutes, and end on a success. If a session is going badly, back up to an easier step the bird can succeed at, reward that, then end. Ending on frustration or failure teaches the bird nothing good. If your goal is specifically focused on getting reliable perching behavior, the detailed guide on how to train a bird to sit on your hand walks through the duration-building phase in more depth.
Species-specific tips
Different birds need different approaches. What works beautifully for a trained Amazon parrot can completely backfire with a nervous finch. Here's what to know about each common species.
Parrots
Parrots are the most trainable of the pet bird world but also the most complex. They're highly social, emotionally intelligent, and will test your consistency constantly. Larger parrots (Amazons, African Greys, Macaws) can cause serious injuries if they bite, so respect their body language and never put your face close to an untested bird.
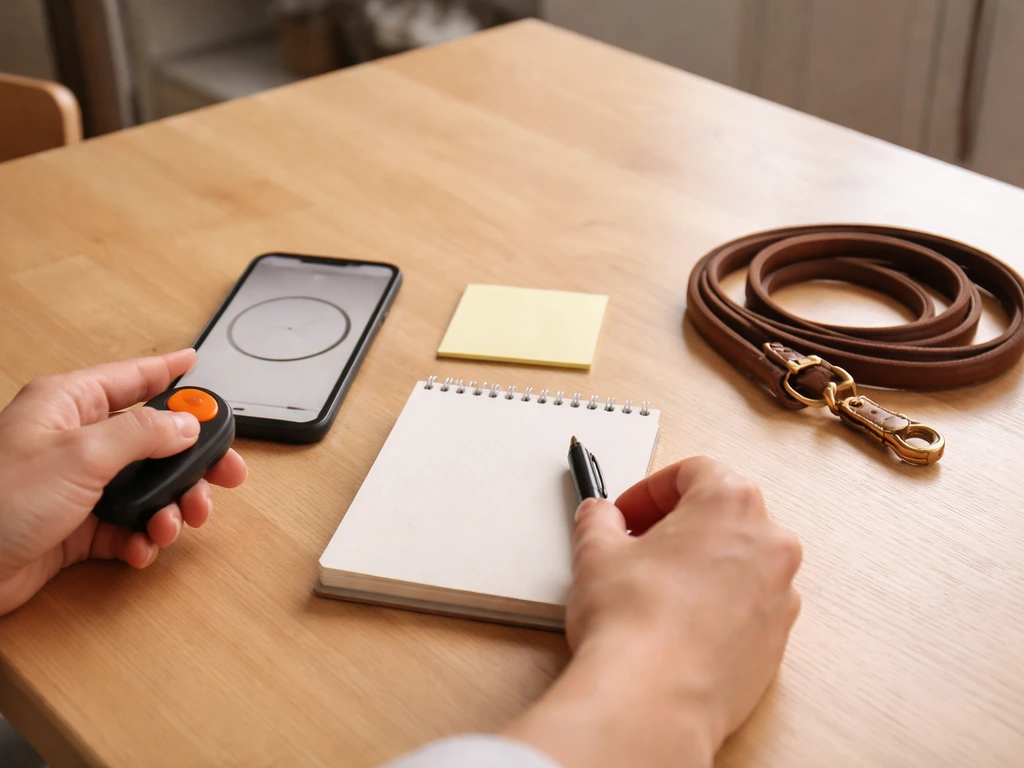
These birds respond very well to clicker training alongside treat rewards, which gives you precise timing for marking the exact moment a foot lands on your hand. Use high-value treats like pine nuts or a small piece of almond for breakthroughs. Parrots often prefer a specific person and may resist step-up with unfamiliar people, so if you're training a bird that's bonded to someone else, start with that person present.
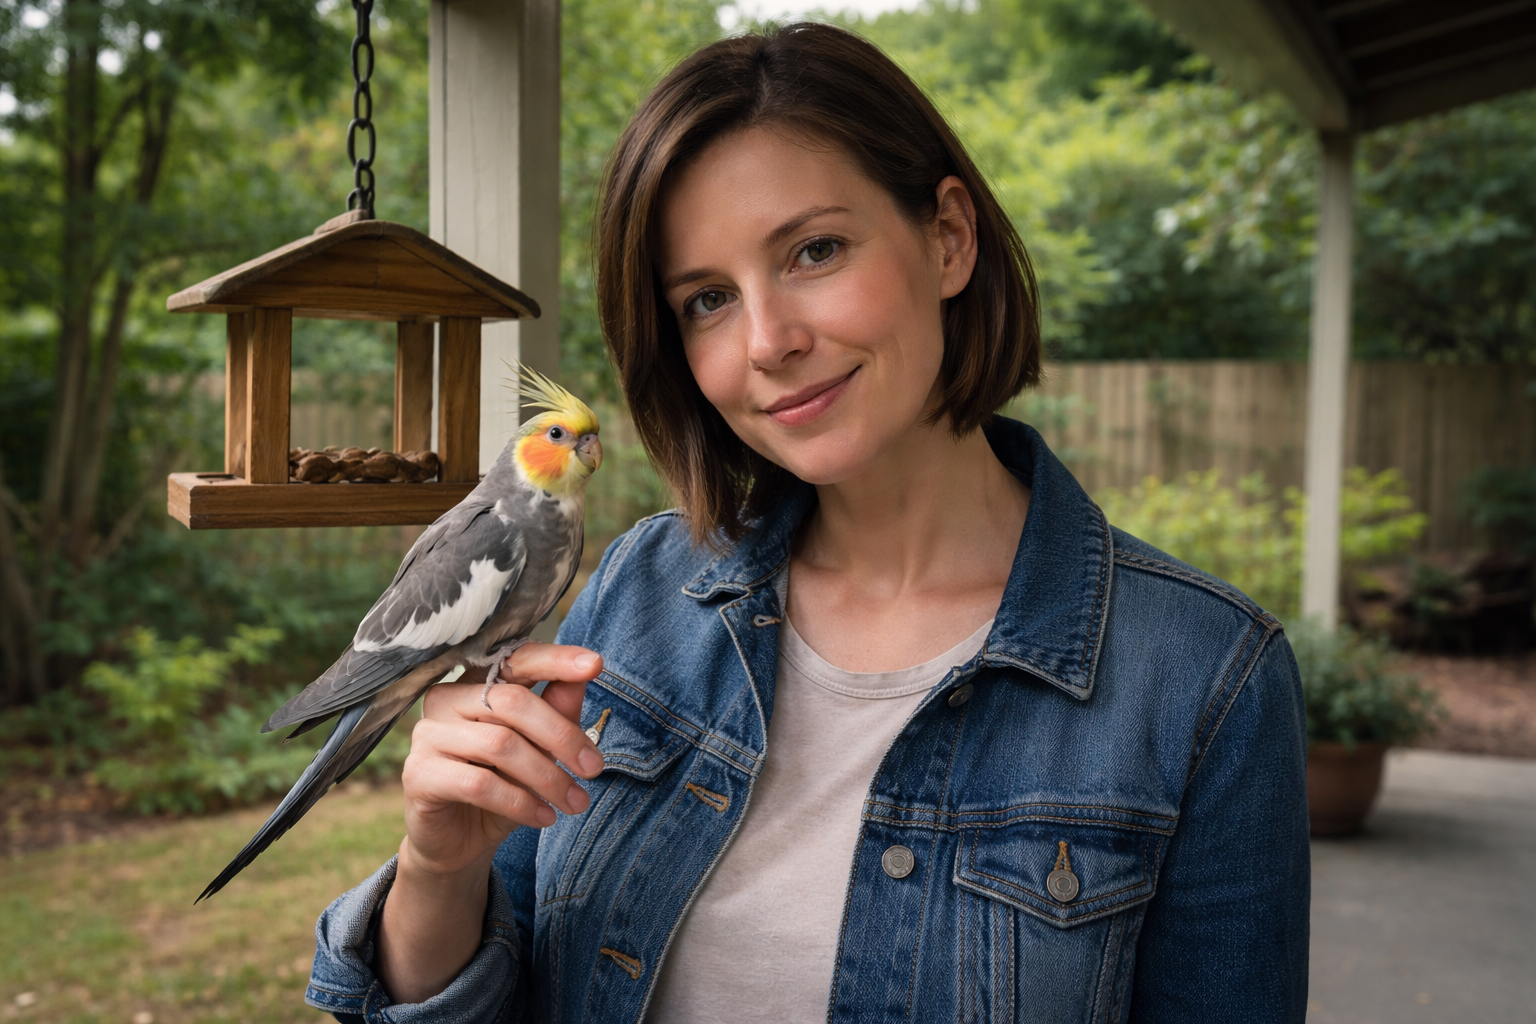
Cockatiels
Cockatiels are generally friendly once their initial wariness is overcome, and they tend to respond well to gentle persistence. They're more motivated by millet than almost anything else. One unique thing about cockatiels: they tend to respond to mimicked contact calls. If you whistle softly to them, they often whistle back, and that vocal exchange builds comfort faster than silence. Cockatiels also tend to be hand-landable much earlier in the trust-building process than larger parrots, often within one to two weeks of consistent daily sessions.
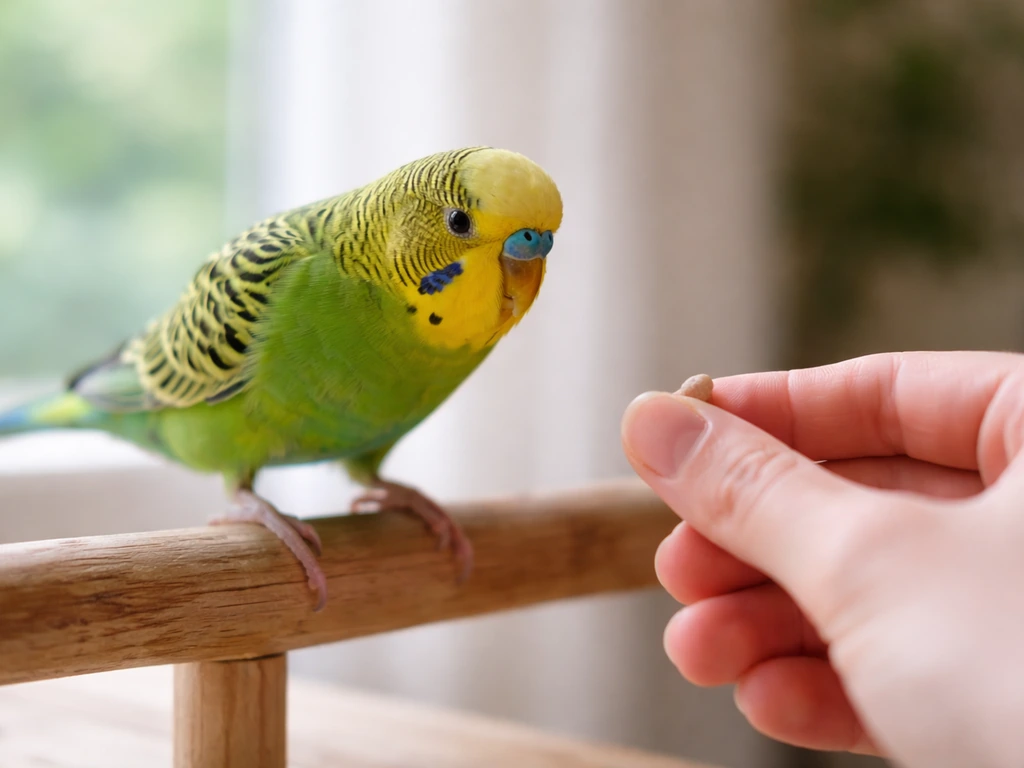
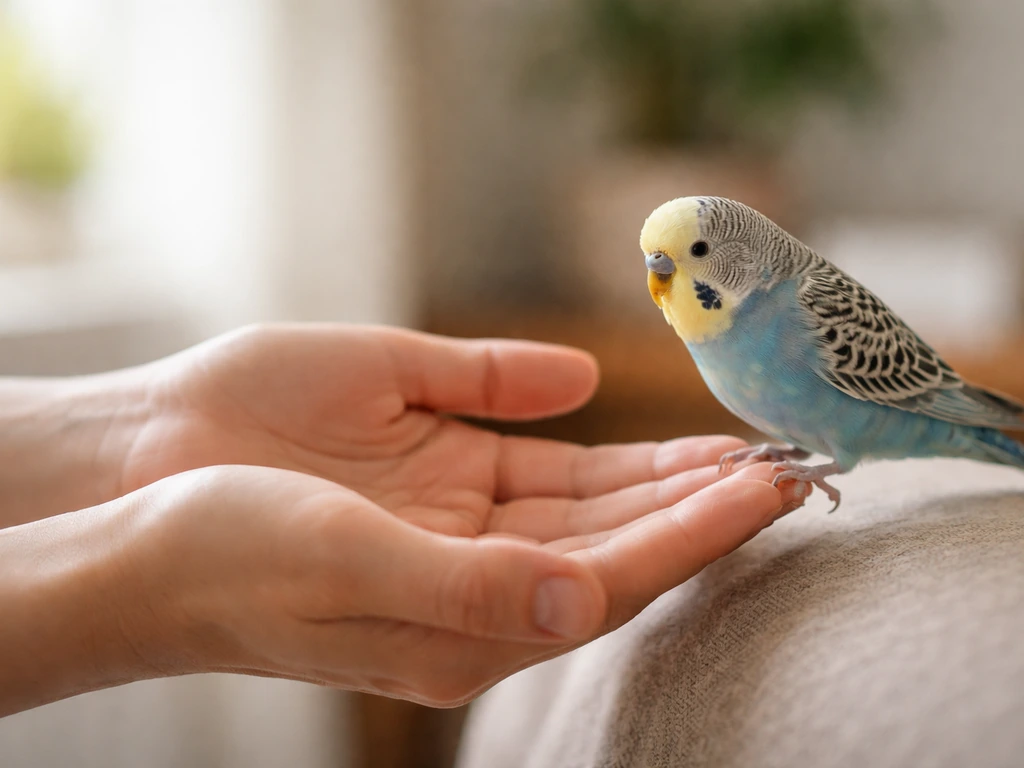
Budgies
Budgies are small, fast, and initially quite flighty, but they become extraordinarily tame with patience. Because they're so small, a single extended finger is the right perch, not a full palm. Use millet spray as your primary treat tool, since budgies are almost universally motivated by it. The critical thing with budgies is to never chase them around the cage to pick them up.
That turns every hand entry into a threat. Instead, let the budgie come to you by holding millet spray just inside the cage door and waiting. Getting a budgie comfortable landing on a finger can take two to six weeks, but once they're there, they're often wonderfully confident birds. For more detail on finger perching for small species, the guide on how to get a bird on your finger covers the positioning and approach specifically.
Finches
Finches are a fundamentally different case. Most finch species (zebra finches, society finches) are not naturally hand-tame and aren't really designed to be. They're flock birds that prefer the company of other finches and generally find close human contact stressful rather than rewarding. Occasional perching on a hand can happen, especially if a bird has been hand-raised or is exceptionally comfortable with its owner, but chasing this goal aggressively with finches isn't in the bird's best interest. If your finch does land on you, stay completely still, don't reward with handling, and let it leave on its own terms. The win with finches is having them comfortable enough in your presence to perch nearby, not necessarily on you.
Wild birds
Getting a wild bird to land on your hand is a genuinely achievable goal with species like Black-capped Chickadees, Nuthatches, and some titmice, but it takes a different approach from pet bird training. The key is habituation over a long period, not active training. Stand very still near a well-stocked feeder that wild birds already trust, hold out a palm with seed on it, and wait.
It can take 30 to 45 minutes of motionless waiting on your first successful attempt, and several weeks of daily effort to build reliability. Going out at the same time each day, wearing the same clothing, and using the same spot all help. The full process for how to get a wild bird to land on you involves patience over days and weeks rather than active cue training.
Also important: in most countries it's illegal to capture, keep, or restrain wild birds. Encouraging a voluntary landing is fine; anything that involves confinement or force is not. The RSPCA’s wildlife-handling guidance also notes that [restraint, such as using blankets or towels](https://www. rspca.
org. uk/adviceandwelfare/wildlife/stayingsafe), should be handled carefully, and that handling wild animals may require specialist knowledge.
Why your bird won't land (and what to change)
If you've been working consistently and the bird still won't land on your hand, something in the setup or approach is off. Here's how to diagnose the most common problems.
| Problem | Likely Cause | What to Change |
|---|---|---|
| Bird flinches or flies off when hand approaches | Hand is moving too fast or coming from above | Approach from the side, at perch level, very slowly. Freeze if the bird tenses. |
| Bird takes treat but won't step on hand | Treat is too easy to reach without stepping up | Hold treat further back so the bird must commit more weight to reach it |
| Bird lands briefly then immediately leaves | No reason to stay; the reward comes too late | Reward the moment both feet land, not after a pause |
| Bird bites hand instead of landing | Bird is uncomfortable and communicating a boundary | Back up to treat-from-hand stage; respect the warning and slow down |
| Bird was landing reliably but has stopped | Something changed: new stress, illness, moult, or inconsistency | Check for health issues first; return to earlier training steps and rebuild |
| Bird only lands for one person | Strong individual bond; other people feel unfamiliar | Have the trusted person present during other people's sessions; transfer trust gradually |
| Wild bird won't approach hand despite using feeder | Feeder is too new or person is too unfamiliar | Build feeder trust for 2 to 3 weeks before trying hand feeding; reduce movement completely |
Biting deserves a special mention. A bird that bites when you offer your hand is not being aggressive without reason. It's telling you that you've moved too fast, the environment feels unsafe, or something about your approach is alarming. Never punish a bite, physically or verbally. Just back up in the training progression. Understanding what triggers the behavior is the fastest path to eliminating it.
If the problem is specifically that the bird comes close but won't make the final commitment to land, you may need to rethink how you're presenting the reward. The guide on how to get a bird to come to your hand covers that in-between phase in detail, including how to use targeting and treat placement to close that last gap.
Training schedule and realistic timelines
Consistency matters more than session length. Five minutes every single day will produce faster results than 30-minute sessions twice a week. Here's what a realistic training calendar looks like for each phase.
| Phase | Goal | Approximate Timeline | Session Length |
|---|---|---|---|
| 1: Proximity comfort | Bird ignores you and behaves normally when you're nearby | 3 to 7 days (hand-raised birds), 1 to 3 weeks (shy or rescue birds) | 10 to 15 min passive presence |
| 2: Hand approach tolerance | Bird doesn't flee when your hand enters the space | 3 to 5 days after Phase 1 | 5 to 10 min |
| 3: Taking treats from hand | Bird confidently takes food from your open palm | 2 to 7 days after Phase 2 | 5 to 10 min |
| 4: One foot on hand | At least one foot reliably lands on your hand for a treat | 3 to 10 days after Phase 3 | 5 to 10 min |
| 5: Full step-up | Both feet land and bird stays for 5 to 10 seconds | 3 to 14 days after Phase 4 | 5 to 10 min |
| 6: Reliable hand landing on cue | Bird steps up on verbal or visual cue without treat visible | 2 to 4 weeks after Phase 5 | 10 min daily maintenance |
The full timeline from zero trust to reliable hand landings is typically four to eight weeks for a cooperative pet bird with no history of trauma, and three to six months or more for a bird with fear history or a very independent temperament. Wild birds that habitually visit your yard can take anywhere from two weeks to a full season to land voluntarily.
Know when to pause. If a bird is showing consistent stress (refusing food, feathers constantly slicked, loud alarm calls during every session), take a full week off from formal training. Just go back to quiet, non-interactive presence near the bird. The RSPB also emphasizes disease prevention in garden feeding, including blank" rel="noopener noreferrer">keeping feeders and bird baths clean and using safe feeding practices. Pushing through stress doesn't build trust, it erodes it.
Once you have reliable hand landings, the next natural step is building confidence with movement and new environments. Birds that step up well can learn to stay perched while you carry them from room to room, which is covered in the guide on how to train a bird to stay on your shoulder. That's a genuinely fun milestone, and it builds on exactly the trust foundation you've been creating.
The most important thing to remember is that every bird is an individual. Some will surprise you with how quickly they warm up. Others will test every ounce of your patience. Either way, the method stays the same: create safety, use positive reinforcement, and let the bird choose. When a bird lands on your hand because it genuinely wants to be there, that's a moment worth every bit of the slow, patient work it took to get there.
FAQ
What if my bird accepts treats but won’t step onto or land on my hand?
If your bird will take treats but refuses to land, slow down the “platform” step. Offer the same treat in the same spot, but wait longer between hand placement and any movement, so the bird learns it is safe to move its feet onto your hand before it expects the treat. Keep your hand completely motionless for 10 to 20 seconds each try, then retreat and try again later.
How do I handle it when the bird approaches but loses confidence at the last moment?
Use a “permission signal” approach: when the bird shows curiosity (leaning forward, relaxed posture, slow head movements), present the hand and reward the first contact or investigation, even if it does not land. Then gradually require one more inch of movement only after the previous step is consistently rewarded.
My bird backs away as soon as I extend my hand. What’s the safest next adjustment?
Do not use your hand as a chase tool or repeatedly withdraw and re-extend it quickly. Instead, set a fixed starting position, hold still, and let the bird initiate. If it walks away, end the attempt, wait until it is calm again, and restart from the last step it reliably succeeded at.
Where should I place my hand if the bird seems intimidated by where I’m offering the treat?
Avoid holding your hand too high or too close to the bird’s face. For many birds, the most workable placement is at the bird’s level or slightly below, starting far enough that the bird can choose to approach without feeling cornered. If the bird watches you from a perch, start with the treat offered slightly to the side of the bird rather than directly in front of the beak.
How can I tell whether my treat choice is really motivating enough?
Choose treats that the bird actually values, and consider consistency over variety. Many owners switch foods too early, which confuses the bird. If you must change treats, do it between sessions, not during the same session, and keep the reward size tiny so the bird stays engaged without getting overly full.
How long should I train, and how do I know when to stop a session?
Long sessions can increase stress and make the bird more wary of your hand. Aim for 5 to 10 minutes, and end after the bird succeeds at the easiest step, even if the goal is not fully reached that day. Track “success steps” (for example, treat from palm, finger touch, one foot contact) so you do not accidentally keep pushing past the bird’s threshold.
What should I do if my bird bites when I offer my hand?
If bites or aggressive lunges happen, pause step-up entirely and return to quiet proximity work. Back up one or more steps (for example, sitting near the bird without offering a hand), and only reintroduce the hand when the bird is accepting treats without tense body language. Never punish the bite, and do not try again immediately after an incident.
Is landing on the hand the same skill as step-up training, or are there differences?
Birds often tolerate and even enjoy contact once trust is built, but “land on my hand” can still be a different skill than “step up.” Confirm readiness by first getting consistent treat-taking from a stationary hand, then require only the smallest foot movement. If the bird is willing to step up but not to perch fully, lower expectations by rewarding brief contact for several sessions before asking for longer standing.
Can I physically guide my bird’s feet so it learns faster?
Do not handle the bird to “help” it land or reposition its feet. That removes the bird’s choice and can create a fear association with your hand. If the bird is not cooperating, keep your hand still, offer the treat, and let it attempt naturally, or return to the earlier phase where it can safely succeed.
How do I adapt this for wild birds without accidentally making it harder for them to trust me?
For wild birds, avoid any practice that pulls them closer through pursuit or repeated approach. If they stop returning, change one variable at a time (time of day, clothing color, or seed type) and keep the same safe distance. Also ensure the approach is legal and ethical in your area, since capture, restraint, or keeping wild birds is often prohibited.
What consistency changes help the training stick over weeks?
If you need a bird to perch on your hand reliably, start building a neutral routine: similar clothing, same general location, same time window, and calm body posture. Keep distractions low and avoid sudden overhead movements, since prey animals often respond more to your predictability than to the treat itself.