Getting a bird onto your finger comes down to one thing: making the step feel safe and rewarding from the bird's point of view. For a pet bird, that means presenting your hand or finger steadily just above their feet, saying 'step up' clearly, and rewarding the moment any weight shifts onto you. For step-by-step guidance on getting a bird to come to your hand, follow the “step up” progression and build trust at the bird’s pace. For a wild bird in your yard, it means earning trust slowly through consistent, calm presence and food offerings, then letting the bird make the choice entirely on its own terms. Force never works, but patient repetition almost always does.
How to Get a Bird on Your Finger Step by Step
Clara Hayes
11 May 2026
Safety and humane mindset before you start
Before you offer your hand to any bird, take a moment to read what the bird is telling you. A relaxed bird holds its feathers smooth, moves around with curiosity, and may chirp or lean toward you. A stressed bird will hiss, pant, hold its wings away from its body, fan its tail, or press itself into a corner trying to get away. If you see any of those signs, stop. Pushing through stress signals does not speed up training; it sets you back because the bird is now associating your hand with fear. The goal is always a voluntary choice on the bird's part, and that only happens when the bird feels safe enough to make it.
- Never grab or trap the bird to force a step-up. Forced contact breaks trust and increases bite risk significantly.
- Keep early sessions short, around 10 to 15 minutes, so the bird never reaches its stress threshold.
- Work in a quiet room with no loud background noise, no other pets nearby, and no sudden movements.
- Avoid looming over the bird from above. Birds are prey animals and overhead movement triggers alarm.
- Do not approach wearing hats, gloves, or bulky sleeves if the bird is not yet used to you.
- If the bird is fluffed, panting, or has an open mouth, pause the session entirely and give it rest.
For wild birds specifically, there is an important legal note: most wild birds in the US are protected under the Migratory Bird Treaty Act. You cannot legally keep a wild bird, and handling one without a permit is restricted. If a wild bird seems injured or is not flying away when approached, do not attempt to train or tame it. Contact a licensed wildlife rehabilitator immediately, and do not offer food or water unless the rehabilitator instructs you to. The guidance in the wild bird sections below is about ethical attraction and trust-building for healthy birds in your yard, not capturing or taming them.
Set yourself up for success: hand position, finger choice, and cues
The physical setup matters more than most people think. If your hand position is awkward or unstable, the bird will feel it and hesitate. Here is how to position everything correctly from the start.
Which to use: finger, fist, or perch
For small birds like budgies, canaries, or cockatiels, a single extended finger works well once trust is established. For medium to large parrots, offer a closed fist or your forearm instead, since a single finger can feel unstable and may get grabbed painfully. If the bird has a history of biting or is still nervous around hands, start with a wooden dowel or T-perch held in your hand. The bird steps onto the perch, not your skin, and you still build the 'step up' behavior without either of you getting hurt. Once the bird steps onto the perch consistently, transitioning to a finger or hand is usually much faster.
Hand position and height
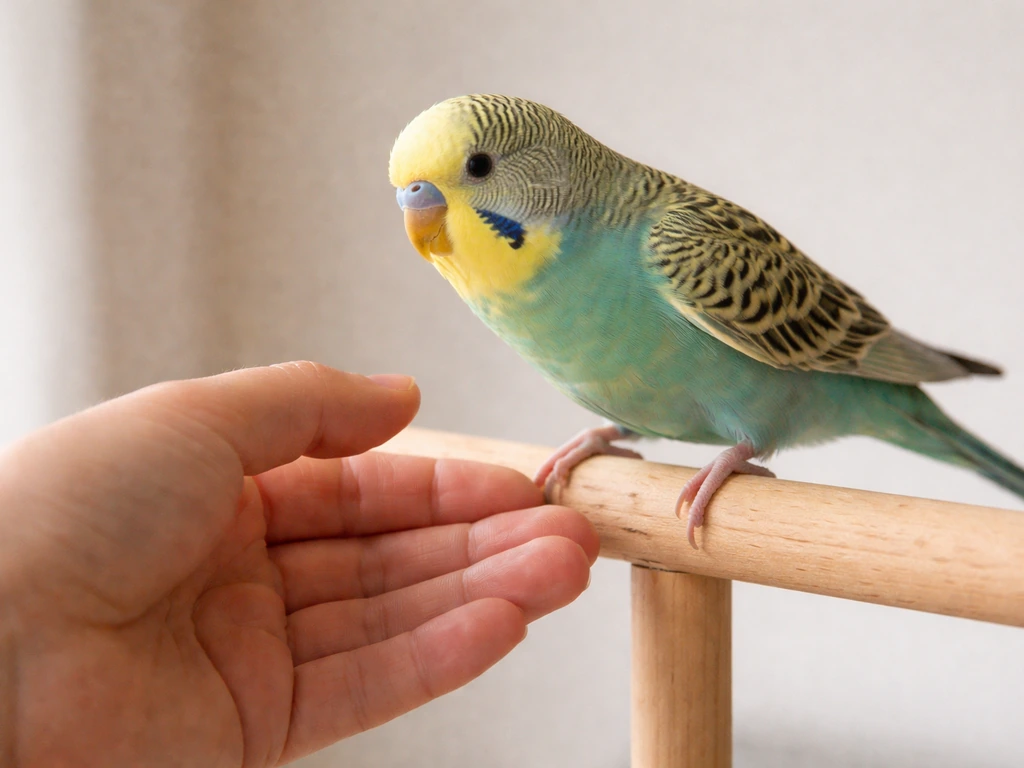
Place your offered hand or perch just above the bird's feet, roughly at the level of its lower belly or just above its legs. Too low and the step feels like a jump down, which most birds avoid. Too high and it feels like a climb they did not ask for. The ideal position is just slightly above where the bird is currently standing so that stepping onto your hand is the path of least resistance. Hold your hand or perch completely still. Any wobble or retreat the moment the bird leans forward teaches it that approaching your hand causes unpredictability.
The verbal cue and marker
Pick one clear phrase and use it every single time: 'step up' is the standard. Say it once, calmly, just before you present your hand. Do not repeat it over and over if the bird hesitates. Pair the cue with a consistent marker the instant the bird puts weight on your hand. A verbal marker like a short, bright 'yes!' works just as well as a clicker. The marker tells the bird precisely which moment earned the reward, so timing is everything. Reward within one or two seconds of the correct behavior or the connection gets lost.
Step-by-step training for pet birds
This progression works for most pet birds. Move through the steps at the bird's pace, not yours. Some birds race through in a few days; others need a few weeks. If you want the details for teaching this exact step-up behavior, follow a structured “step up” cue and reward timeline how to train a bird to sit on your hand. Both are normal.
- Start with trust at a distance. Sit near the cage daily without attempting to touch the bird. Let the bird get used to your presence, your voice, and your smell before a hand ever appears.
- Introduce hand-feeding through the cage bars or open cage door. Offer a favorite treat on your palm held still just inside the cage. Do not push forward. Wait for the bird to come to you.
- Move the treat to your finger. Once the bird reliably takes food from your palm, position the treat between your thumb and forefinger so the bird has to lean onto your finger slightly to reach it.
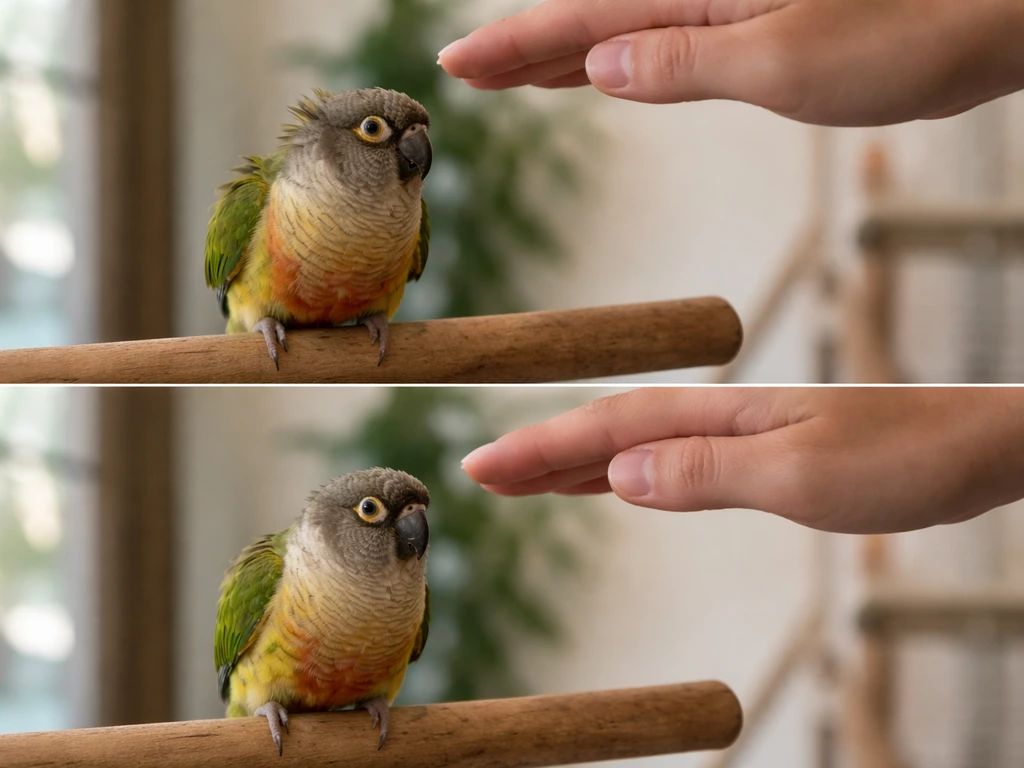
- Present the step-up position. With the treat visible, move your hand so your finger or fist is positioned just above the bird's feet at belly height. Say 'step up' once.
- Wait for one foot. The bird may lean forward, investigate with its beak, or shift weight. The moment one foot touches your hand, mark with 'yes!' and reward immediately. Do not wait for both feet yet.
- Build to two feet. Once one-foot contact is reliable, withhold the reward until both feet are on your hand. Mark and reward the full step-up.
- Repeat in short sessions. Practice 5 to 10 step-ups per session, keep sessions to 15 minutes or less, and do at least one session per day.
- Fade the treat. Once the bird steps up reliably on the verbal cue, start rewarding every other successful step-up, then randomly. The bird should still expect a reward sometimes, which actually keeps the behavior stronger than rewarding every time.
- Practice in new locations. Once step-up is solid in one spot, practice near the cage door, on a perch stand, and in different rooms so the behavior generalizes and is not locked to one specific context.
One important note on the 'step down' cue: teach this alongside step-up from the beginning. Show the bird it can safely return to its perch or cage on request. Birds that know they can leave your hand willingly are far less likely to refuse to step up in the first place, because they know they are not trapped.
Species-specific notes: parrots, cockatiels, and budgies
Parrots (medium and large species)
Larger parrots like African greys, Amazon parrots, conures, and cockatoos are intelligent enough to test your reactions, and some will bluff-bite or lunge to see if you back off. Maintain a calm, neutral expression and do not yank your hand away at the first lunge, because flinching teaches the bird that lunging works. If your bird is actively biting, start with stick training using a wooden dowel and build confidence there before moving to your hand. Keep your body angle side-on rather than squared-up facing the bird, since a direct frontal approach can feel confrontational. Parrots also respond well to target training (touching a stick tip with their beak on cue) as a warm-up before requesting a step-up.
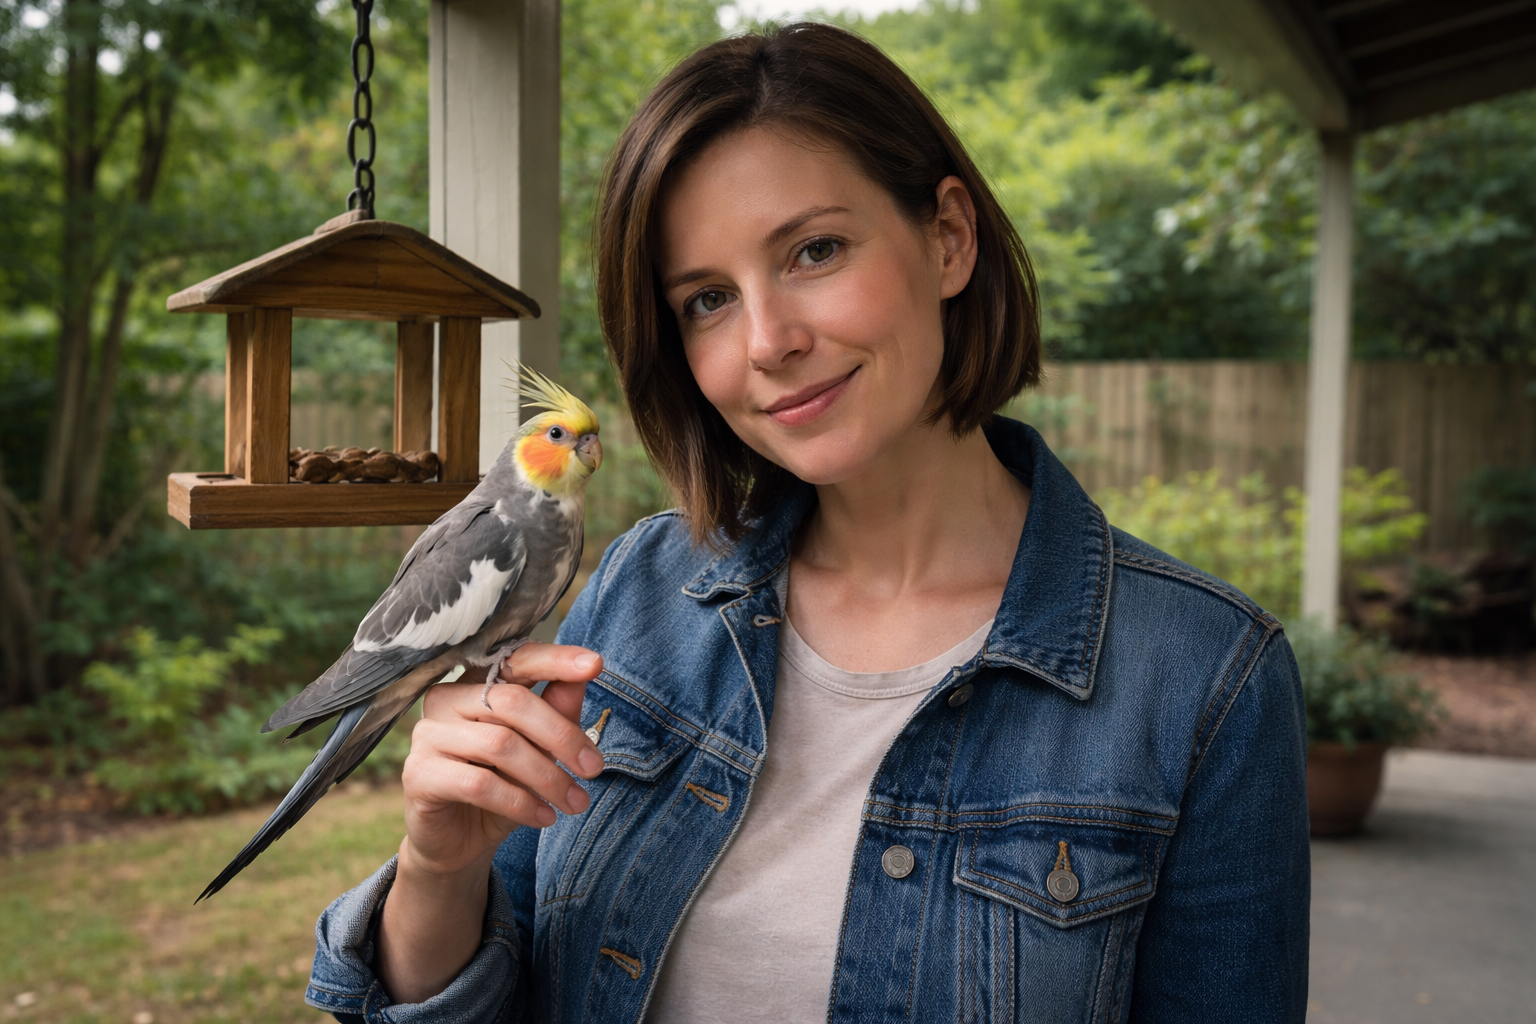
Cockatiels
Cockatiels are generally gentler than larger parrots but can be skittish, especially birds that were not well-socialized as chicks. The key with cockatiels is hand steadiness and repetition. Hold your finger absolutely still and let the cockatiel investigate at its own pace. Millet spray is an excellent reward because cockatiels are highly motivated by it and it keeps the reward experience calm rather than exciting. If a cockatiel is stalling, try going back to hand-feeding through the cage door for a few more days before attempting step-up again. Do not rush the transition.
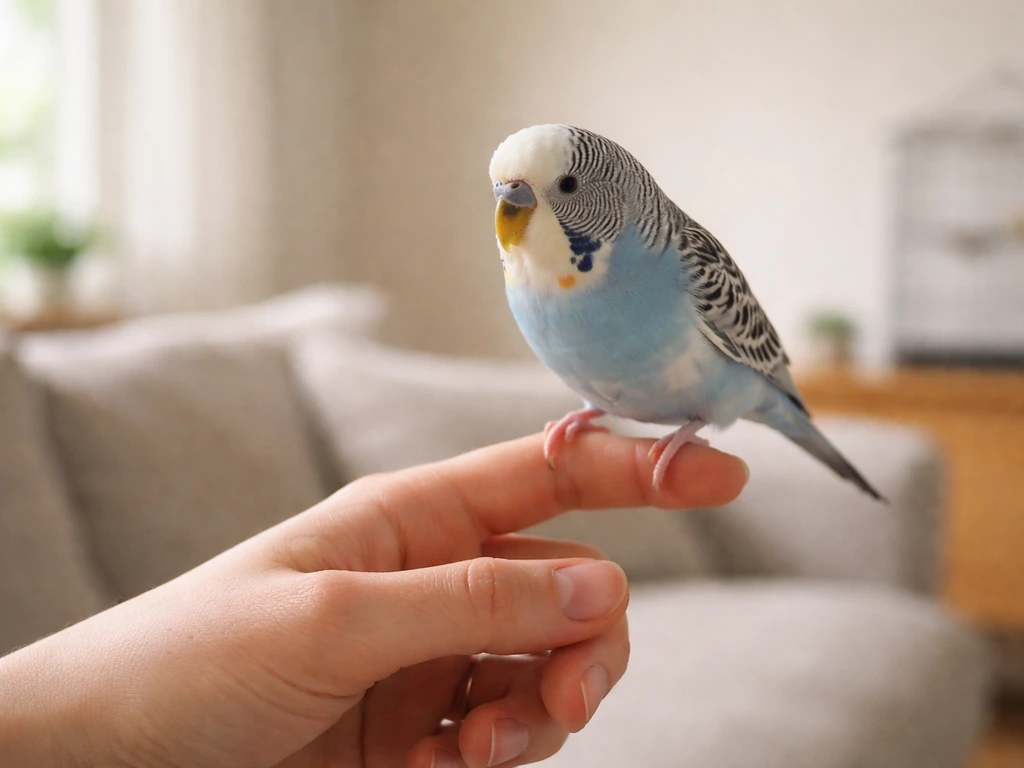
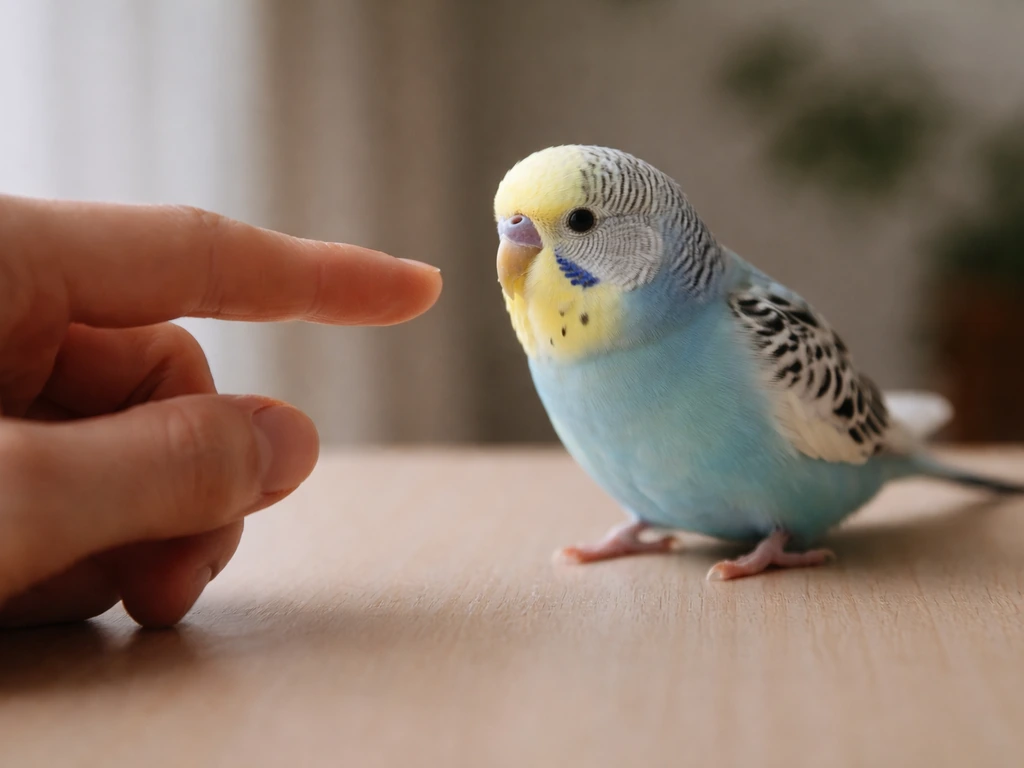
Budgies
Budgies are small, quick, and can be nippy when nervous, which makes the step-up feel intimidating for new owners. The most effective approach is a dedicated perch-first progression. Teach the budgie to step onto a small dowel before asking for a finger. Once the perch step-up is solid, introduce your finger alongside the perch, then gradually transition.
Reward tiny shifts in behavior, including leaning toward your hand, shifting one foot, or even just not moving away. A 7-day plan of short daily sessions, one or two minutes at a time with a budgie, is very realistic. The most important adaptation for budgies is patience with the nibbling phase: they often mouth your finger to investigate before stepping, and this is normal exploration, not aggression.
| Species | Best starting tool | Top reward | Key adjustment | Typical timeline |
|---|---|---|---|---|
| Large parrot | Wooden dowel/stick | Favorite nut or fruit piece | Stay side-on; avoid flinching at lunges | 1 to 4 weeks |
| Cockatiel | Extended finger or dowel | Millet spray | Hold hand completely still; go slow | 1 to 3 weeks |
| Budgie | Small dowel perch first | Millet or seed treat | Perch before finger; reward tiny steps | 1 to 2 weeks |
Working with finches and small cage birds
Finches, canaries, and similar small cage birds are fundamentally different from parrots and cockatiels in one important way: they are not typically domesticated for handling. Most finches are kept and enjoyed for their song and movement, not for finger-perching. Attempting to train a finch to step onto your finger the same way you would a budgie is usually more stressful than it is worth for the bird. That said, some finches do become comfortable landing on a hand, but it happens through attraction rather than formal step-up training.
The approach that works best is to hold a small millet spray or seed cup in your open palm inside the cage and remain completely motionless. Do this daily. Over days or weeks, a curious finch may hop onto your hand to reach the food. The moment any foot touches you, stay absolutely still. Do not try to close your hand or move. Just let the landing happen and end naturally. Repeat this until the finch is comfortable landing voluntarily. This is perch-and-food attraction, not trained step-up, and it is the appropriate and humane goal for this group of birds.
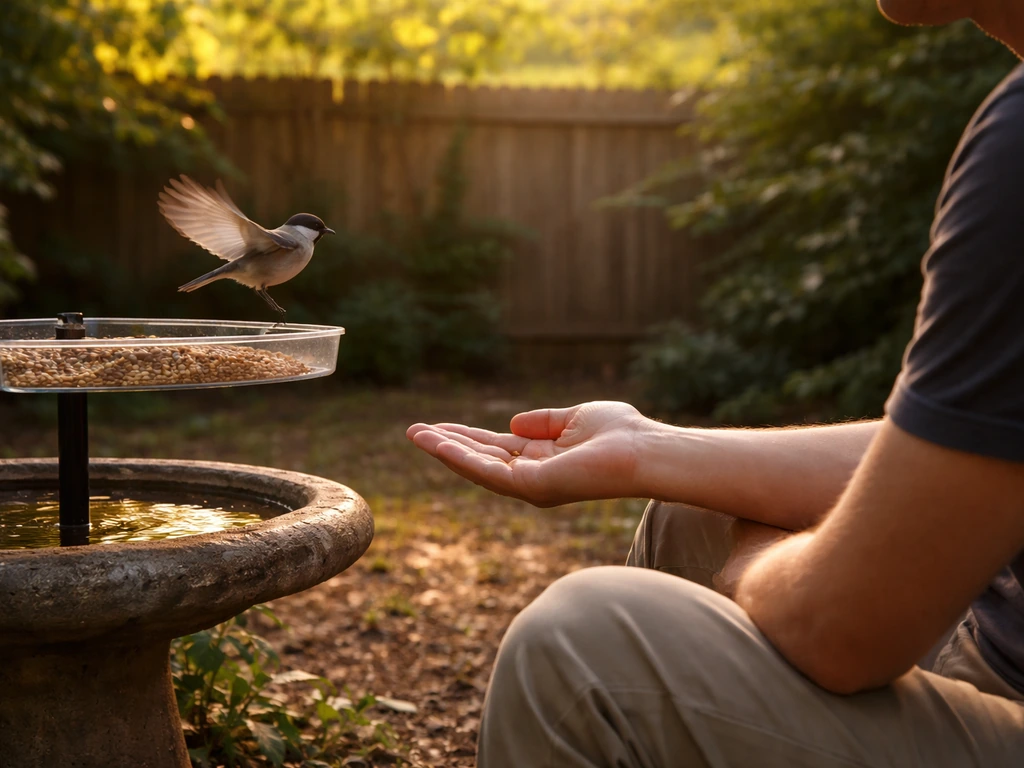
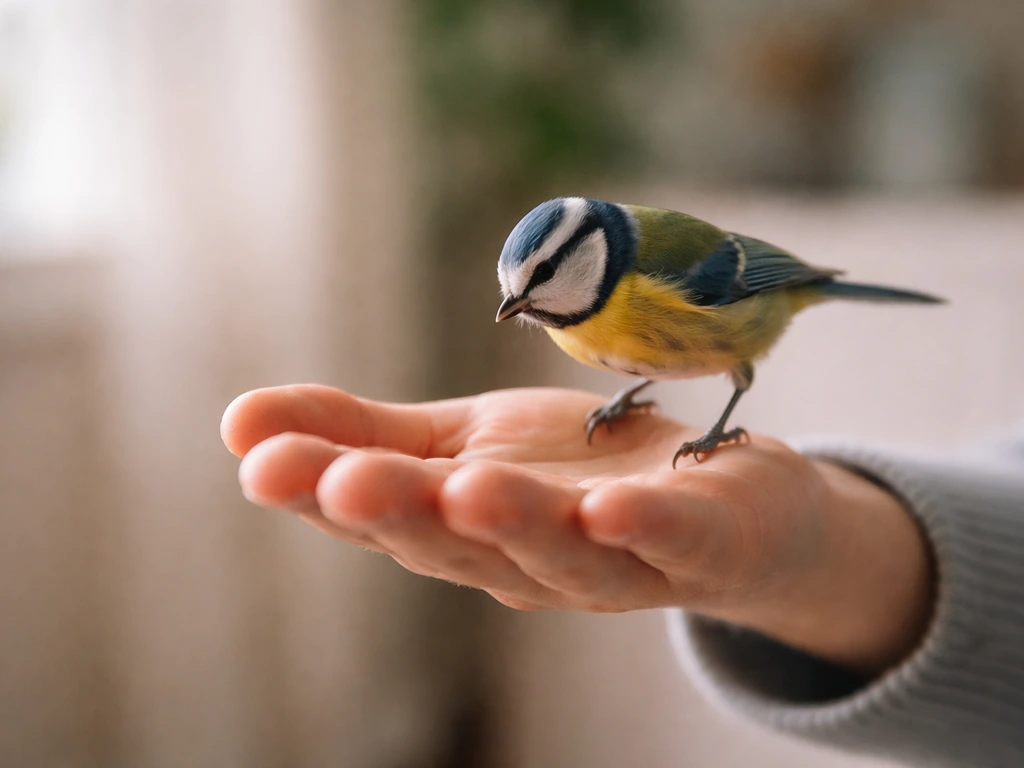
Wild birds in your yard: attract, earn trust, and know the limits
Getting a wild bird to voluntarily land on your hand in your yard is absolutely possible, especially with species like chickadees, nuthatches, and titmice, which are naturally curious and bold. But the process is slow, measured in weeks or months, and requires you to think like the bird, not like a trainer. If you want to encourage a wild bird to land on you, focus on patience, consistent presence, and food offerings while the bird makes the choice on its own how to get a wild bird to land on you.
The step-by-step attraction approach for yard birds
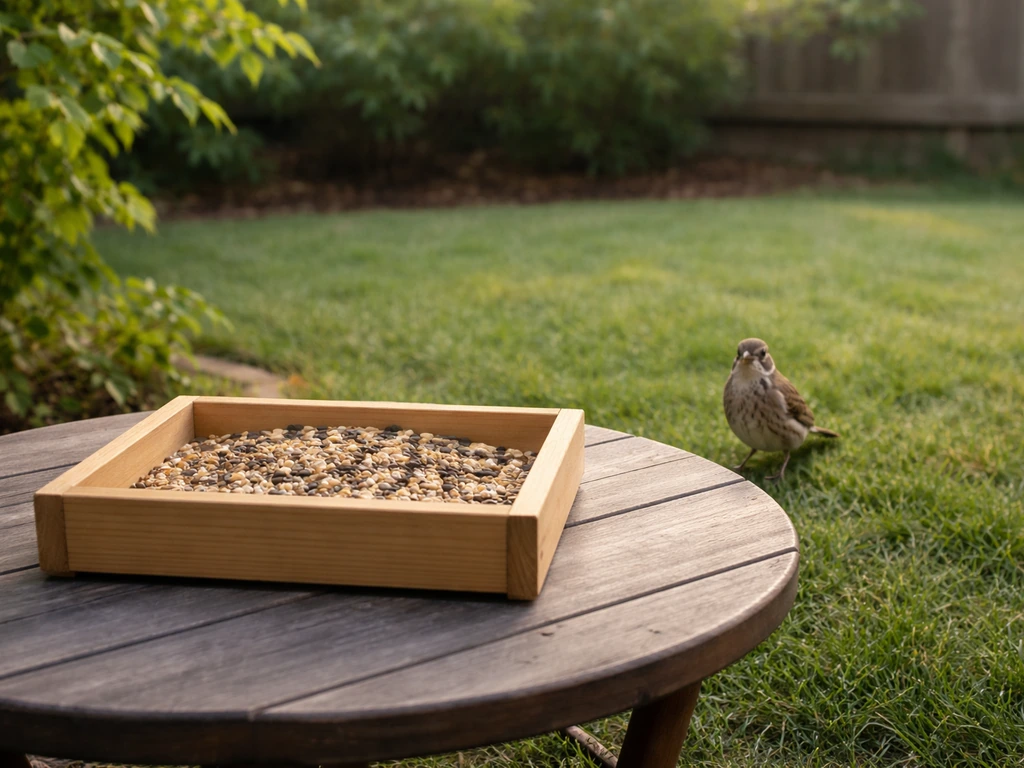
- Establish a reliable feeding spot. Use a feeder or tray stocked with the right food for your target species (black-oil sunflower seeds work for most backyard birds) and fill it consistently so birds learn to expect food there.
- Move closer to the feeder over days. Start standing or sitting 10 feet away while birds feed. Every two or three days, move a foot or two closer. The birds' comfort at each distance is your signal to advance.
- Replace the feeder with your hand. Once birds are feeding comfortably within two or three feet of you, hold a palm full of seeds and stand motionless where the feeder used to be. Face away or look to the side to appear less threatening.
- Wait without moving. This can take 20 to 40 minutes of stillness on the first attempt. Stay calm, breathe slowly, and resist any urge to reach toward a bird.
- Let the landing happen. When a bird lands on your palm, do not move. Do not close your hand. Just let it feed and leave. Repeat daily.
There are clear limits here. Wild birds that seem tame, do not fly away when you approach, appear off-balance, or have visible injuries are not candidates for this attraction process. A wild bird that is not flying away from a human is almost always sick or injured, not friendly. If you encounter that situation, do not attempt to feed, water, or handle the bird. Contact a licensed wildlife rehabilitator in your area. Under US federal law, most wild birds are protected, and only permitted rehabilitators can legally hold and treat them.
Also worth knowing: feeding wild birds in your yard is a personal and community decision with real tradeoffs. Supplemental feeding helps some birds through harsh winters but can create dependency, attract predators, and spread disease if feeders are not cleaned regularly. Keep feeders clean, offer appropriate foods, and be aware of local guidelines. The goal is observing and appreciating wild birds, not domesticating them.
When it is not working: troubleshooting and realistic timelines
The bird won't approach your hand at all
Go back one step in the progression. If you were trying finger step-up, return to hand-feeding through the cage door. If you were doing that, return to simply sitting near the cage with treats visible but not offered. The bird is telling you the trust foundation is not there yet. This is not a failure; it is information. Slow down and give it another full week at the previous stage before advancing again.
The bird flinches or backs away when your hand appears
Your hand is probably moving too fast or appearing too suddenly. Practice moving your hand into view in extremely slow motion. Also check your approach angle: coming from above triggers a fear response in most birds. Always bring your hand in from the side or below the bird's eye level. Some birds also react to rings, nail polish, or unusual hand appearance, so try a clean, unadorned hand if that has not been your approach.
The bird lunges or bites
Switch to a wooden dowel or T-perch for all step-up practice. Do not present your finger to a bird that is actively biting. Build the step-up behavior on the perch, get it reliable and calm, then gradually transition to your hand over several more sessions. Biting during step-up almost always means the bird is not ready for the hand yet, so forcing the issue makes things worse. Stay neutral when a bite happens: no loud reactions, no withdrawal, just calmly reset and try again with the perch.
The bird steps up but immediately wants off
This is very common and usually means the bird does not yet feel secure on your hand. Keep your hand lower and steadier. Reward the bird for staying on, even for a couple of seconds, before it steps off. Teach the 'step down' cue actively so the bird knows it can leave when asked. Once the bird reliably steps up, you can focus on keeping it settled by using the step down cue only when it is ready to come off your shoulder. Birds that feel trapped stay for shorter periods; birds that know they can leave often end up staying longer voluntarily.
Realistic timelines
| Situation | Realistic timeline to first step-up | Timeline to reliable on-cue step-up |
|---|---|---|
| Hand-raised, socialized pet bird | 1 to 3 days | 1 to 2 weeks |
| Pet bird with some handling history | 3 to 7 days | 2 to 4 weeks |
| Untamed or rescue pet bird | 2 to 6 weeks | 2 to 3 months |
| Finch or small cage bird (voluntary landing) | 2 to 8 weeks | Not applicable; goal is voluntary landings |
| Wild yard bird (voluntary hand landing) | 4 to 12 weeks | Not applicable; goal is consistent voluntary landings |
What to do right now, today
If you have a pet bird and have never worked on step-up before, start today with a five-minute session at the cage door. Hold a small treat in your palm, stay still, and see what the bird does. That is your baseline. Note whether the bird approached, ignored you, or moved away, and use that information to decide which step of the progression to start at.
If you are working with a wild bird in your yard, fill your feeder today and choose a spot to sit within 10 feet. That is your first session. Progress is rarely dramatic in the first few days, but the consistency you start building today is exactly what leads to a bird landing on your hand weeks from now.
If at any point your bird seems ill, is losing weight, has labored breathing, or the behavior changes suddenly and dramatically, stop training and contact an avian vet. Behavior changes in birds can be an early sign of illness, and a bird that is unwell should not be in training sessions. Get the health check first, then resume once the bird has a clean bill of health.
FAQ
How long should a step-up training session last?
Yes, but aim for the smallest session you can end on a calm success. If your bird hesitates, stop before it becomes stressed, then try again later the same day or the next day. For many birds, the best progress comes from frequent short wins (about a few minutes), not one long push.
What should I do if my bird bites during step-up attempts?
Avoid offering your finger when the bird is already backing away or actively biting. Instead, reset to a dowel or T-perch held where the bird can step onto it comfortably, then only move toward the finger after the bird is stepping on the perch reliably for multiple attempts.
My parrot lunges when I offer my hand. Should I pull away fast?
For most parrots and cockatoos, do not yank or flinch. A sudden retreat tells the bird that lunging makes you move. Stay neutral, lower the energy, switch to stick or target training for confidence, then try step-up again later in the session once the bird is calm.
My bird steps onto my finger, then immediately jumps off. Is something wrong?
If your bird steps up but immediately steps off, treat that as a normal early stage. Reward the first stable moment (even one or two seconds), then gradually increase how long it stays before the next reward. Also double-check hand height so it does not feel like an awkward jump down.
Should I use the same cue when the bird steps down?
Use one cue consistently for each action (for example, “step up” for moving onto you and a separate cue for leaving). If you only use “step up” and then stop responding, the bird never learns it can exit safely, so it may refuse step-up later.
What should I do if my bird suddenly stops stepping up after doing well before?
If your bird seems fine one day and refuses the next, start where it was last successful. Go back one stage (for example, from finger to perch, or from perch to hand-feeding through the cage door) and give it several days at that level before trying to advance again.
Why does my bird freeze or ignore my finger even after I say “step up”?
If you cannot get the “step up” you want, a common fix is timing and stillness. Present the hand from the correct angle, keep it motionless, and reward the exact moment weight shifts onto you. Repeating the cue repeatedly often increases hesitation.
How do I choose better rewards if my bird is not motivated?
Try one clean change at a time: make sure the offered hand is slightly above the bird’s current footing, use a steadier perch or closed fist if your finger feels unstable, and switch rewards to something higher value for your bird. Many birds respond better to specific treats than generic ones.
How can I tell if my hand position or approach is scaring my bird?
Move your hand to where the bird can see it clearly without looming. Many birds react to hands coming from directly above or suddenly. Bring the hand in from the side or below the bird’s eye level, and keep your approach slower than you think you need.
Does the training location (cage door versus open room) make a difference?
Start the training in the most familiar area, usually the cage door for a pet bird, and avoid busy distractions. If you set the session up in a new place with loud noise, strong smells, or lots of foot traffic, the bird may not generalize the behavior and will appear “stuck.”
My bird mouths or nibbles my finger. Is that normal?
For birds that mouth first, treat mouthing as part of investigation, but do not escalate with a touchy response. Let the bird explore briefly, reward any calm leaning or step attempts, and avoid tightening your hand or moving suddenly. If mouthing becomes fast, painful biting, revert to perch-first and slow the pace.
When should I switch from a perch to a finger for step-up training?
It is safer to use a dowel or perch in training if your bird has a bite history or is still nervous around hands. Once the perch-based step-up is calm and consistent, you can transition gradually, pairing finger presentation with the same reward timing you used on the perch.
Can I train a finch to step onto my hand like a budgie?
For finches and similar small cage birds, “step up training” is usually the wrong goal. A humane alternative is perch-and-food attraction, such as offering food in an open palm inside the cage and staying completely still until the bird lands voluntarily, then repeating until it’s comfortable.
How do I know whether a wild bird should be attracted or ignored?
If you are trying to encourage a healthy wild bird to land on you, do not chase or corner it, and do not offer food unless it is safe and consistent with local expectations. Also expect slower progress over weeks to months, and stop if the bird appears unbalanced, too tame, or shows signs of injury.
Should I keep training if my bird seems unwell?
Do not attempt step-up on a sick bird. If you notice sudden behavior change, labored breathing, weight loss, or unusual lethargy, pause training and arrange an avian vet check first. Health issues can make the bird feel unsafe in a way that treats cannot fix.
Can I train my bird to come to me and then stay on my shoulder?
Yes, but only in coordination with step-down learning. If the bird learns it can leave your hand on request, shoulder time is easier because it stops feeling like a trap. If the bird refuses shoulder time, go back to perch and practice step-down cue in smaller steps first.
Next Article
How to Get a Wild Bird to Land on You Humanely
Humane, step-by-step tips to help a wild bird land near you using safe food, water, body language, and patience.