Bird phobia is real, it ranges from mild unease to full panic attacks, and you can genuinely reduce it with a patient, step-by-step exposure plan. The core method is gradual desensitization: you start far from any trigger that bothers you, stay at that level until your anxiety drops on its own, then move one small step closer. No forced contact, no 'just push through it,' no surprise encounters. Whether your fear involves a parrot lunging at the cage bars, a cockatiel flapping near your face, or pigeons on the sidewalk, the same framework applies. Most people see real improvement within weeks of consistent, unhurried practice.
How to Overcome Bird Phobia: Step-by-Step Exposure Plan
Clara Hayes
11 May 2026
What bird phobia actually looks like and what triggers it

Ornithophobia (the clinical name for fear of birds) shows up differently for everyone. For some people it's a dry mouth and racing heart the moment a bird flaps near them. For others it's a slower dread that builds when they know they'll be near birds, leading to avoidance of parks, outdoor dining, or even a friend's home where a pet bird lives. Panic-attack-level symptoms, including rapid breathing, pounding heart rate, dizziness, and the urge to flee, are common when the trigger is close or sudden.
Understanding your specific triggers matters because your desensitization plan needs to be built around them. Take a minute to identify which of these applies to you, because they each point to a different starting point.
- Fear of sudden movement or flapping wings (parrots, cockatiels, wild birds taking flight)
- Fear of biting or being hurt (parrots and larger hookbills are the most common here)
- Fear of fast, erratic movement (finches darting around a cage, sparrows hopping unpredictably)
- Fear of birds swooping (common with wild birds like crows, mockingbirds, or gulls)
- Fear of feathers, droppings, or physical contact with any part of a bird
- Fear of specific species only (large parrots but not small birds, or wild birds but not caged pets)
- Generalized avoidance: you change your route, skip events, or feel stuck thinking about a potential encounter
It also helps to rate your anxiety on a 0-to-10 scale (called a Subjective Units of Distress Scale, or SUDS) for each trigger. A picture of a bird online might be a 2 for you; a cockatiel landing on your shoulder might be a 10. This scale becomes your map. You will not work at level 8 or 9 until you have spent genuine time at level 3 or 4.
Plan your exposure before you start, and keep it safe
The single biggest mistake people make is moving too fast. Before any actual exposure, blank" rel="noopener noreferrer">write out a rough hierarchy from lowest anxiety to highest. A typical list for someone with a pet bird fear might start at 'looking at a photo of a bird' and end at 'letting a bird step onto my hand.' You do not have to reach the end of that list to call this a success. If your goal is simply to be in the same room as a budgie without panic, that's a completely valid stopping point.
A few safety principles to set before you begin any session. Keep all first sessions short, ten to fifteen minutes maximum. Always have a clear, calm exit from the room. Never corner a bird or let yourself feel cornered. Never allow anyone to place a bird on you without your explicit, fully prepared consent. And if a session brings your anxiety above a 7 out of 10 and it does not come down within a few minutes, stop, leave the space calmly, and treat it as data rather than failure. You simply found the edge of your current comfort zone.
For wild bird encounters, the same logic applies: plan your exposure in advance. Decide where you will stand and for how long. If a bird approaches closer than you're comfortable with, step back to re-establish your distance rather than freezing or bolting. To learn how to approach a bird without scaring it, use the same gradual desensitization approach and keep increasing distance only when your anxiety stays low If a bird approaches closer than you're comfortable with. The goal at first is controlled observation, not interaction. If you want to know how to approach a bird safely, focus on distance first and move in only when your anxiety stays low.
A step-by-step desensitization plan for pet birds and backyard birds
This plan uses a graduated exposure sequence. Spend as much time as you need at each step before moving to the next. 'Ready to move on' means your SUDS rating at that step has dropped to a 2 or below and stayed there across at least two or three separate sessions.
Stage 1: Image and sound exposure (no live birds)
Start with photos or short videos of the bird type that triggers you. Watch them from a comfortable distance on a screen, at whatever volume feels manageable. If birdsong through speakers raises your anxiety, start with the volume very low. Gradually increase the length of time you spend watching and the volume of the audio. Your benchmark: you can watch a two-minute video of the relevant bird species with no more than mild discomfort.
Stage 2: Same building, different room

If you're working with a pet bird (or visiting someone who has one), the next step is simply being in the same building while the bird is in a closed room you are not in. You are not near the cage. You're just getting used to knowing a bird is nearby. Stay for ten minutes, do something calming with your hands, and leave normally. Repeat until this feels routine.
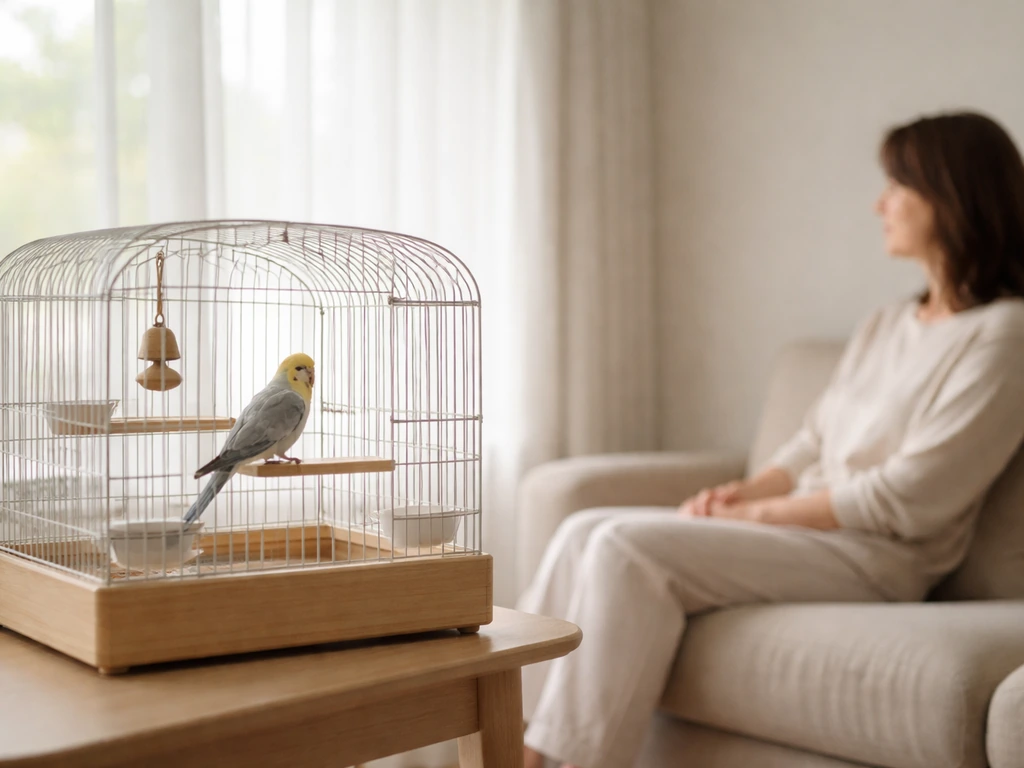
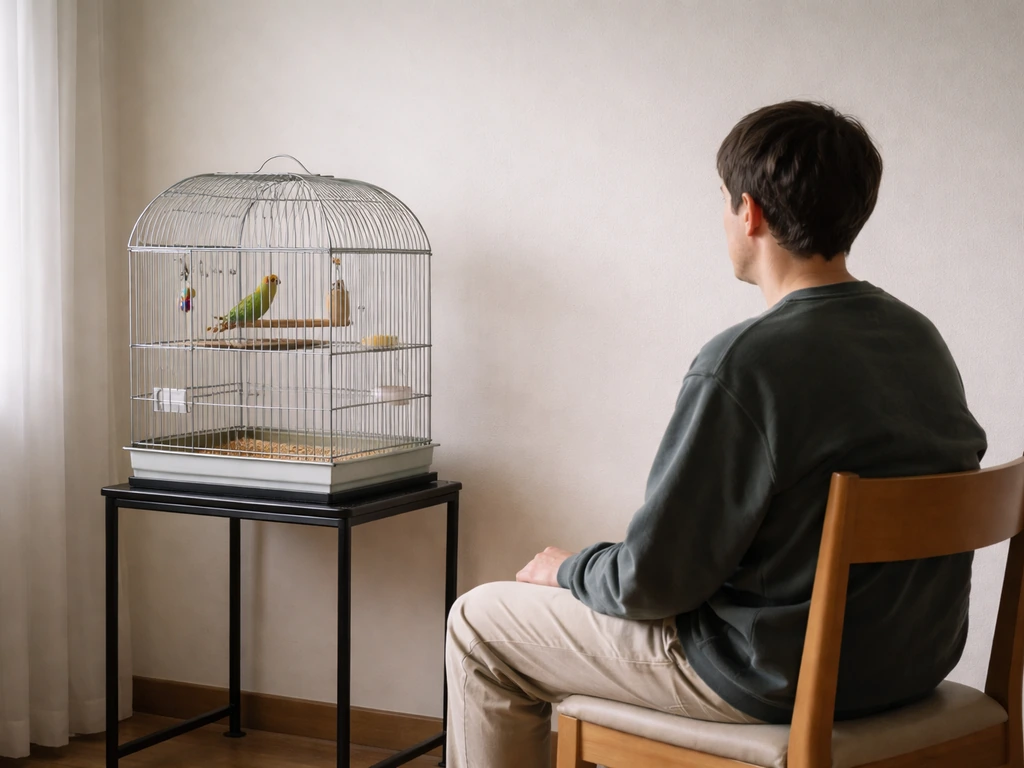
Stage 3: Same room, bird secured in cage, you at the far side
Now you enter the room where the bird lives, but you stay near the door or across the room. The bird stays in its cage. Sit quietly or stand for five minutes, then extend to ten, then fifteen over multiple sessions. Watch the bird's body language: a calm bird sits upright, moves smoothly, and chirps normally. An alarmed bird puffs up, bobs, or presses to the far side of the cage. Both are useful information. Your benchmark here is being in the same room for fifteen minutes with your SUDS at 3 or below.
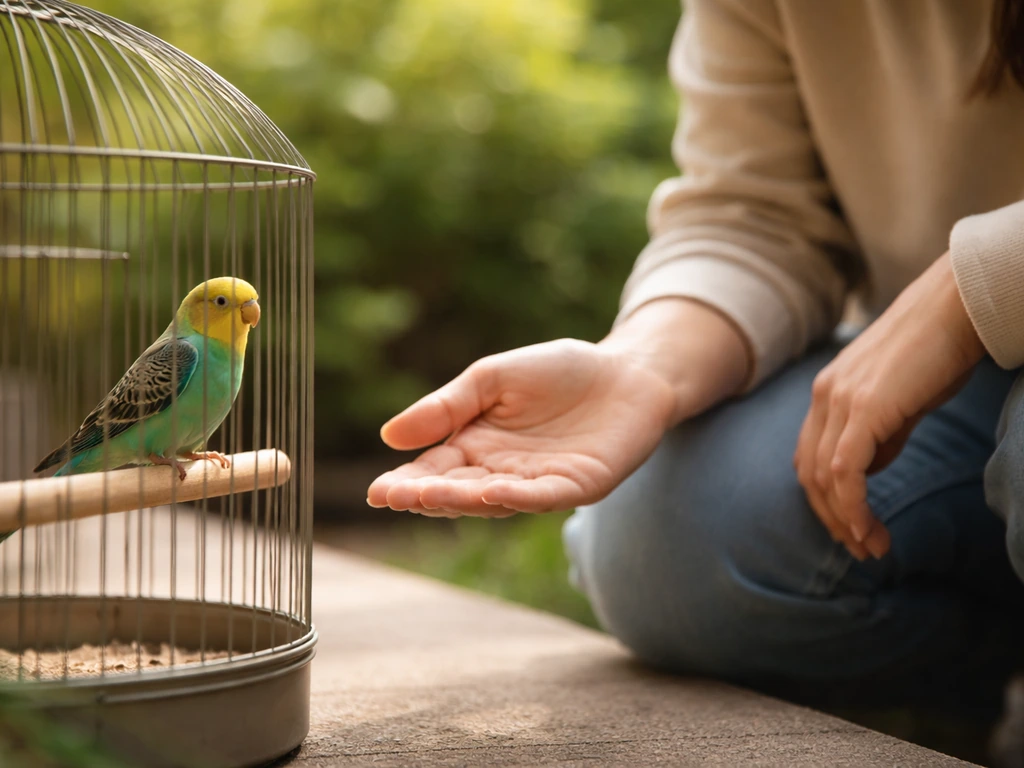
Stage 4: Closer proximity to the cage
Move a chair or standing position progressively closer to the cage over multiple sessions, a couple of feet at a time. If you want a simpler, structured answer for how to get close to a bird, use this same staged desensitization sequence as your checklist closer to the cage. Move slowly, avoid sudden gestures, and keep your voice low and calm. This benefits both of you: slow movement is less alarming to the bird, and a calm bird makes this step easier for you. At this stage you're learning to tolerate the bird's proximity; you're not interacting yet.
Stage 5: Presence near an open cage (optional interaction)
This stage is only for people whose goal includes eventually handling or interacting with the bird. If your goal is simply tolerating a bird's presence, Stage 4 may be your endpoint. For those continuing, this step involves being near the cage when it is open, knowing the bird could exit but not forcing it to. Let the bird make the first move toward any contact.
Offering a finger or a short perch stick at the cage door is more manageable for many people than reaching inside; a stick perch keeps your hand at a distance while you practice the motion. If the bird does step toward you and that spikes your anxiety, move your hand back gently and take a breath. No session should end in panic or in forced contact.
Wild birds: a parallel outdoor exposure plan
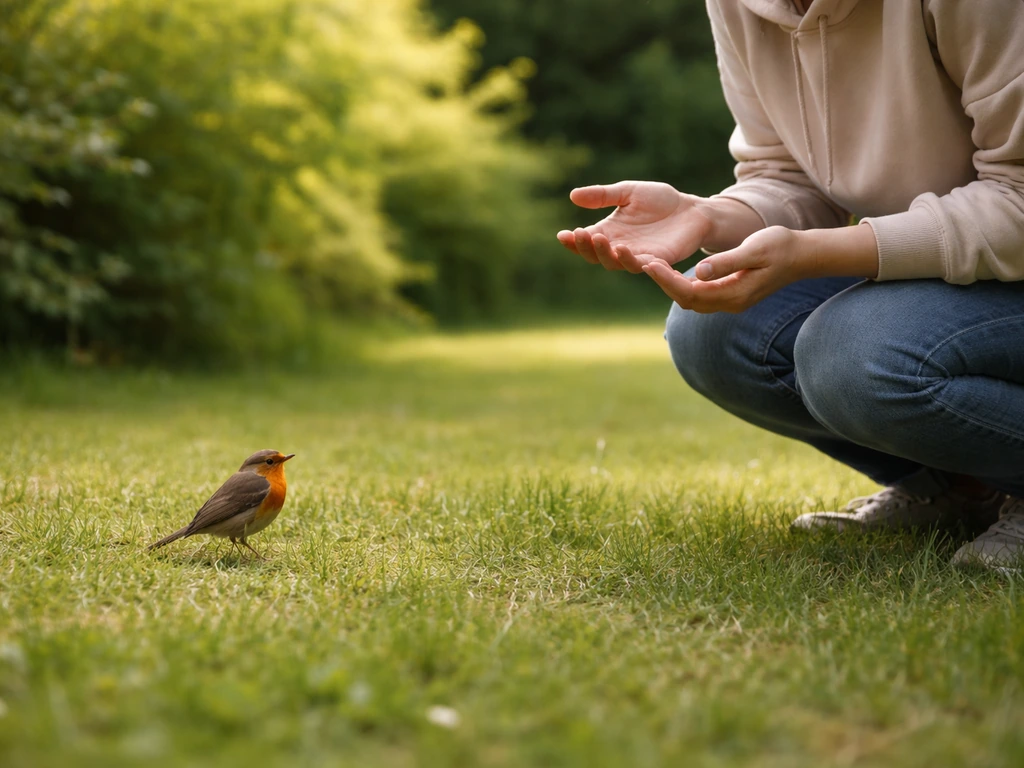
For wild birds in your yard or a park, the steps mirror the above. Start with viewing from inside, through a window. Then move to sitting on a porch or at an outdoor table at maximum comfortable distance. Gradually shorten that distance across sessions.
If you add a feeder, position it at least 30 feet from your seating area initially so birds approach the feeder, not you. Observe from a chair, with something to do with your hands (a phone, a book). Over time, move your seating position closer to the feeder in small increments. Ethical wildlife guidelines are clear that you should not follow, corner, or crowd birds, and if they approach uncomfortably close, you move back.
This is actually ideal for phobia work because it keeps you in control of the distance.
Species-specific notes: parrots, cockatiels, budgies, and finches
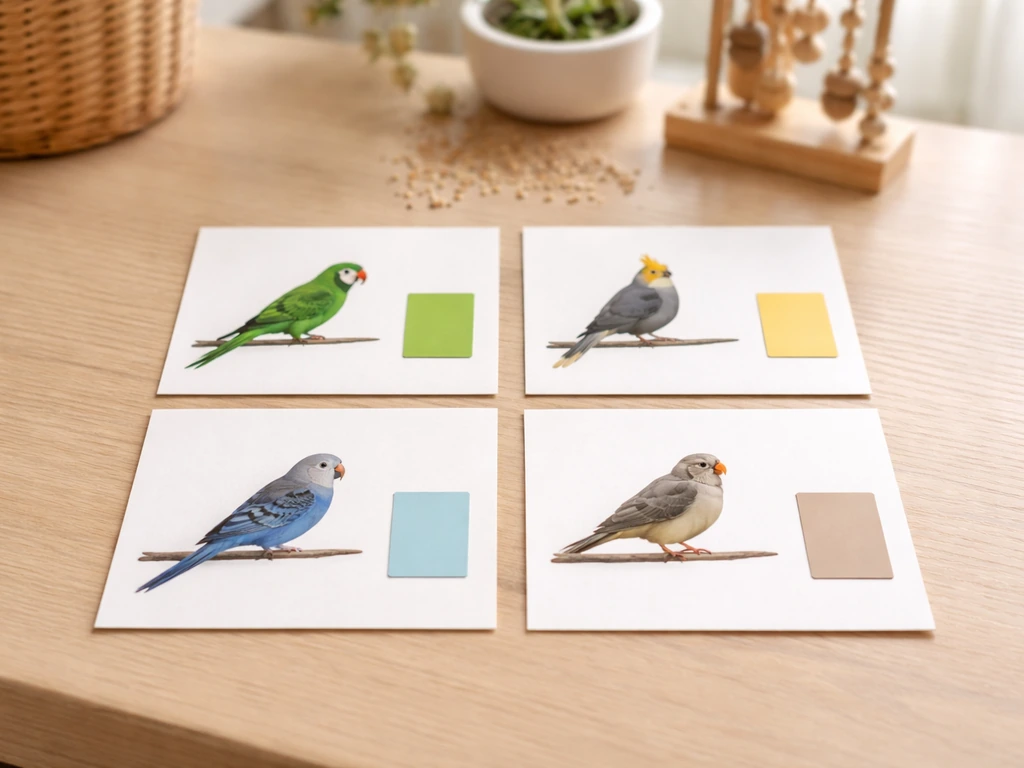
Different birds present different challenges, so it's worth adapting your approach based on which species you're working with.
| Species | Common fear triggers | Key adaptation for your exposure plan |
|---|---|---|
| Parrot (large, e.g., African Grey, Amazon, Macaw) | Loud calls, large beak, sudden lunge at cage bars, size | Stay further back during early stages; learn to read body language (pinned pupils, raised feathers = warning); use a perch stick before any hand contact; never approach from above |
| Cockatiel | Wing flap and hiss, crest raising, unexpected flight across the room | Keep cage in a corner during early sessions to reduce flight range; watch crest position (flat and back = defensive); approach at eye level |
| Budgie/Parakeet | Fast movement, erratic cage darting, nipping fingers | Short sessions near cage only; place hand inside cage without touching first so the bird learns your hand is not a threat; move very slowly; never wrap your hand fully around the bird |
| Finch | Rapid, unpredictable movement even in a small cage, sudden burst flying | Sit further back longer than you might think necessary; finches are not typically handled, so your goal is usually proximity comfort, not touch; dimmer lighting in the room can calm cage activity |
| Wild yard birds | Swooping (mockingbirds, crows near nests), flock movements, unexpected approach | Observe from fixed, elevated position (porch, bench); avoid nesting areas in spring and summer; keep distance of at least several yards initially; move away if a bird adjusts its behavior because of you |
Understanding bird body language is genuinely useful here, not just for the bird's benefit but for yours. A parrot that is about to lunge shows it well in advance: the eyes pin (pupils rapidly dilate and contract), the feathers flatten, and the body leans forward. A cockatiel that is relaxed holds its crest loosely upright and may softly chirp. Recognizing these signals gives you predictability, and predictability reduces anxiety.
Set up your environment so you feel in control
Your physical setup matters more than people realize. Anxiety spikes when you feel trapped, surprised, or without options. Here are the practical things to arrange before any exposure session.
- Always know your exit: keep the door to the bird room open or clearly accessible during every session
- Keep cage placement predictable: put the cage in the same spot every session so there are no surprises about where the bird is
- Reduce other stressors: do your exposure sessions when you're not tired, hungry, or already stressed from the day
- Use a consistent routine: arriving, sitting in the same chair, using the same quiet voice, and leaving calmly at a pre-set time all build a sense of structure that calms nervous systems
- Brief someone you trust: if a friend or family member manages the bird, have them handle any cage-opening or bird-retrieval tasks during your early stages so you never feel ambushed
- Keep early sessions screen-free: resist the urge to distract yourself with your phone during exposure, since attention to your actual anxiety level (and watching it come down) is part of the process
For outdoor or wild bird exposure, a fixed observation spot (a specific bench or porch chair) acts as your anchor. Coming back to the same spot in roughly the same conditions each time builds routine and reduces the variables that feed anxiety. Early morning or late afternoon are usually calmer periods for bird activity, which can make your initial outdoor sessions more manageable.
Building trust and moving toward humane handling
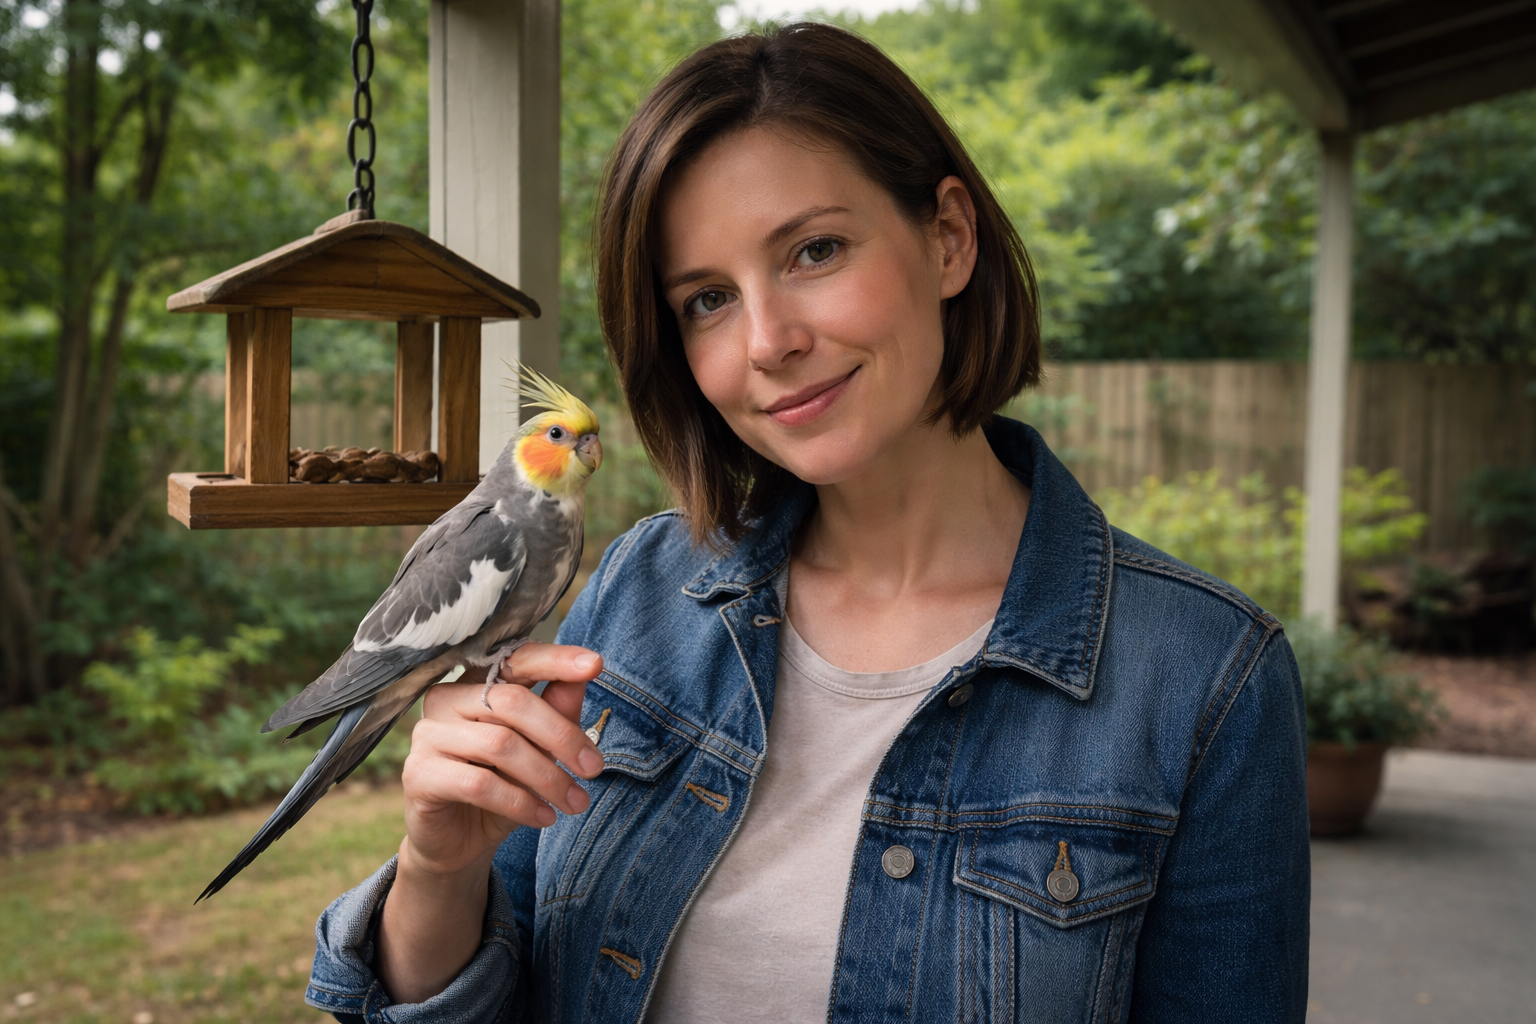
Once you've spent real time at Stage 4 or 5 of the desensitization plan with low anxiety, you may find you genuinely want to interact with the bird. The approach that works for both the bird and for managing your remaining nervousness is positive reinforcement with choice. The bird is never forced to approach or step up, and you are never required to hold steady if your anxiety is above a 4 or 5.
The step-up request is the foundational pet bird interaction. Offer a finger or short perch stick at the bird's chest level, just below the feet, and wait. A relaxed bird will step onto it in its own time. Keep sessions to two or three minutes at first. If the bird doesn't step up, that's fine. Withdraw, give it a moment, and try once more. Short, positive, and unpressured sessions build trust faster than long, tense ones. This mirrors how building a bond with a bird works in general: consistency and patience matter far more than any single breakthrough moment.
If the bite risk is part of your fear (very common with parrots and cockatiels), the stick perch is your best tool because it keeps your hand out of range while you practice the motion. When you are eventually ready to offer your hand, move slowly, approach from the front and below, and watch for the body language cues discussed earlier. A bird that is leaning away or feather-flattening is telling you it's not ready, and neither should you be.
What to do when anxiety spikes mid-session
Even with careful planning, your anxiety will sometimes spike faster than expected. That's normal and it doesn't reset your progress. Here is a practical sequence for managing it in real time.
- Stop moving immediately: sudden movement when you're scared often startles the bird and escalates both your anxiety and its reaction
- Breathe out slowly first: exhale for twice as long as your inhale (try 4 counts in, 8 counts out) to activate your parasympathetic nervous system
- Use grounding if panic rises: name 5 things you can see, 4 you can physically feel, 3 you can hear, 2 you can smell, 1 you can taste — this five-senses grounding technique interrupts a panic spiral by pulling attention into the present moment
- Do not flee in a panic if you can help it: leaving when anxiety is at a peak can reinforce avoidance; if you can, wait for your SUDS to drop by even 1 or 2 points before exiting calmly
- After the session, note what triggered the spike: was it a sudden movement from the bird, an unexpected sound, proximity you misjudged? Use this to adjust your hierarchy, not as evidence that you're failing
Common mistakes that slow progress
- Skipping steps because 'it seemed easy today': easy days are great, but skipping three steps at once often leads to a hard crash that sets you back
- Avoiding the trigger entirely between planned sessions: avoidance reinforces the fear circuit, so even small, low-anxiety exposures (a photo on your phone, sitting in the room with the cage covered) on off days keep momentum
- Letting someone else rush you: well-meaning bird owners sometimes put the bird on you 'to help.' This is forced contact and it nearly always makes things worse
- Expecting linear progress: anxiety does not decrease in a straight line. A harder session after several good ones is normal, not a sign of failure
- Skipping relaxation preparation: spending even two minutes on slow breathing before a session lowers your baseline anxiety and makes the exposure more effective
When self-help isn't enough and how to find the right support
Self-directed desensitization works well for mild to moderate bird anxiety, and many people make significant progress without professional help. But there are clear signs that working with a therapist will get you further, faster. Consider reaching out to a professional if: your fear is preventing daily functioning (you're avoiding neighborhoods, workplaces, or social events because of birds); your panic response is immediate and severe even at early hierarchy steps; or you've tried a self-guided plan for six to eight weeks and aren't moving forward.
Exposure-based therapy, specifically cognitive behavioral therapy (CBT) with an exposure component, is the most extensively studied and effective treatment for specific phobias including ornithophobia. The therapist helps you build a more customized hierarchy, sometimes starting with imaginal exposure (vividly imagining the feared scenario in a safe setting) before any in-person work, which can be helpful when even early stages feel overwhelming. The process is collaborative and you set the pace.
When choosing a therapist, look for someone licensed in your state (psychologist, licensed clinical social worker, or licensed professional counselor), and specifically ask whether they have experience with specific phobias and exposure-based treatment. Professional directories from psychology associations in your country are a reliable starting point, and many therapists now offer telehealth, which can be a good entry point before in-person sessions. Avoid anyone who proposes flooding (immediate full-intensity exposure) as their primary method, as it is both unpleasant and less effective than gradual exposure for most people.
For those who already work with pet birds or are rehabilitators and find that fear is interfering with their ability to handle or observe birds humanely and safely, a therapist familiar with both anxiety treatment and, ideally, animal work can be especially helpful. You do not have to choose between managing your fear and continuing to care for birds.
Realistic timelines and how to track your progress
Most people with mild to moderate bird anxiety notice measurable improvement within four to eight weeks of regular, structured exposure practice (two to four sessions per week). 'Measurable' means your SUDS ratings at early hierarchy steps have dropped and stayed down, not just dipped once. Moderate to severe phobias with frequent panic responses typically take longer, and professional support compresses that timeline considerably.
Keep a simple log: date, which step you practiced, starting SUDS, ending SUDS, any notes on what triggered a spike. Patterns in that log will show you both your progress and where your hierarchy needs adjusting. Progress in this kind of work rarely feels dramatic in the moment. It usually looks like 'I sat near the cage for fifteen minutes and realized I hadn't thought about leaving.' That's the win.
If your longer-term goal is to approach and bond with a pet bird, or to calmly attract and observe wild birds in your yard, the same principles that underpin phobia work are the ones that make those relationships rewarding: moving slowly, reading signals, building trust over time, and never forcing contact. Those same gradual, consent-based techniques also make it easier to learn how to talk to a bird without triggering panic bond with a pet bird. The skills you build working through your own fear directly translate into better, more humane bird interactions.
FAQ
What should I do if my bird phobia spikes during an exposure session and I cannot calm down quickly?
If panic symptoms hit mid-session, pause the exposure activity at the exact step you were doing, take slow breaths, and restore distance immediately (step back, leave the room, or stop walking toward the wild bird). Then wait until your SUDS returns close to your usual baseline before attempting anything else in that session, or end the session if it does not come down.
How do I decide whether to move forward, repeat a step, or scale back when my anxiety changes between sessions?
Choose the next step based on what happened after the last session. If SUDS stayed high for more than a few minutes or you had avoidance afterward, repeat the same step or drop one level (for example, from being in the room with the door open back to being outside the room). Progress is measured by recovery and consistency, not by how brave you feel in one moment.
What if my anxiety depends on unpredictable variables like time of day, bird behavior, or where I’m standing?
Bring the trigger closer only when you can keep it predictable. That means same observation spot, similar time of day, and similar bird conditions when possible. If you cannot control variables, lower the intensity instead (shorter time window, lower volume for videos, farther distance from the cage), because unexpected changes are a common reason people stall.
Can I do exposure using videos, and how do I make sure it actually helps rather than just distracting me?
Yes, but keep it structured so it does not become avoidance in disguise. Examples include practicing with a video while you also rate SUDS, doing short exposures in the presence of a real bird even if you never look directly at it, and using measurable “stays” (for example, 10 minutes near the door). Avoid only consuming information or monitoring birds from a hiding place, because that can reinforce fear.
What if hearing birdsong or a specific bird sound is the main trigger?
If birdsong is a trigger, start with silent or very low-volume clips, and only increase volume after you can watch at that volume with SUDS staying around your target (for example, 2 or below). You can also pair the audio with something neutral you do during exposures (like reading or counting), so your brain links the sound with a safe, routine activity.
Is it common to stall at the later stages (open cage, step-up, hand approach), and how should I adjust?
It is normal for progress to slow when you reach higher steps, especially around open-cage or step-up work. A practical rule is to extend time at the same level before changing the setup, and to shorten sessions if you notice fatigue or anticipatory dread building. If you keep “overshooting” and ending panic, that is a sign your hierarchy step is too steep.
How should I tailor exposure if my bird phobia is specifically about bite risk, especially with parrots or cockatiels?
If the fear involves being attacked or bitten, do not rely on imagination alone. Use a safer proxy first, like the short perch stick approach, and keep your hand out of the bird’s reach while you practice. Only move to hand-based contact after you can tolerate the moment the bird shows approach cues without spiking above your personal threshold.
Are there any health or safety reasons I should get medical guidance before doing bird phobia exposure?
If you have a medical condition that can be aggravated by panic symptoms, talk with a healthcare professional before intensifying exposure. Also consider tracking what you feel physically (dizziness, shortness of breath) and distinguishing it from fear-based sensations. If symptoms resemble a health emergency or do not resolve as anxiety decreases, seek medical evaluation.
How do I prevent my progress from disappearing because I start avoiding after a hard exposure day?
Use a log to spot whether you are avoiding after sessions. If you notice a pattern like “I did okay during the exposure, then I avoided the place for days,” your recovery step is still too hard. In that case, keep the hierarchy but make the post-exposure routine easier, such as leaving calmly while doing a planned activity afterward and returning sooner to the next repetition.
When is it time to move from self-guided exposure to professional help?
If you are making little or no movement after consistent practice for about 6 to 8 weeks, or your panic is immediate and intense even at early hierarchy steps, that is a good time to seek an exposure-focused therapist. Also consider help sooner if your fear is shrinking your life, like avoiding work, transit routes, or social visits because of birds.