Putting a leash on a bird means fitting a lightweight harness vest around your bird's body, then clipping a leash to it. You loop the neck opening over your bird's head, guide the wings through the body loops, and secure the fit so nothing is too tight or too loose. That's the core of it. The real challenge isn't the mechanical steps, it's getting your bird calm enough to tolerate something unfamiliar touching its body. Most birds need several short desensitization sessions before they'll accept a harness without panicking, so this guide covers both how to put it on right now and how to train your bird to genuinely tolerate it over time.
How to Put a Leash on a Bird Safely Step by Step

Clara Hayes
15 May 2026
What 'bird leash' actually means and when to use one
There's no such thing as a traditional collar-and-leash setup for birds the way there is for dogs. If what you mean by a cat collar is a “bird safety collar” to keep your bird from getting away, use a proper bird harness instead and follow the fit and desensitization steps. When people search for how to put a leash on a bird, they almost always mean a bird harness: a soft vest or figure-eight body wrap that distributes pressure across the chest and back, with a leash attachment point on top. Birds do different things when they are scared or hunting, so it can help to also understand how cats catch birds and why a bird's instincts matter for safety How to put a leash on a bird. The leash clips to this, giving you a tether that prevents your bird from flying away while still letting it move around comfortably on your arm or shoulder (though standing on the shoulder comes with its own risks, more on that later).
Harnesses are appropriate for outdoor time with a tame, handleable pet bird: walks in the yard, sitting on a porch, or accompanying you somewhere safe. They are not a substitute for trust and training. If your bird isn't hand-tame or regularly steps up for you, trying to force a harness on it will cause real stress and can set back your relationship significantly. In that case, focus on taming and handling first. Harnesses are also not appropriate for wild birds you find injured or wandering in your yard. Restraining a wild bird improperly can cause serious injury or death, and in most places, possessing or restraining wild birds without a permit is illegal (New Jersey's statutes are one example, and many other states have similar protections). For injured wildlife, call a licensed rehabilitator instead.
Choosing the right harness type and getting the fit right
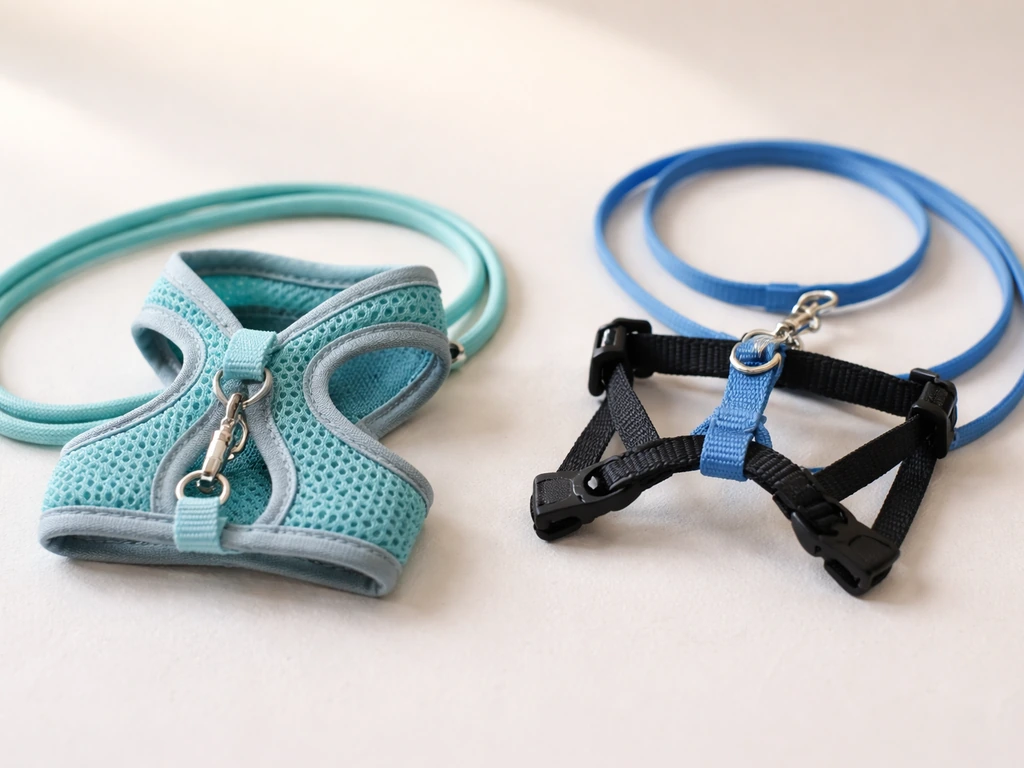
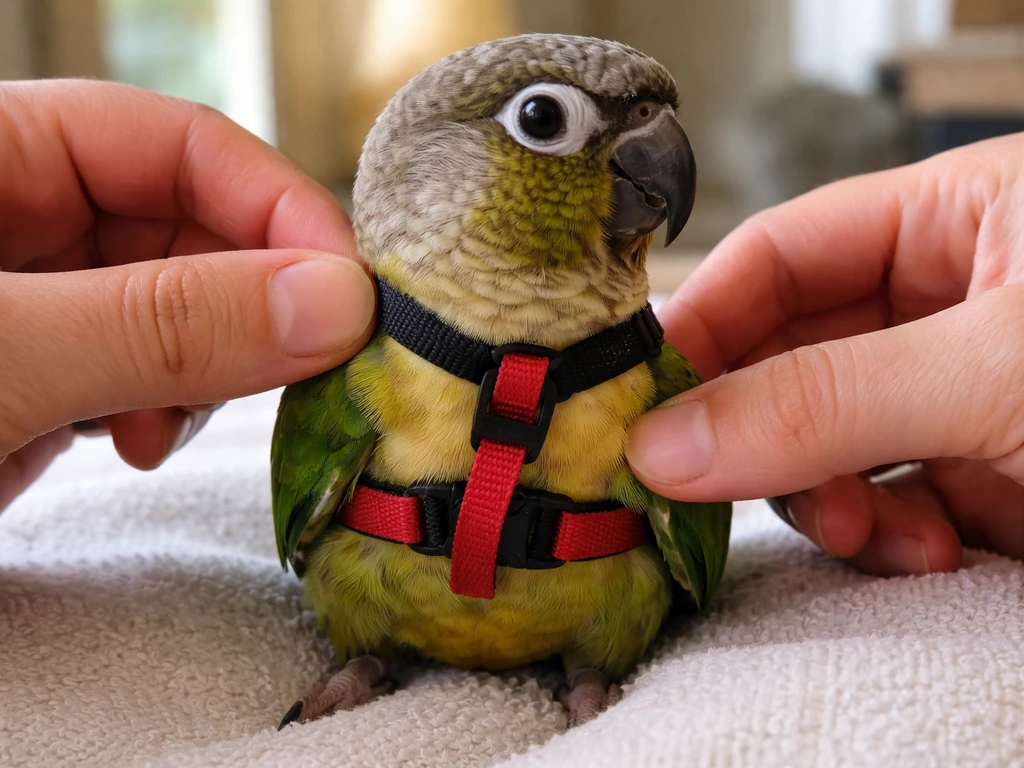
Two main styles dominate the market: the figure-eight/vest style (like the Aviator Harness) and the strap-and-buckle style (like Flight Suits or ALLSafe). For most pet bird owners, the figure-eight vest is the easiest to put on solo and the most secure. Strap styles can work well but require more fiddling and a second pair of hands with nervous birds.
Fit is everything. A harness that's too loose lets your bird slip out or get a toe caught in a strap loop. One that's too tight restricts breathing and causes injury. The Aviator Harness, for example, ranges from about 6 to 10 grams for small sizes up to around 25 grams for larger parrots. That sounds minor, but a small bird like a budgie will definitely feel the difference initially. The ALLSafe sizing system uses three body measurements (neck circumference, chest girth, and back length, labeled A, B, and C) to slot your bird into the right size. Getting those measurements right before you buy saves a lot of frustration.
| Species | Typical Harness Size | Key Fit Notes |
|---|---|---|
| Budgie / Parrotlet | XS or Tiny (brand-specific) | Collar must sit close to chest to prevent toe entanglement; extremely close tolerances |
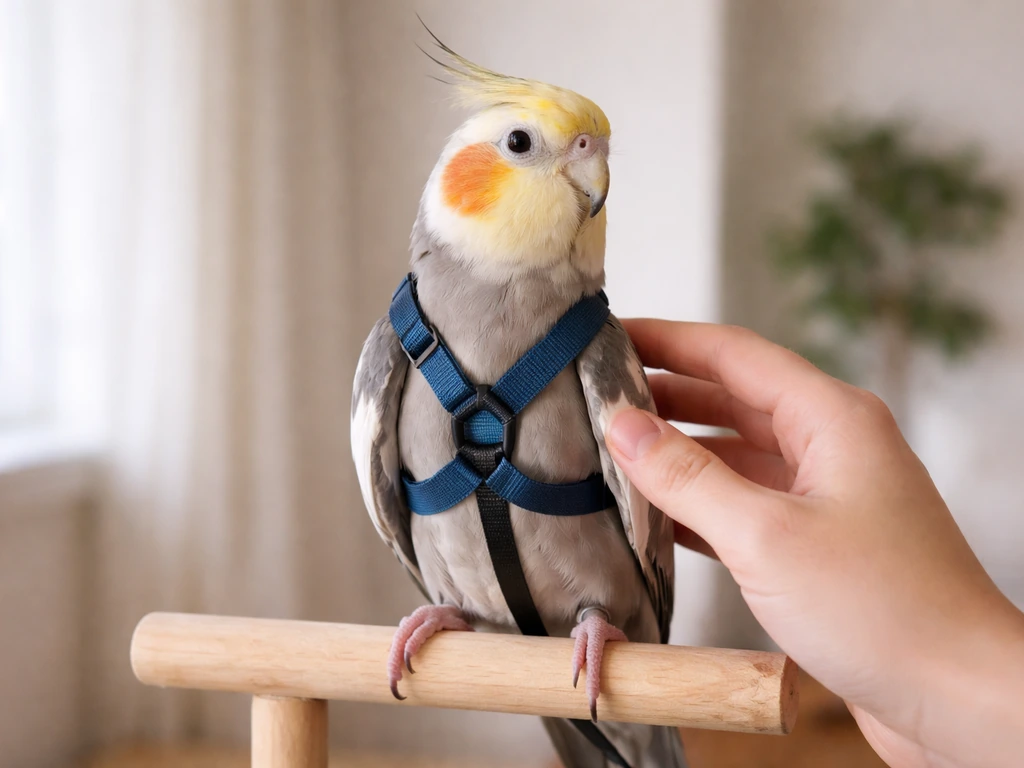
| Cockatiel | Small | Check neck loop isn't so tight it restricts crop; bird should be able to turn head freely |
| Conure / Caique | Small to Medium | Chest strap should lie flat against keel bone without pressing hard |
| African Grey / Amazon | Medium to Large | Ensure wing loops don't pinch flight feathers; recheck after first flight flap |
| Macaw / Large Cockatoo | Large or XL | Heavier harnesses (up to ~25g); worth re-measuring if bird has molted significantly |
A quick rule of thumb for fit: after the harness is on, you should be able to slide one finger easily under the neck loop but not two. The body loops around the wings should lie flat without bunching. If you see your bird hunching, shifting weight constantly, or immediately trying to chew the harness, the size is probably off. Aviator's sizing guidance specifically flags toe entanglement as a sign the collar isn't sitting close enough to the chest, which usually means you need to go one size smaller.
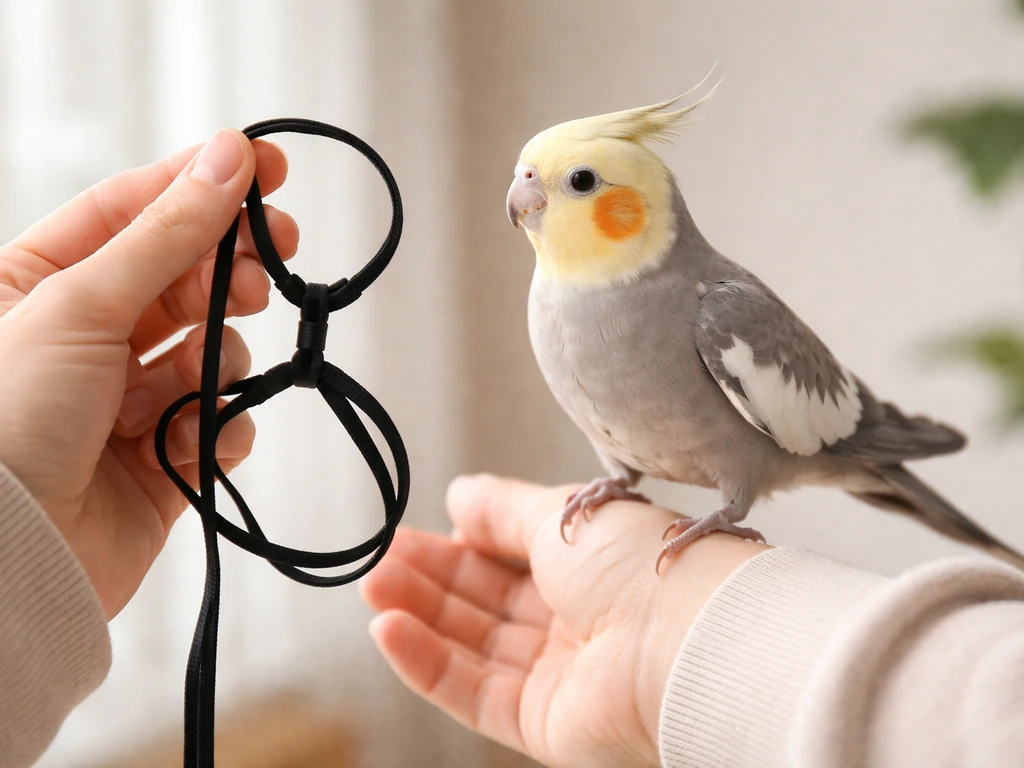
Preparing your bird before the harness comes anywhere near it
The single biggest mistake people make is trying to put a harness on a bird that has never seen one before. Birds are suspicious of new objects, and something that moves toward them and then wraps around their body is genuinely alarming from their perspective. Lafeber's harness training guidance makes the goal clear: the ideal outcome is a bird that voluntarily puts its own head through the neck opening. That takes time, but it makes every subsequent session easier and safer.
Desensitization: introducing the harness over several days
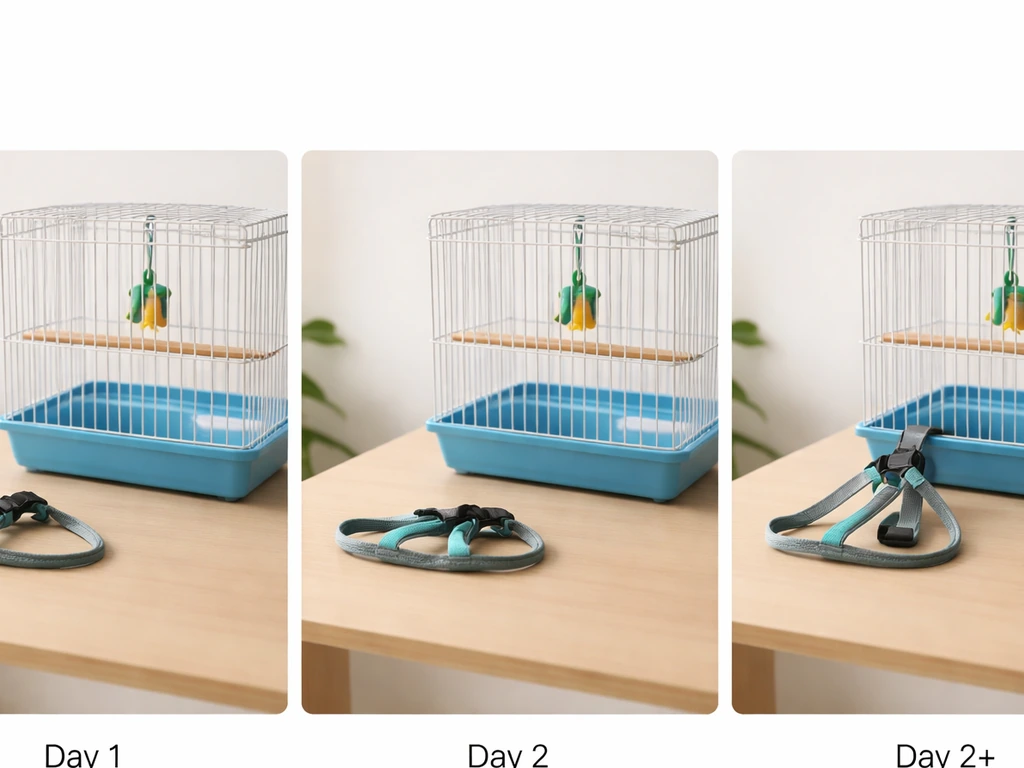
Run two or three short sessions per day, about five minutes each. RSPCA training guidance recommends this exact pace for introducing new objects to birds. Here's the progression to follow:
- Day 1 to 2: Place the harness near the cage, not touching it. Let your bird look at it and ignore it. Reward calm behavior with a preferred treat.
- Day 2 to 3: Hold the harness in your hand during a normal handling session. Let the bird sniff and peck at it if curious. No negative reaction from you if it does.
- Day 3 to 5: Gently touch the harness to the bird's back and chest while it sits on your hand. Remove immediately after one or two seconds. Treat and praise.
- Day 5 to 7: Loop the neck opening loosely near the bird's head without going over it. Treat the moment the bird holds still.
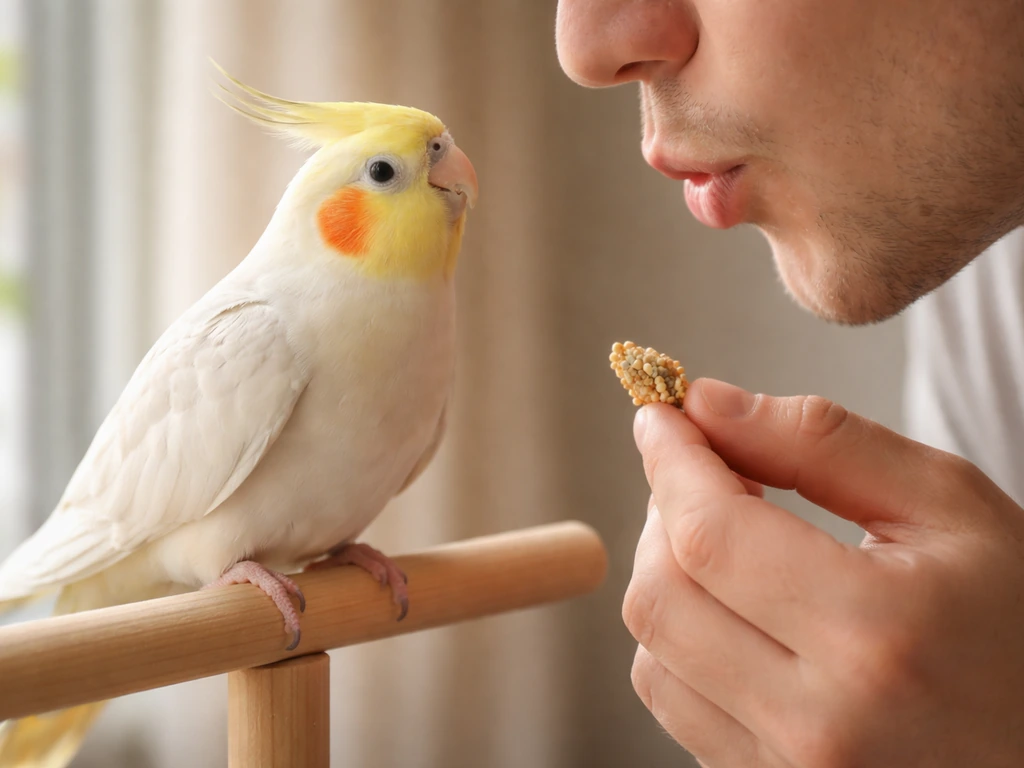
- Day 7 to 10: Encourage the bird to put its head through the neck loop voluntarily by holding a treat on the other side. Never force the head through.
- Day 10 onward: Practice the full fit sequence slowly, one step at a time, with treats after each wing loop and body adjustment.
Measuring your bird before this process starts means you already have the right size ready. To measure, use a soft fabric measuring tape around the neck (over the feathers, not pressing to skin), around the chest just behind the wings, and from the base of the neck to the base of the tail. Write these down and compare to the manufacturer's chart.
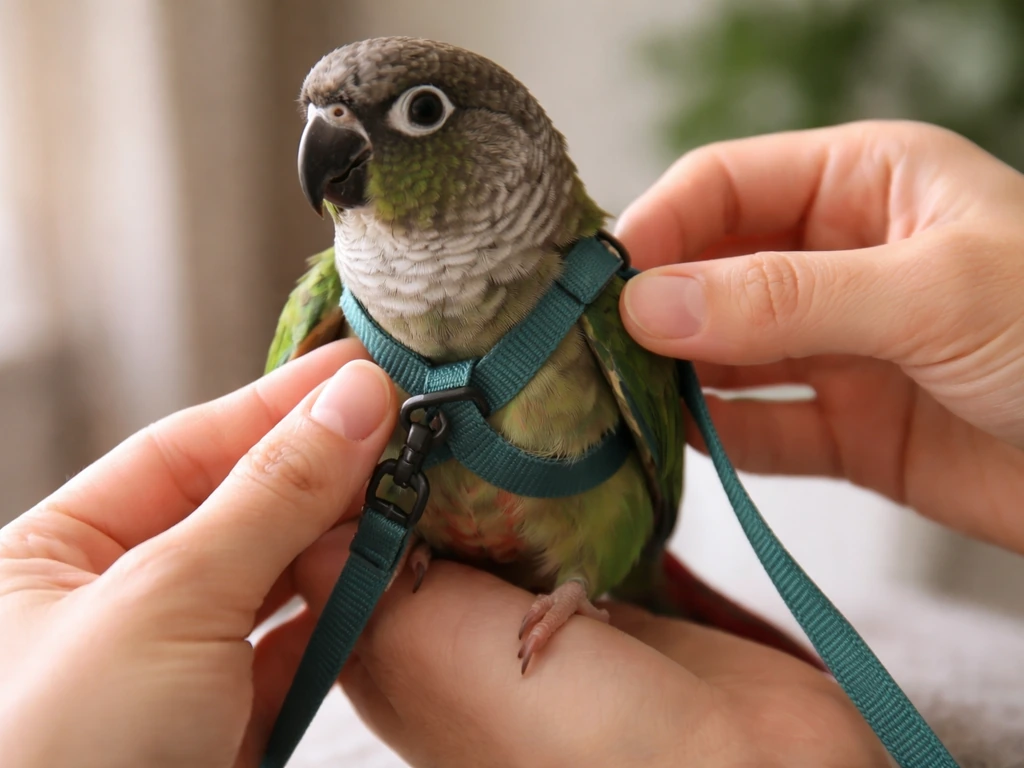
How to actually put the harness on: step-by-step
Once your bird is comfortable with the harness touching its body, you're ready to fit it. Work in a quiet room with no other pets, windows closed, and ceiling fans off. Have treats in your pocket, not in your hand, so your hands are free. The whole process should take under two minutes once your bird is trained. For the first several times, take it slow.
For cockatiels and similarly sized birds (figure-eight harness)
- Have your bird step onto your non-dominant hand or wrist. Make sure it's calm and not already alert or puffed up.
- Hold the harness in your dominant hand with the neck loop open and the leash attachment pointing upward.
- Bring the neck loop toward your bird's head from the front, not from above. Birds are prey animals and things coming from above trigger alarm. Encourage it to duck its head through voluntarily with a treat on the other side.
- Once the neck loop is around the neck, let the bird stand still for a moment and offer a small treat before moving on.
- Gently draw the left wing loop around the left wing, guiding the wing tip through the opening so the loop rests at the base of the wing, against the body. Do not pull the wing away from the body; work with the natural resting wing position.
- Repeat with the right wing loop.
- The figure-eight crossing piece should now sit on the bird's back. Check that it lies flat and isn't twisted.
- Give a final treat, then check the fit with your finger test: one finger under the neck loop, loops lying flat over the wings.
For budgies and very small birds
The sequence is the same, but the tolerances are tighter and the speed needs to be gentler. Budgie-sized harnesses have very small neck openings, and the collar must sit flush against the chest to prevent toe entanglement. If your budgie is untrained, it will likely resist vigorously. Do not persist through strong resistance. Stop, calm the bird, and go back a step in your desensitization sequence. With very small birds, even one or two extra minutes of struggling can cause overheating or muscle strain.
For large parrots (African Greys, Amazons, Macaws)
Large parrots are stronger and can bite hard enough to draw blood if they feel threatened. Wear a long-sleeved shirt for arm protection, and never rush. The neck and wing loop steps are the same, but pay extra attention to flight feathers: make sure the wing loops don't pinch or fold any primary feathers awkwardly. After the harness is on, ask your bird to flap once to confirm the feathers are free. Also check the clip point on the leash is not rubbing against the back of the neck. The leash itself should be short enough (typically 12 to 18 inches for indoor use, longer for outdoor perching) that your bird can't gain enough momentum to hit the end of it hard.
Securing the harness and safety checks before going anywhere
Never take a harnessed bird outside until you've confirmed the fit indoors first. Run through this check every single time before opening a door:
- Neck loop: one finger slides underneath, no chafing visible on the feathers
- Wing loops: lying flat, no twisted straps, no feathers caught or folded
- Back piece: centered and not pulling to one side
- Leash clip: snapped fully closed, no fraying on the leash material near the clip
- Leash length: appropriate for the activity, no excess that could wrap around a limb
- Harness material: no chewed spots, no fraying, no visible damage (birds can chew through strap material and a compromised harness can fail without warning)
Best Friends Animal Society's guidance is clear: if you're taking a bird outside without a carrier, the harness must be on the entire time. No quick trips to the car without it, no assuming the bird won't fly. Even clipped birds can be carried away by a strong gust or take off in a panic if startled. The leash is your backup, not your primary safety tool. Your primary tool is a calm, trust-based relationship and consistent handling.
Also worth noting on shoulders: RSPCA specifically cautions against carrying birds on shoulders during outdoor time because a spooked bird can take off from shoulder height before you can react, and the harness leash can snap taut suddenly if the bird launches. Keep your bird on your hand or forearm where you have more control.
Starting outdoor sessions and building confidence
Your bird's first time outdoors in a harness should be short, calm, and in a familiar environment. The backyard or a quiet balcony is ideal. Busy streets, dogs, and loud sounds can overwhelm even a confident bird. Keep the first session to five minutes or less. Watch your bird's body language constantly.
Wind is a real factor. The Aviator Harness FAQ recommends a useful exercise for building wind tolerance: hold your bird on your hand and walk slowly into the breeze, letting the wind naturally lift its wings. This gets your bird used to air movement without sending it into a panic. Take it slowly and let your bird decide when it's had enough. If it crouches, presses against your hand, or starts flapping frantically to fly away, go back inside.
Temperature matters too. Birds can overheat quickly when stressed or in direct sun. Avoid outdoor sessions in temperatures above 85°F (29°C), keep sessions to shaded spots on warm days, and always have fresh water available when you get back inside. FAO handling guidance flags over-agitation as a real risk for exertional injury and overheating, both of which can happen faster than most owners expect.
Over two to four weeks of short daily sessions, most birds become genuinely relaxed in their harness outdoors. Some even start to associate the harness with the exciting thing (going outside) and cooperate much more readily once that association forms.
When things go wrong: troubleshooting common problems
Bird is terrified and won't let you near it with the harness
Go back to the beginning of desensitization. Leave the harness on top of the cage for a week, ignore it yourself, and let your bird get bored of it before you try again. You cannot rush this. Some birds take three to four weeks just to accept the harness touching their body. That is normal.
Bird is flapping hard once the harness is on
Hold the bird gently but firmly against your chest with one hand supporting the feet and the other cupped over the back. Speak calmly. Most birds settle within 30 to 60 seconds. If the flapping continues past two minutes or the bird seems genuinely panicked (rapid breathing, eyes wide, beak open), remove the harness and end the session. FAO guidance on restraint is clear: if a bird is struggling so hard it risks overheating or muscle injury, it's time to stop.
Bird is biting during the fitting process

Biting means the bird is communicating clearly that it has hit its limit. Do not react loudly or jerk away. Calmly end the session. For large parrots with a serious bite, consider working with a towel as a physical barrier during the wing loop steps until your bird is more comfortable, and think about consulting an avian behavior specialist.
Harness seems to slip or bird gets a toe caught
This is almost always a sizing issue. Toe entanglement specifically points to the collar being too loose at the chest, which usually means going one size smaller. Slipping out entirely means the harness is too large overall. Re-measure your bird and compare to the manufacturer's chart. Do not continue using a harness that your bird can slip out of outdoors.
Bird chews at the harness constantly
Some attention to the harness is normal, especially at first. Constant, frantic chewing that disrupts the bird's ability to stand or perch normally is a sign the harness is uncomfortable or your bird is too stressed to wear it yet. SpectrumCare's guidance on cockatiel harness training is worth heeding here: if a bird cannot perch normally, is chewing frantically, or seems genuinely distressed, remove the harness and pause the plan. If the problem persists after multiple attempts, a vet familiar with bird behavior can help you assess whether the fit is the issue or whether your individual bird may not be a good harness candidate.
Humane, legal, and ethical considerations you need to know
For pet birds, the ethical bar is straightforward: the process should involve minimal stress, full supervision, and immediate removal of the harness if something goes wrong. Harness use should be the bird's regular outdoor safety tool, not an emergency measure you try for the first time when you want to take your bird somewhere. The RSPCA's handling philosophy says it well: good restraint is about empathy, finesse, and reading body language, not force.
For wild birds, the situation is completely different. In most of the United States, it is illegal to capture, possess, restrain, or interfere with wild migratory birds without a federal permit, and many states add their own restrictions on top of federal law. New Jersey's revised statutes are one example of how specific these laws can be, and penalties for violations can be significant. If you've found an injured wild bird in your yard, do not attempt to harness or restrain it yourself. Contact a licensed wildlife rehabilitator or your state's fish and wildlife agency. The humane, legal, and safest course is always to hand that situation to a professional.
Local leash ordinances, like Rowan County, North Carolina's requirement that animals be restrained by a leash, harness, or similar humane device, technically apply to pet birds taken in public spaces in some jurisdictions. It's worth checking your local rules before taking your bird to a park or public area, not because enforcement is common, but because knowing the rules protects you and your bird.
Quick reference: your harness checklist
Here's a condensed summary you can come back to before each session, especially in the early weeks of training.
| Step | What to do | Watch for |
|---|---|---|
| Buy the right size | Measure neck, chest, and back length; compare to manufacturer's size chart | If in doubt between sizes, go smaller for small birds to prevent toe entanglement |
| Desensitize | 2 to 3 sessions per day, 5 minutes each, over 7 to 14 days minimum | Stop if bird is showing fear or aggression; go back one step |
| Fit indoors first | Neck loop from the front, left wing loop, right wing loop, check the back piece | One finger under neck loop; loops lying flat; no twisted straps |
| Safety check | Inspect leash clip, harness material, and fit before every outdoor session | No fraying, no chewed spots, harness cannot slip off |
| First outdoor sessions | 5 minutes max, quiet familiar space, no extreme temperatures | Watch for overheating, panic, or frantic flapping |
| Build duration slowly | Add 5 minutes per session over 2 to 4 weeks | Bird should be calm and curious, not stressed or hunched |
If you're working with a cockatiel specifically, the steps for fitting and desensitization are the same but the tolerances on the small neck and wing loops require extra patience. Training a cockatiel to wear a harness reliably is one of the more rewarding things you can do with these birds, and it opens up a lot of safe outdoor time once it clicks. If you're also wondering how to grow cockatiel bird confidence and comfort, start with proper diet, enrichment, and gentle handling before any outdoor attempts Training a cockatiel to wear a harness. The key is really just not rushing the early desensitization work, and letting your bird tell you when it's ready for the next step. Once your cockatiel is comfortable with handling, you can start simple training games to teach it how to train cockatiel bird to talk teach it to talk.
FAQ
Can I use a collar like a cat or dog safety collar, or does it have to be a harness vest?
For birds, you generally should not use a traditional collar setup. The safer option is a properly sized body harness that distributes pressure over the chest and back, with a secure attachment point. A collar that sits around the neck can press on the throat or restrict breathing, and it also increases the risk of the bird getting its head or toes caught during sudden movement.
My bird keeps chewing the harness. When is it “normal attention” versus a problem I should stop for?
Brief investigation, light chewing, or occasional attempts to mouth the straps can be normal early on. Stop the session if chewing is preventing normal perching, causing frantic shifting, or escalating into clear panic signs (rapid breathing, open-mouth begging, eyes wide). If the bird cannot stand or relax within a couple minutes, remove the harness and repeat the previous desensitization step later.
How tight should the neck loop be, and what do I do if the fit seems to change when my bird moves?
After fitting, use the one-finger guideline (able to slide one finger under the neck opening, but not two). If the harness rides up when your bird stretches, fluffs, or hops, it is often too loose or the size is wrong, and the risk of toe entanglement increases. Re-measure and adjust before reattempting outdoors.
What should I do if my bird’s wing feathers get pinched or look rumpled after the harness goes on?
Do not “tough it out.” Check that wing loops lie flat and that primary flight feathers are not folded or trapped against the body. If the feathers are awkward, go back to a fit check before continuing with treats or moving on to training steps. For stubborn fits, try a different harness style, since strap-and-buckle models can seat differently than figure-eight vests.
Is it safe to let my bird walk around inside with the leash attached?
Indoor walking can work, but you should keep supervision constant and prevent line tension. A leash should not drag or get caught under furniture, and you should avoid situations where the bird could wedge the tether between bars or objects. Many owners also shorten session time at first, since unfamiliar leash movement can trigger sudden launches even if the harness itself was accepted.
Can I clip the leash to the harness right away, or should I wait until the bird accepts the vest?
Wait. First confirm the bird is comfortable with the harness touching and fitting correctly, then progress to brief periods with the leash attached while you remain close and keep slack. This prevents the bird from associating the initial harness experience with the sensation of a tether tightening if it startles.
How long is too long to have a harness on during training sessions?
Use very short sessions at first, commonly around five minutes, especially for birds that are not yet fully desensitized. If the bird shows stress signals that do not quickly settle, end the session. Also plan “off days” where the harness is not used, because repeated short exposures can be better than longer sessions that raise stress for multiple hours afterward.
My budgie or small parrot seems to keep trying to slip out. Should I keep trying different adjustments?
If your bird can slip out, it is usually a sizing or seating problem, not something you should keep forcing through. Re-measure (neck, chest girth, and back length as required by the specific brand), then try the correct size. Continuing outdoors with poor retention is not recommended because a successful escape can happen quickly if the bird panics.
What should I do if my bird launches or the leash suddenly snaps taut during a training attempt?
Treat a launch as a sign the bird is not ready for that stage yet. Immediately stop, remove the harness safely, and return to earlier desensitization steps without trying to escalate. When restarting, ensure the leash length prevents hitting hard endpoints and practice in a low-stimulation area where you can avoid startling triggers like loud noises or other pets.
Are shoulders ever okay for harnessed birds, especially outside?
Generally, it is risky to let a bird ride on your shoulder during outdoor time. From shoulder height, a spooked bird can take off before you can react, and sudden launch can create a sharp leash tension event. Hand or forearm control gives you more ability to steady the bird and respond quickly.
Do I need to check the harness fit every time, even if it’s the same size it always was?
Yes. Birds can change how they sit, fluff, and move from day to day, and harness straps can shift slightly after bathing, heavy preening, or repeated use. Make the same quick fit checks before each outing, especially for signs like toe access near straps, bunching at the wing loop area, or the leash attachment point rubbing the back of the neck.
Can I take my bird outdoors without a carrier if I have a leash on?
You still need the harness on the entire time, because a leash is a backup, not a guarantee. Unexpected gusts, startled takeoffs, or traffic sounds can cause sudden panic. Plan the first outdoor outing in a familiar, quiet area, and keep sessions very short while you observe body language closely.
What if I find a wild or escaped bird in my yard, can I harness it just to keep it safe until help arrives?
Do not attempt to harness wild birds. Handling and restraining wildlife can cause injury or death, and in many places it is illegal without permits. Instead, contact a licensed wildlife rehabilitator or your local wildlife authority so they can secure it legally and safely.
Next Articles
How to Put a Bird Harness on a Cockatiel Safely
Step-by-step safe guide for fitting a cockatiel harness, acclimating indoors, avoiding rubbing, slipping, and stress.
How to Train a Cockatiel Bird to Talk: Step-by-Step Guide
Humane, step-by-step training to teach cockatiel to talk-like sounds and a few words using rewards, timing, and troubles
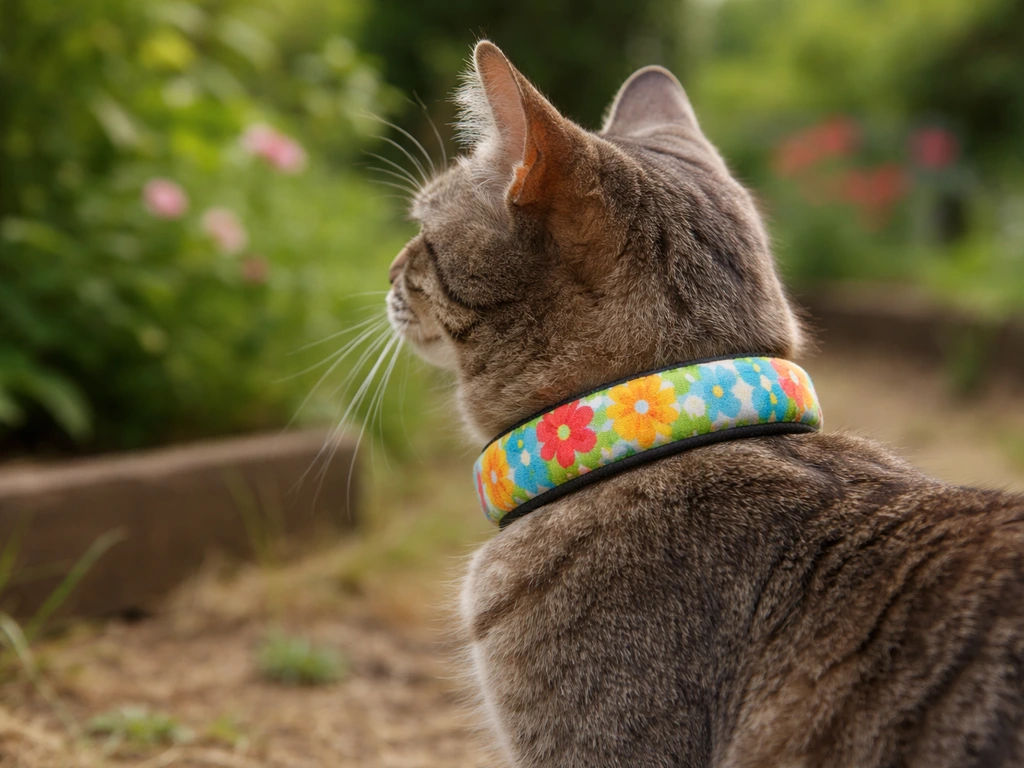
How to Make a Bird-Safe Cat Collar: Safe Fit Steps
Learn how to make a bird safe cat collar with fit steps, risk checks, training, and alternatives if it fails.