Taming a lovebird is absolutely doable, even if your bird currently bites, screams, or flattens against the far corner of the cage every time you walk by. The process comes down to one thing: building genuine trust. If you're wondering how to tame bird in a calm, trust-based way, use the same trust building steps and treat-based reinforcement this guide describes. That means going at the bird's pace, using food as motivation, and being consistent enough that your lovebird starts to see you as safe, then interesting, then genuinely worth spending time with. If you are also looking for how to tame a dove bird, these same trust-first, treat-based steps are the best starting point, just with species-specific cueing and timing. To learn how to love bird in a steady, humane way, focus on trust, consistency, and rewarding calm behavior every day. This guide walks you through the whole process, from day one in a new cage to confident step-up handling, with a realistic timeline and fixes for the most common problems that trip people up.
How to Tame a Lovebird: Gentle Step by Step Training Guide

What 'taming' actually means for a lovebird
Taming is not about dominating the bird or forcing it to sit on your hand. A truly tamed lovebird is one that chooses to interact with you because the experience has been reliably pleasant. Practically speaking, you're aiming for a bird that doesn't flee or bite when you approach, that steps onto your finger or hand voluntarily when cued, and that stays calm during handling, including vet visits, travel, and routine care.
Lovebirds are small parrots, typically 5 to 6 inches long and weighing around 40 to 60 grams, but they have big parrot personalities. They bond intensely, can be feisty, and are not naturally inclined to trust strangers, including you, until you've proved yourself. An untamed lovebird isn't broken or mean. It's just a prey animal doing exactly what evolution built it to do: treat large, unfamiliar things as a threat. Your job is to become the exception to that rule.
Set your expectations at the start. Some lovebirds, especially hand-fed babies or birds that have been handled from a young age, come around in 1 to 2 weeks. Others, particularly adult birds with little prior handling or birds that have had bad experiences with hands, can take 2 to 3 months or longer. Progress is rarely linear. You will have great sessions followed by regression. That's normal, not failure.
Set up a calm, safe space before you even start training
Before you do a single training session, the environment has to be right. A stressed bird cannot learn. Place the cage at roughly chest height, in a room with moderate activity so the bird habituates to household noise without being overwhelmed. Avoid direct sunlight on the cage, drafty windows, and spots near the kitchen where fumes from non-stick cookware can be lethal to birds. The cage should be large enough for the bird to fully spread its wings and move between perches, with at least two perch heights and a clear view of the room.
If this is a new bird, give it a full quarantine period before any hands-on training begins. The recommended minimum is 30 days of isolation from other birds in your home, and many avian welfare organizations suggest extending that to 60 days when possible, especially if you have existing birds. During quarantine, the bird should see a vet and have fecal samples checked. This protects your other birds and also gives the new lovebird time to decompress and start eating and drinking consistently, which is the prerequisite for treat-based training.
Establish a daily routine immediately. Birds feel safer when they can predict what happens next. Feed fresh food at the same time each morning, cover and uncover the cage at consistent times, and keep the room environment as stable as possible during the first few weeks. A bird that feels safe in its environment is far easier to work with than one that is still on high alert.
Foods to use as training treats (and what to avoid)
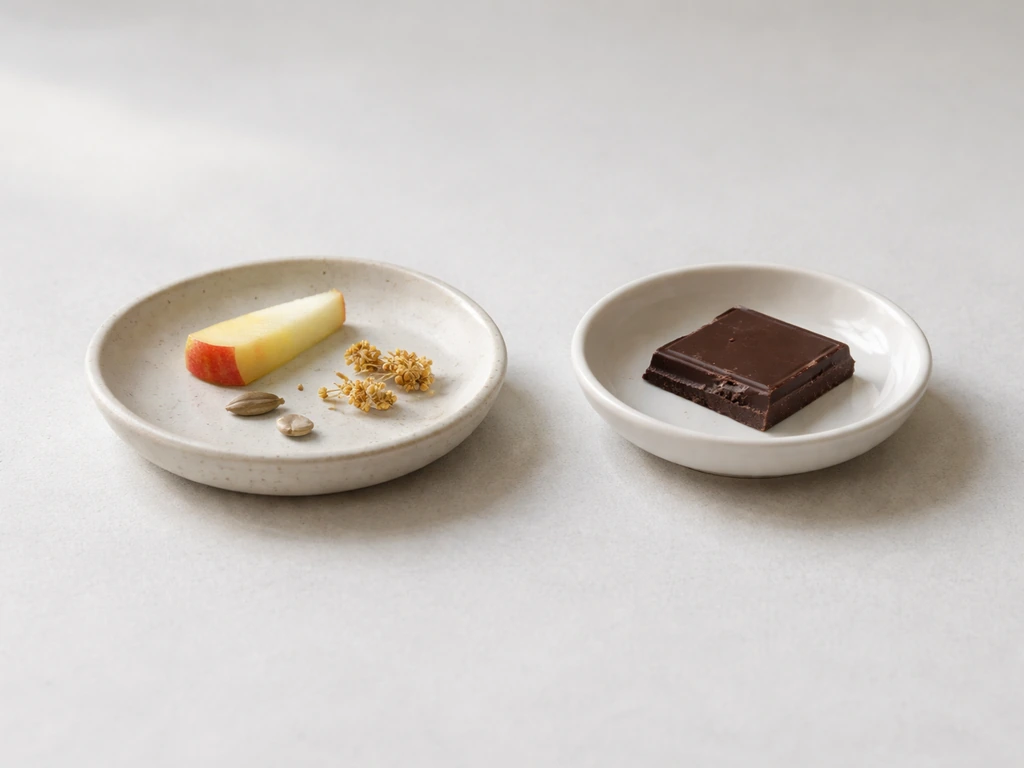
High-value treats are the engine of positive reinforcement training. For most lovebirds, small pieces of millet spray, a single safflower seed, a tiny sliver of apple, or a fragment of cooked egg work well. The treat should be tiny, maybe the size of a grain of rice, so you can repeat rewards many times without filling the bird up. Offer training sessions before the bird's main meal, not after, so hunger keeps motivation high.
Keep these foods away from your bird completely: chocolate and anything containing cocoa (toxic due to theobromine), avocado in any form (persin causes serious toxicity), caffeine in any amount (can cause cardiac arrest in birds), and alcohol. These are not 'small amounts are fine' situations. They are genuine hazards, full stop.
Building trust: approach, voice, and reinforcement
Start without touching anything. Sit near the cage, just close enough to be visible but not close enough to cause the bird to retreat. Talk quietly in a calm, even tone. Read a book aloud, narrate what you're doing, hum softly. The content doesn't matter. The goal is for the bird to associate your presence and voice with calm, non-threatening experiences. Do this for 10 to 15 minutes, once or twice a day. When the bird stays relaxed (preening, eating, moving around the cage) while you're seated nearby, you're ready for the next step.
Gradually close the distance over several sessions, moving your chair a few inches closer each day only when the bird remains calm. Never loom over the cage from above. Approach from the side, make your movements slow and predictable, and avoid direct eye contact initially, which can feel threatening to a prey animal. Once you can sit right next to the cage without the bird showing stress signs, start placing treats on the cage floor or on a perch near you, letting the bird eat them while you watch passively.
Watch for stress signals so you know when to slow down. A lovebird that is hissing, panting, holding its wings slightly away from its body, fanning its tail, or raising its head feathers is telling you it's feeling threatened. Back off a few steps when you see these signs. On the other hand, a bird that is quietly watching you, chirping softly, or moving closer to your side of the cage is showing curiosity. That's your green light to proceed.
Teach target training and step-up, in that order
Target training is the most efficient way to build the step-up behavior, and it should come first. When training birds, the RSPCA advises working on specific behaviors like “step up,” while keeping training consistent and building comfort as part of the process RSPCA guidance on training birds like “step up”. A target is simply an object, usually a chopstick, pencil eraser, or a commercially made bird training stick, that you teach the bird to touch with its beak. Once the bird touches the target on cue, you can use the target to guide it toward your hand, and eventually onto it.
Step 1: Clicker or marker recognition
If you're using a clicker, spend the first two or three sessions just teaching the bird that a click means a treat is coming. Click once, immediately offer a treat through the cage bars or from your fingertip. Repeat 10 to 15 times per session. When the bird reacts to the click by looking toward you expectantly, the association is established. You can also use a short verbal marker like 'yes' if you don't want to manage a clicker.
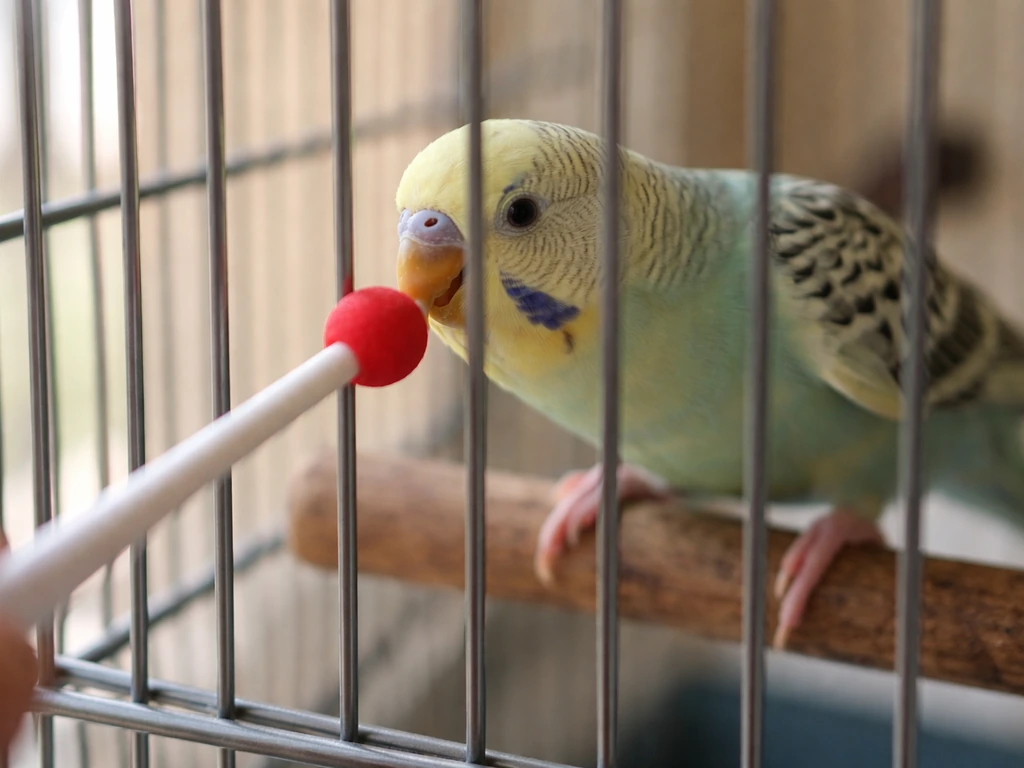
Step 2: Touch the target
Hold the target stick near the bird, just inside or through the cage bars. Most birds will investigate a novel object within a few moments. The instant the beak touches the stick, click and treat. Keep each session to 3 to 5 minutes maximum and stop while the bird is still engaged and motivated. Short sessions repeated across the day are far more effective than one long session. Once the bird is reliably touching the target, start moving it to different positions, left, right, slightly above, slightly below, so the bird has to take a small step to touch it.
Step 3: Target to step-up
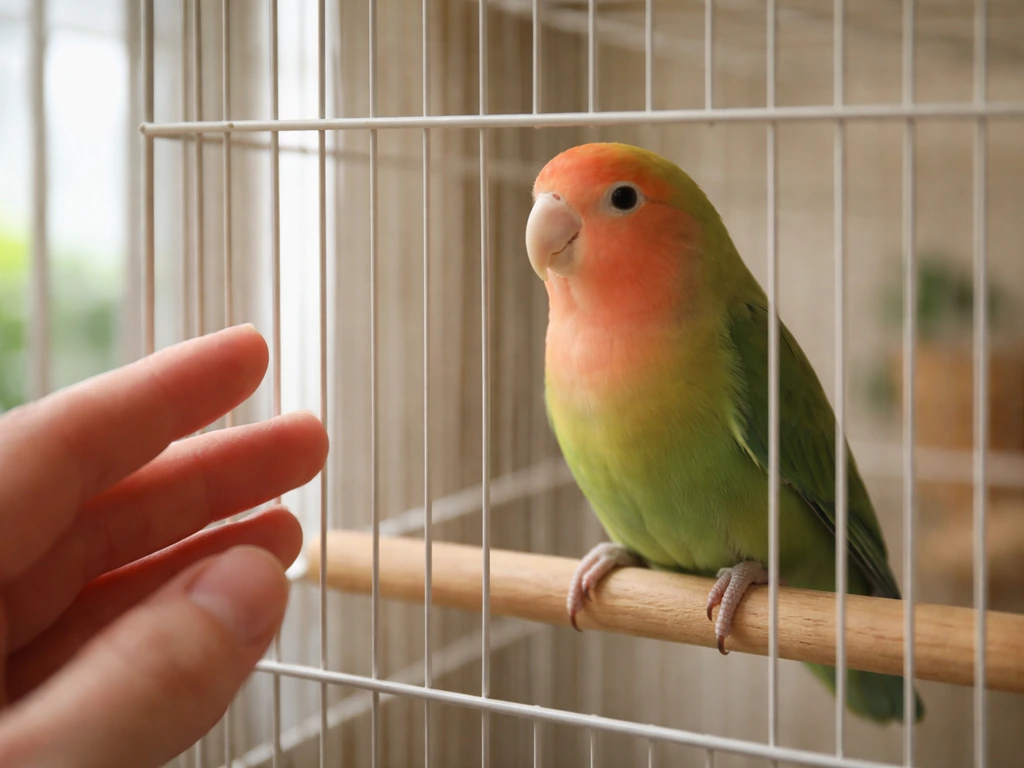
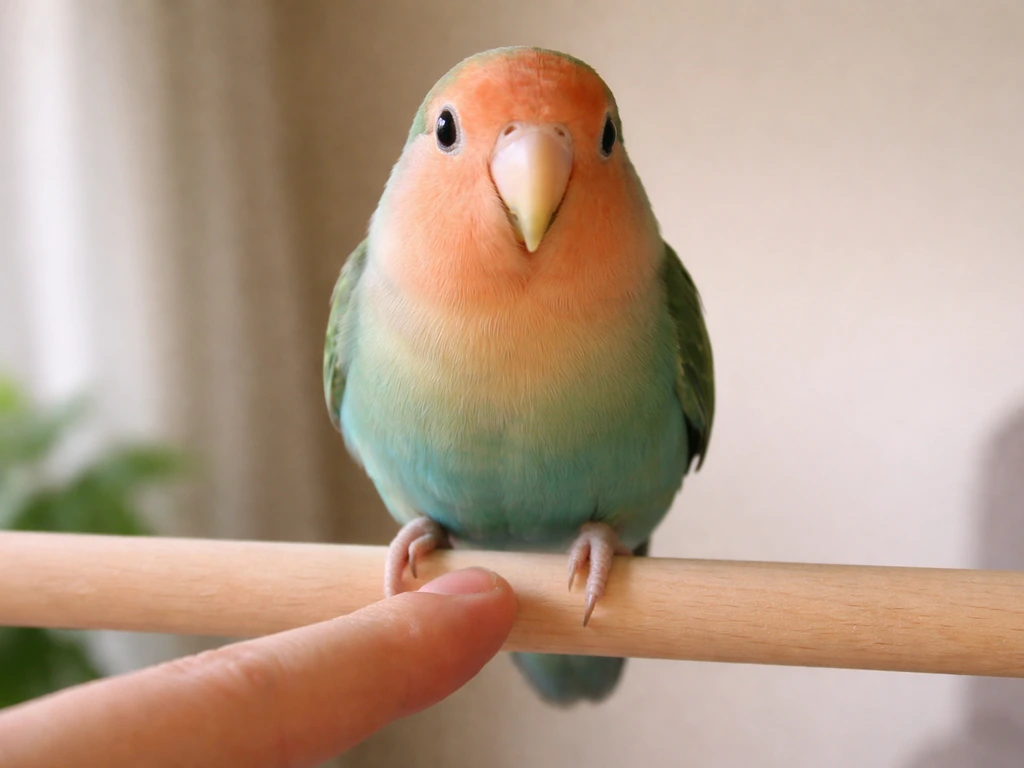
Open the cage door and hold your index finger horizontally near the bird's lower chest, just above its feet. For step-up training, Petco recommends using a gentle approach that prompts the bird by touching near the stomach area and repeating the practice daily gently prompting step-up training by touching near the stomach area and repeating daily. Position the target stick beyond your finger so touching it requires the bird to step onto your hand. The moment one foot lands on your finger, click and treat immediately. Don't wait for a perfect perch at first. Reward the first foot, then build toward the full step-up over multiple sessions. Lovebirds are small enough to step up comfortably onto a single finger. Keep the finger still and your hand low enough that the bird doesn't feel it needs to climb rather than step.
Always reward a step-up the moment it happens. This is where a lot of people lose progress: they get excited the bird stepped up and forget to click and treat in the moment. The reward needs to happen within about two seconds of the behavior for the bird to connect the two things.
A daily training plan with a realistic timeline
Here's how a practical daily routine looks during the taming process. Adjust the phase you're in based on where your bird actually is, not where you think it should be.
| Phase | Approximate Timeline | Daily Practice |
|---|---|---|
| Settling in and habituation | Days 1 to 7 | Sit near the cage 2x/day, 10 to 15 min. No hands. Quiet talking. Observe stress signs. |
| Treat delivery and approach | Days 7 to 14 | Offer treats through bars. Move treats closer to your hand each session. 2 to 3 sessions/day, 5 min each. |
| Clicker/marker + target intro | Days 14 to 21 | 5-min sessions, 2x/day. Click and treat for target touches inside or through cage bars. |
| Target outside the cage | Days 21 to 35 | Open door. Target in doorway and beyond. 3 to 5 min sessions, 2 to 3x/day. |
| Step-up introduction | Days 35 to 60 | Finger near chest, target beyond. Reward first foot. Build to full step-up. 5-min sessions, 2x/day. |
| Consolidation and handling | Day 60 onward | Daily step-up practice. Introduce gentle handling, travel carriers, and new environments one at a time. |
These timelines are averages for a bird with average prior handling. A hand-tame baby might move through all phases in 2 to 3 weeks. An adult bird that has never been handled may be in the approach phase for a full month. Never rush a phase because the calendar says you should. Move forward when the bird's behavior tells you it's ready.
Troubleshooting the most common problems
The bird bites when I put my hand near it
Biting is almost always fear or a learned behavior that got reinforced when it caused your hand to disappear. Do not pull away sharply when bitten: that teaches the bird that biting works. Instead, go back to an earlier phase where no biting was happening, likely the treat-through-bars stage, and slow your progress. Build up hand proximity in tiny increments. You can also try 'station training': teach the bird to go to a specific perch for treats so you're not asking the hand to be a scary thing. Over time, the hand becomes associated with good things and biting motivation fades.
The bird refuses to step up no matter what
Check that your finger is positioned correctly: horizontal, level with or just below the bird's feet, and close enough that it only needs a small step rather than a leap. If the bird targets reliably but won't step up, make the target placement more incremental. Reward the bird for leaning toward your hand, then for touching it with a foot, then for one foot on, then for two feet. Break the behavior into smaller pieces. Also check that the treat you're using is genuinely high-value. If millet isn't working, try fresh fruit or a seed the bird goes crazy for inside the cage.
Fear of hands persists even after weeks of training
Some birds, particularly those that had negative hand experiences, need much more time at the 'treats near hand' stage. Try laying your open hand, palm up and still, inside or near the cage door with a treat balanced on it. Don't reach toward the bird. Let it come to you. You can also try teaching the bird to eat from a spoon, which is less threatening than fingers for many birds, and then transition to hand delivery once the bird is comfortable. Consistency matters more than speed.
The bird screams when I leave the room
Lovebirds are social and contact-calling when separated is normal behavior, not a training failure. Avoid rushing back every time the bird calls, as that reinforces the screaming. Instead, return to the room during a quiet pause and reward calm with your presence. Gradually extend the time you're away before returning. Providing foraging toys and enrichment while you're absent helps reduce anxiety-driven calling.
Progress is inconsistent or the bird seems to regress
Regression is extremely common. It can happen after a vet visit, a new person in the home, a change in the room, or even a change in your schedule. When you see it, don't panic or push harder. Drop back a phase, rebuild confidence with easy wins and reliable treats, and move forward again. Also consider whether you're doing sessions when the bird is naturally more active (typically morning and late afternoon) rather than when it's sleepy or has just eaten a full meal.
The bird won't eat during sessions
If the bird ignores treats entirely, it's either not hungry enough, the treat isn't motivating enough, or it's too stressed to eat. Check the timing: train before the main meal, not after. Experiment with different treat options. And if the bird is showing stress signals like fluffed feathers, tail bobbing with breathing, or open-mouth breathing, stop training immediately and consult a vet. These can be signs of illness, not just nerves.
Handling, safety, and keeping it humane
Once step-up is reliable, practice it multiple times a day in short bursts. Step the bird up, give a treat, let it return to a perch, then repeat. When you want to actually move the bird somewhere, keep your movements slow and walk smoothly without swinging your arm. Talk calmly during transport so the bird hears your voice as a reassuring constant.
On the question of gloves: avoid them during taming. Gloves change the texture, smell, and appearance of your hand and can make the entire hand-fear problem worse. The only time gloves make sense is if you're handling an injured or truly wild bird as an emergency measure to protect both of you. If you are dealing with a truly wild bird, the safest option is to contact a licensed wildlife rehabilitator before you try to work on taming an injured or truly wild bird. For a pet lovebird, getting used to your bare hands is part of the training, not something to shortcut.
Keep sessions short enough that the bird never reaches the point of frantic struggling. A session should end while the bird is still relatively calm and ideally still interested in treats. If you notice the bird starting to pant, spread its wings, or refuse food, end the session immediately and give it time to decompress in its cage. Post-session, make sure the bird has access to water and its regular perches, and give it at least 30 to 60 minutes of quiet before another interaction.
Never use punishment or force
Forcing a bird onto your hand, scruffing it, or using any form of aversive pressure does not produce a tame bird. It produces a bird that is temporarily restrained and permanently more afraid. All the research on parrot training points the same direction: positive reinforcement builds lasting behavioral change, while punishment builds fear and aggression. If you're not making progress, the answer is always to slow down and make the task easier, not to escalate pressure.
What to do if the bird you found might be wild or a stray
Sometimes people searching for information on taming a lovebird have actually found a small parrot-like bird in their yard or neighborhood, not a bird they purchased. This section is for you. This section is for you, but if what you found is truly wild, see how to tame wild bird for the safest adjacent steps and when to involve wildlife rehab.
First, figure out what you're dealing with. True wild lovebirds are not native to North America, but escaped or released pet lovebirds are found in some U.S. cities, particularly in the Southwest and Florida. If the bird is tame, approaches people, or is clearly exhausted and out of its element, it is almost certainly an escaped pet. Check for leg bands and post locally (neighborhood apps, social media, local bird clubs) to find the owner before doing anything else.
If the bird is injured or appears sick, place it in a warm, dark, and quiet container (a cardboard box with ventilation holes works) and contact a licensed wildlife rehabilitator immediately. Do not attempt to feed or handle it beyond what's necessary to contain it safely. Note exactly where and when you found the bird, as rehabilitators need this information to plan care and eventual release.
Be aware of the legal situation: keeping a wild bird in captivity without a state or federal permit is illegal in the United States, even if you found it and mean well. This applies even to non-native species in many jurisdictions. If the bird is healthy and not someone's lost pet, contact a wildlife rehabilitator for guidance rather than attempting to tame it yourself. Taming guides, including this one, are intended for legitimate pet birds, not for encouraging the unregulated keeping of wild animals. The ethical and legal path is always to get proper help.
If you're working with other small birds and wondering how these techniques apply more broadly, the trust-building and positive reinforcement approach described here transfers well across species. The specific body language cues, treat preferences, and timelines shift by species, but the underlying principles remain the same.
What to do right now: your first week checklist
- Set up the cage at chest height in a moderate-activity room, away from the kitchen and drafts.
- If the bird is new, begin a 30-day quarantine and schedule a vet visit before starting hands-on training.
- Remove all toxic foods from reach: no chocolate, avocado, caffeine, or alcohol anywhere near the bird.
- Identify a high-value training treat your lovebird responds to strongly (millet, a favorite seed, small fruit piece).
- Start habituation sessions today: sit near the cage for 10 minutes, twice a day, and just talk quietly. No hands yet.
- Get a thin chopstick or pencil to use as a target stick. You'll need it within the first 1 to 2 weeks.
- Decide on your marker: clicker or a short verbal cue like 'yes.' Be consistent from session one.
- Watch for stress signals at every session and write down what you observe so you can track progress and regression.
- Keep a simple log: date, what you practiced, how the bird responded, and how the session ended. Even three sentences is enough.
- If the bird you found may be wild or a stray, contact a licensed wildlife rehabilitator before taking any other steps.
Taming a lovebird takes patience and consistency, but it's one of the most rewarding things you can do with a small parrot. If you want step-by-step help, follow the exact trust-building approach in this article to learn how to tame bird safely and humanely. Once that bird is stepping up onto your hand willingly and hanging out on your shoulder because it wants to, not because it has no choice, the work it took to get there feels completely worth it. Start with today's habituation session, keep your expectations grounded, and trust the process.
FAQ
My lovebird only bites when I try to handle it, but it’s fine near the cage. Should I stop all contact or still practice step-up?
Yes. If your lovebird is showing fear, use the least intrusive step first, typically treats through the cage bars or from a perch near you. If you need to pick the bird up for a necessary task (health issue, moving, vet transport), do it calmly and briefly, then return immediately to trust-building sessions once the bird is settled.
When is the best time of day to work on step-up so my lovebird won’t get overwhelmed?
Avoid practicing step-up right after you wake up, during peak fear moments, or when the bird just ate a large meal. Aim for times when the bird is naturally interested in the environment, usually morning or late afternoon, and end sessions early while it is still accepting rewards.
What should I do immediately after a bite so I don’t accidentally make the biting worse?
For a bite, the safest pattern is pause, do not yank your hand away, and go back to an earlier, non-biting phase (like treat delivery through bars). If you need to reset quickly, do station training to teach a specific perch choice, then rebuild proximity gradually so the bird is successful again.
Is it normal if my lovebird touches my fingers with its beak during taming?
A good goal is consistent step-up without frantic behavior, not “no beak contact.” Some lovebirds gently nudge or tap with the beak during training. Only treat it as a problem if it’s paired with threat signals, painful bites, or the bird stops engaging and retreats.
How do I figure out if my chosen treats are actually motivating enough?
Choose treats that can be eaten instantly and in small pieces, and keep them scarce during training so your bird stays motivated. If your bird ignores the treat even when you use the right timing (before the main meal), switch to another high-preference option the bird already eats willingly in-cage.
My lovebird won’t eat treats when I’m near. How can I rebuild training without touching it?
If your bird won’t take treats near the hand, reduce the distance and increase predictability. Try placing a treat on the cage floor closer and closer, or balance a treat on an open palm without reaching toward the bird, then reward any voluntary approach.
Can I train step-up if my lovebird targets reliably but refuses to step onto my finger?
Yes, but change the plan if you see stress. If the bird flinches or starts giving threat signals when your hand appears, step back and rely on target training first (beak touch with the target), then use the target to guide small steps toward your hand instead of asking for step-up right away.
My lovebird is breathing hard and puffing up during sessions. Is it still okay to continue and push through?
If the bird is flapping, holding wings away, open-mouth breathing, or panicking, stop immediately. Those signs can indicate illness or serious stress, not just “fear of hands.” Arrange a vet check and restart training only when the bird is calm and eating normally.
Should I use gloves to prevent bites while I teach my lovebird step-up?
Generally, avoid gloves during taming because they change how your hand feels, smells, and looks, which can reset fear. The exception is true emergency containment for an injured or truly wild bird, where you prioritize safety and should involve the proper wildlife help.
My progress keeps slipping after changes at home, like a vet visit. How do I recover without starting over completely?
Very common. After a vet visit, new person, room change, or schedule shift, drop back to an easier phase (often treat delivery near the cage) and keep sessions shorter. Rebuild confidence with easy wins before expecting step-up.
Once step-up works, what’s the safest way to practice it daily without making the bird stressed?
Do a quick, structured practice block: step up, reward immediately, return to the perch, then repeat briefly. If you want to move the bird for transport or routine care, keep the movement smooth and talk calmly so your voice becomes a steady reassurance.
How should I adjust the taming plan if I have more than one lovebird?
With multiple lovebirds, avoid training sessions where one bird’s fear or jealousy disrupts the other. Start one bird at a time in a routine where it has access to its partner if needed, but ensure the working bird can eat and focus on rewards near you.
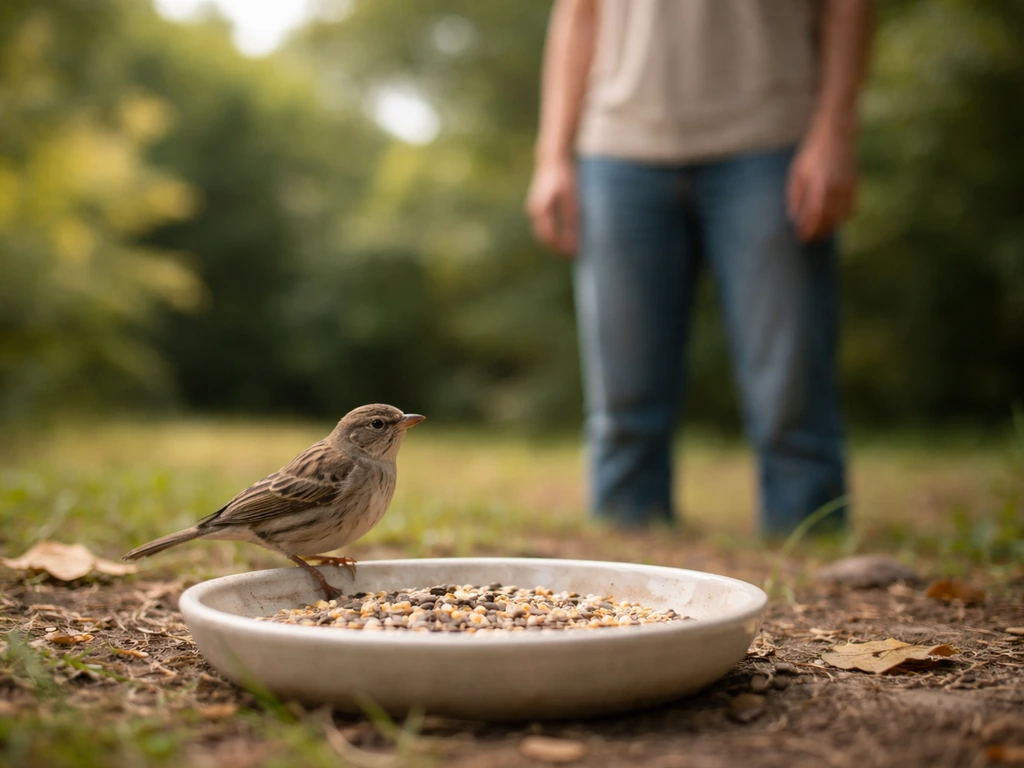
Can you tame a wild bird? Learn safe, humane trust-building steps, feeding routines, and when to avoid handling.
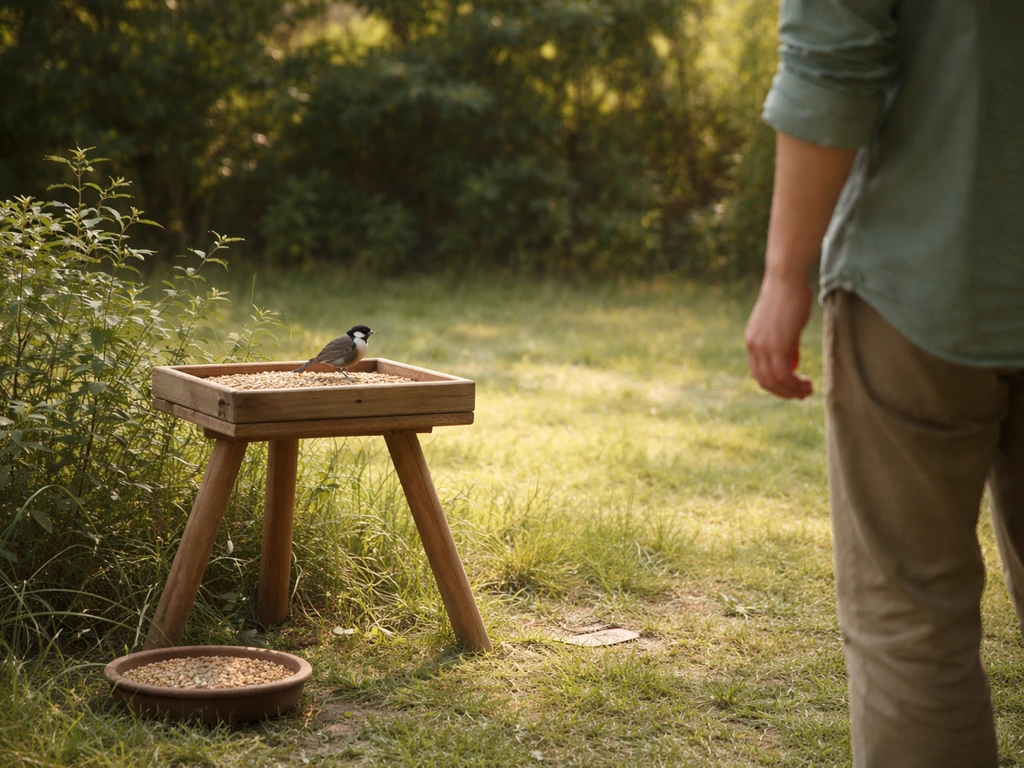
Humane, step-by-step guide to build trust with wild birds safely using food routines, safe setups, and legal boundaries.
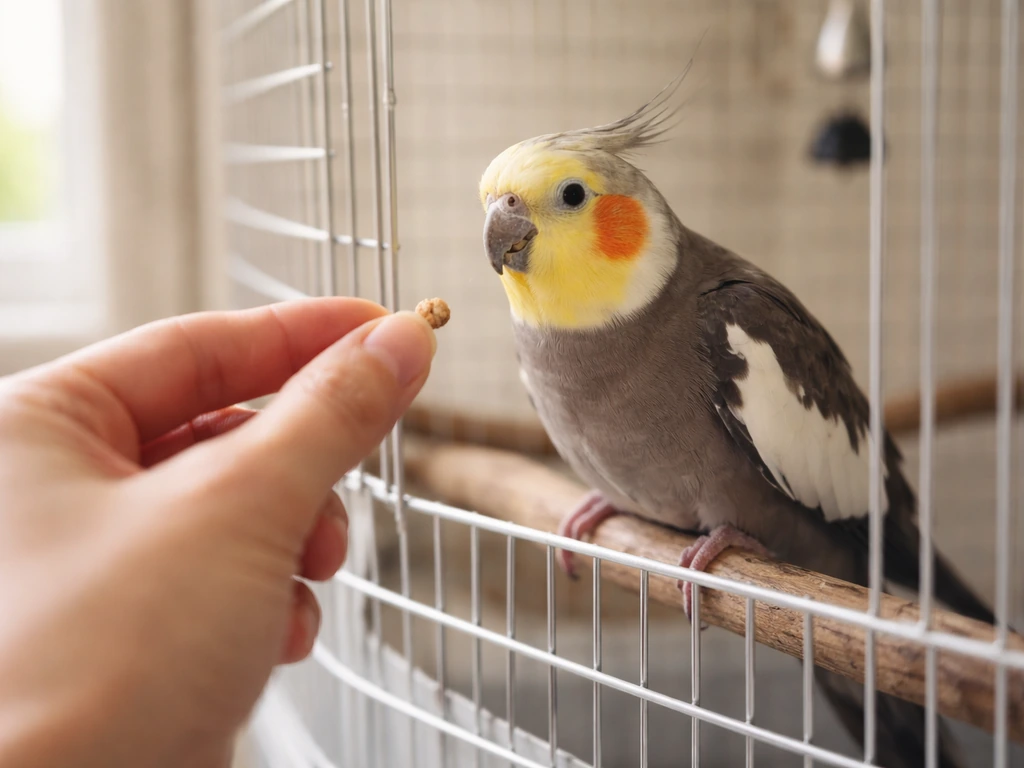
Humane, step-by-step trust building to tame pet parrots, cockatiels, budgies, and finches, plus safe wild-bird guidance.