To carry a bird safely, support its body weight fully with your hand or both hands, keep its wings gently secured against its sides so it can't flap and injure itself, and move slowly and calmly the entire time. The exact grip depends on species: small birds like budgies and finches are usually carried bare-handed or cupped, cockatiels and conures do better wrapped loosely in a towel, and larger parrots need a two-handed towel wrap that protects you from bites while keeping their chest free to breathe. Wild birds in your yard are a different situation entirely, with legal rules that affect what you're even allowed to do.
How to Carry a Bird Safely: Step-by-Step Guide
Clara Hayes
25 Apr 2026
Safety, legality, and humane basics before you touch any bird
Before anything else, slow down and run through a quick safety check. Watch the bird breathe. If you see open-mouth breathing, tail bobbing with each breath, panting with wings held away from the body, or the bird closing its eyes during your approach, stop. Those are signs of respiratory distress or severe stress, and forcing a carry could be dangerous. The MSPCA-Angell avian emergency guidelines list open-mouth breathing and inability to stand as signals to get the bird to a vet urgently rather than attempting further handling. If you're seeing any of those signs, your job right now is containment and transport to a professional, not a casual carry.
On the legal side: if you're dealing with a wild bird in the US, the Migratory Bird Treaty Act (50 CFR § 21.12) generally prohibits taking, transporting, or possessing migratory birds without a permit. The practical exception is that you can briefly pick up a clearly sick, injured, or orphaned bird to immediately transport it to a licensed wildlife rehabilitator. That's it. You are not legally authorized to keep it, relocate it, or attempt your own treatment. In the UK, the Wildlife and Countryside Act 1981 offers similar blanket protections. EU member states operate under the Birds Directive. In every jurisdiction, the correct path for wild birds is: contain safely, contact a licensed rehabilitator, and hand off fast.
For pet birds, the legal bar is lower but the welfare bar is just as high. Rough handling, aggressive grabbing, and techniques that frighten a bird can damage the trust you've built, sometimes permanently. The RSPCA Australia is direct about this: handling that destroys trust sets back your entire relationship with the bird. Keep that in mind every step of the way.
Reading your bird before you reach in
Body language tells you everything about whether a carry is going to go smoothly or turn into a struggle. Take 15 to 30 seconds to observe before you move in. A relaxed bird holds its feathers smooth and close to its body, makes eye contact without alarm, and may even lean toward you. A stressed or fearful bird shows a very different picture.
- Hissing, panting, or open-mouth breathing: high stress or overheating, pause and assess
- Tail fanned out and wings held away from the body: fear or threat display, slow your approach significantly
- Raised head feathers with a crouched posture: defensive, may bite if cornered
- Rapid side-to-side head movements or frantic cage circling: panic state, let the bird settle before attempting a carry
- Eyes closing or inability to grip a perch: illness or injury, treat as a medical situation
Your approach should always be from the front, at the bird's level, with slow deliberate movements. Talking in a calm, low voice helps. Avoid sudden gestures, loud noises, or looming over the bird from above, which triggers a predator-avoidance response. For birds you handle regularly, this pre-carry check only takes a few seconds once you know what a relaxed bird looks like for that individual. For birds you don't know well, or any wild bird, spend more time observing. Understanding how to hold a bird without scaring it starts before your hands ever make contact.
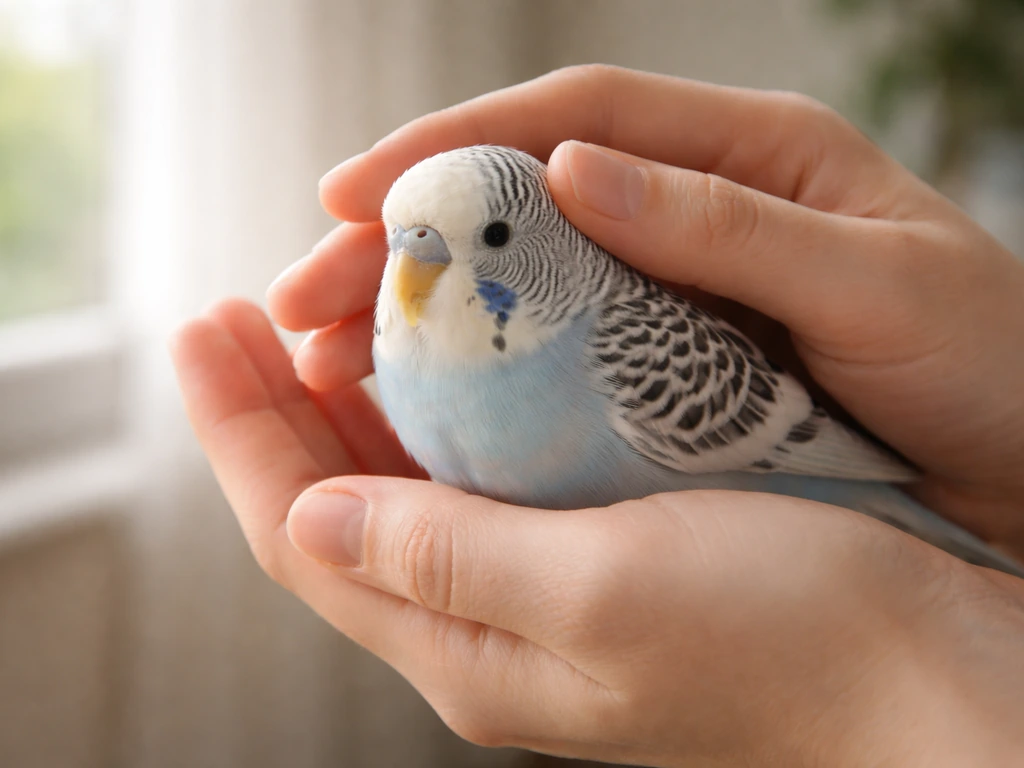
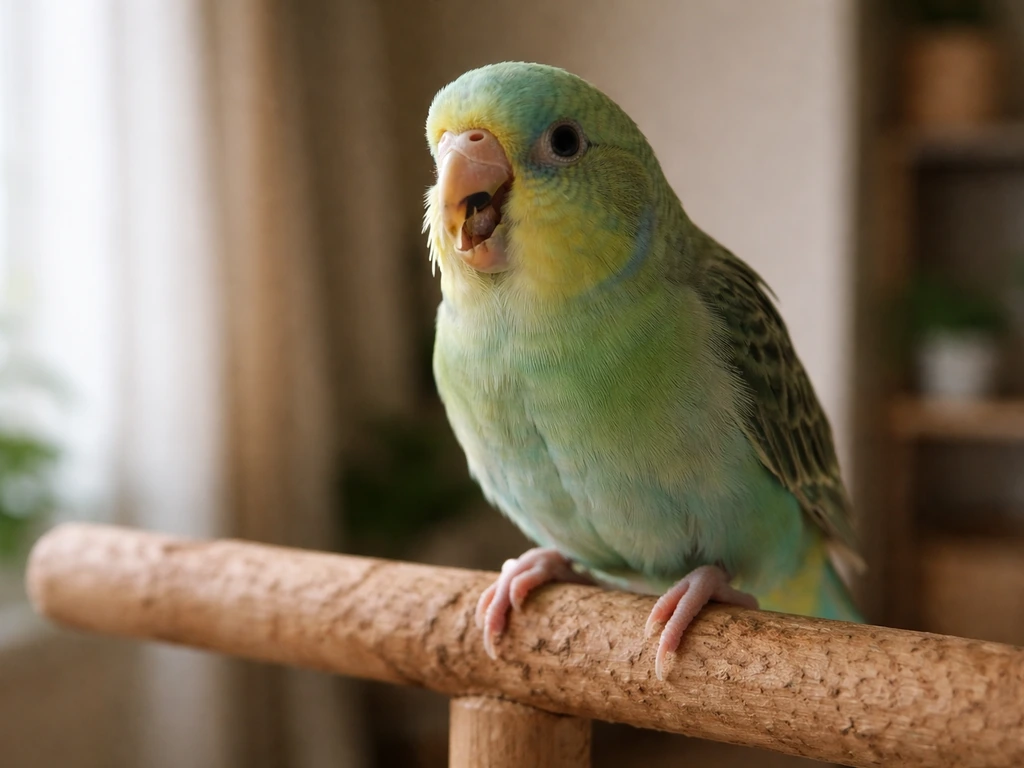
Carrying small pet birds: budgies, finches, canaries, and parrotlets
Small birds are fragile, and the most common mistake people make is gripping too tightly out of fear of dropping them. A budgie or finch weighs between 25 and 55 grams. You do not need much pressure at all. The goal is gentle containment, not a firm grip.
For a hand-tame small bird, the simplest carry is the cupped-hands method. Offer your index finger as a perch, let the bird step up onto it, then bring your other hand up to form a loose cup around its body. Your fingers should barely rest against the bird's sides, just enough to prevent a sudden flap from launching it. Keep your wrists level and walk slowly. For finches and canaries that aren't tame enough to step up, the bare-hand catch described in basic avian technique guides works well: approach from behind with a smooth, deliberate motion, close your hand gently around the bird's body so both wings are against its sides, and support its feet with your fingers underneath. The grip uses almost no pressure. If the bird is small enough to fit in your palm with room to spare, you're probably holding too tight.
To move a small bird in a cage or travel carrier, the safest method is a cage-to-cage transfer rather than a hands carry. Cover both the travel carrier and the home cage with a large towel or sheet, butt the two openings together under the towel to block flight paths, then open both doors and let the bird move on its own. This reduces handling stress significantly, especially for untamed birds. If you must carry the bird by hand from cage to carrier, complete the transfer in one smooth motion and get the carrier door closed quickly.
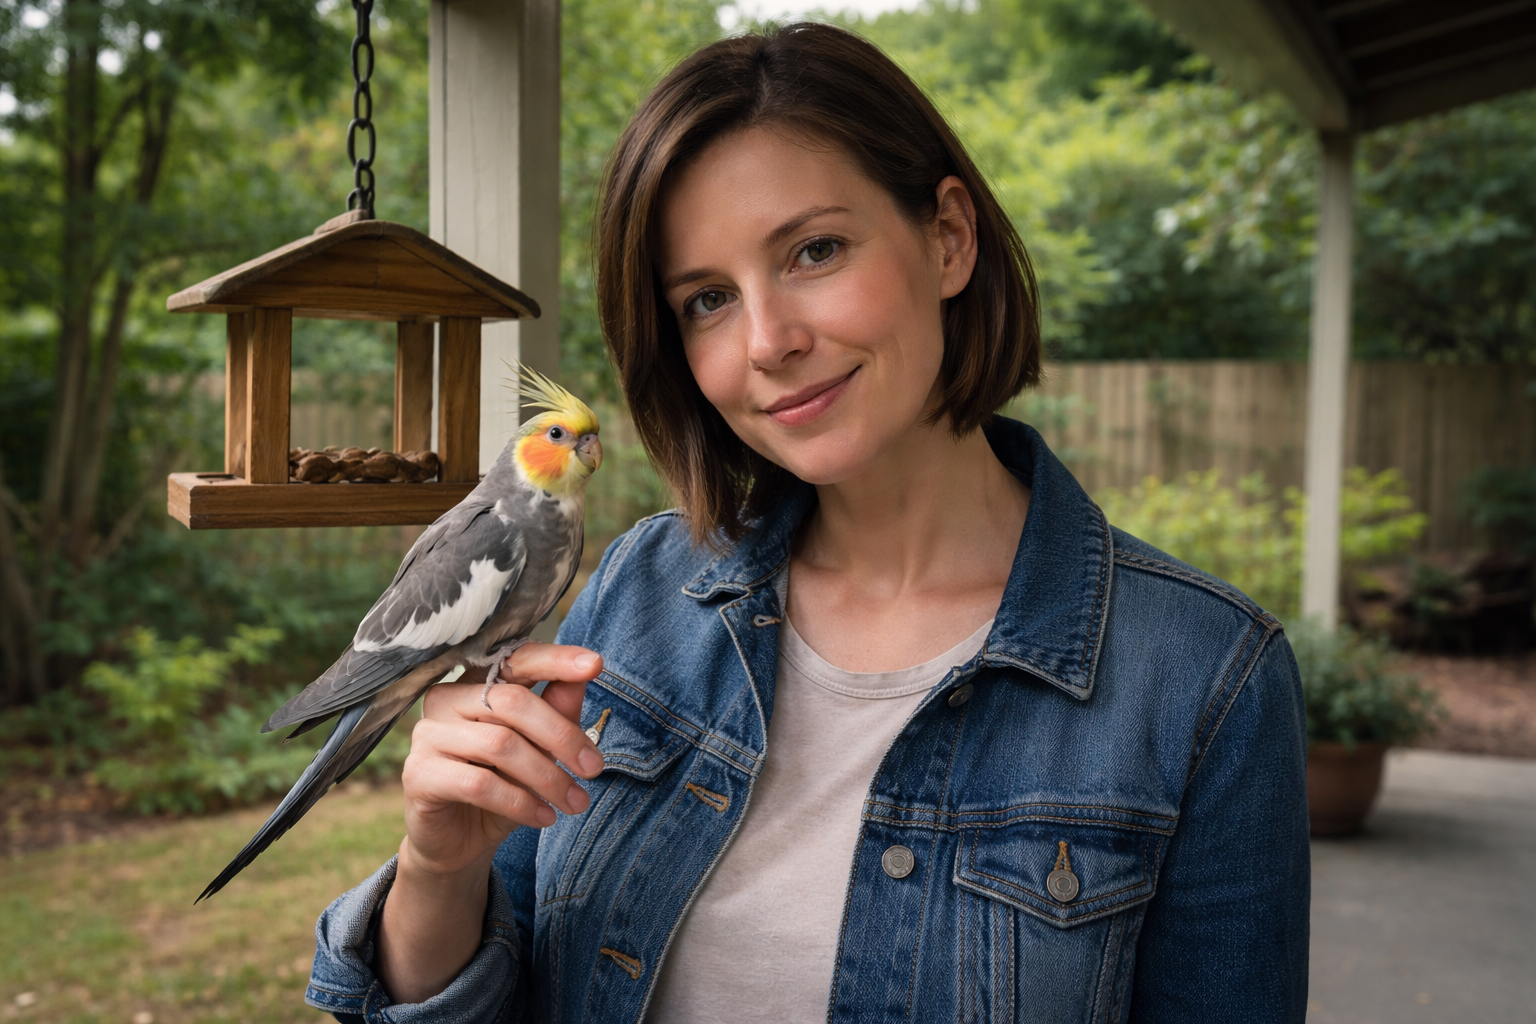
Carrying cockatiels in between
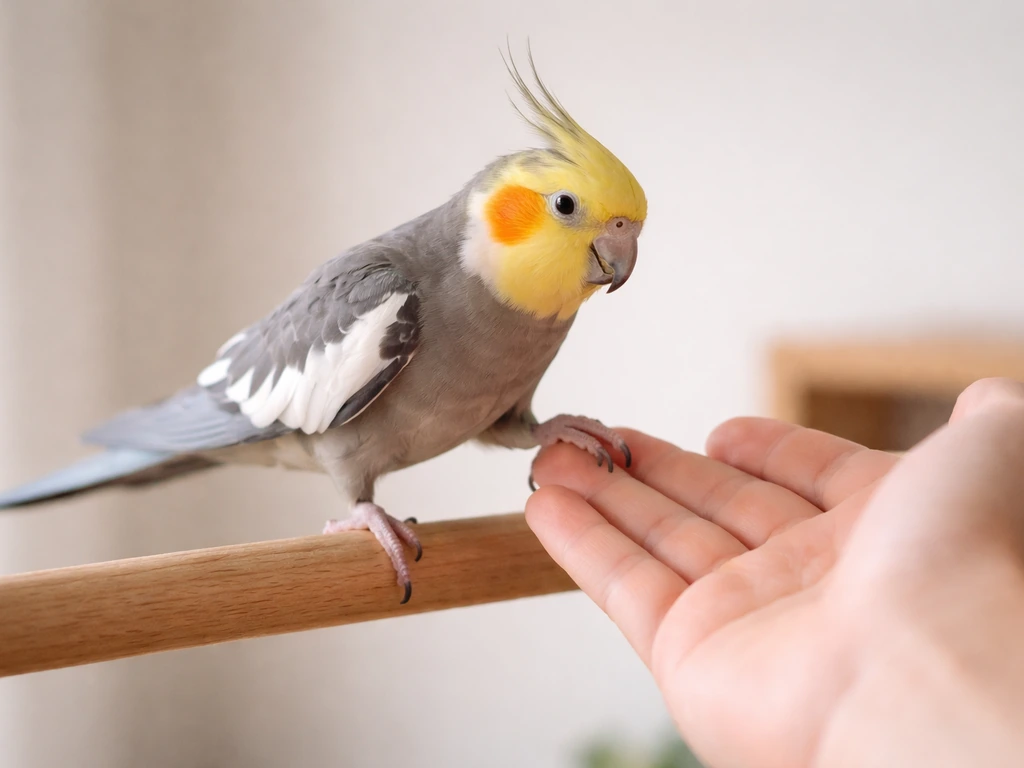
Cockatiels sit in an interesting middle ground. A tame cockatiel that's used to you can be carried on a perch or a hand-step-up just like a parrot. An untamed or scared cockatiel, though, needs towel assistance. Use a small, light hand towel. Drape it over the bird from above, wrapping loosely around the body to secure the wings, then support the bird in both hands with the towel between your skin and the bird. Hold the head gently between your thumb and index finger to prevent a bite, without putting any pressure on the throat. Keep the chest clear. The carry should take no longer than needed, and the bird should go straight into the carrier.
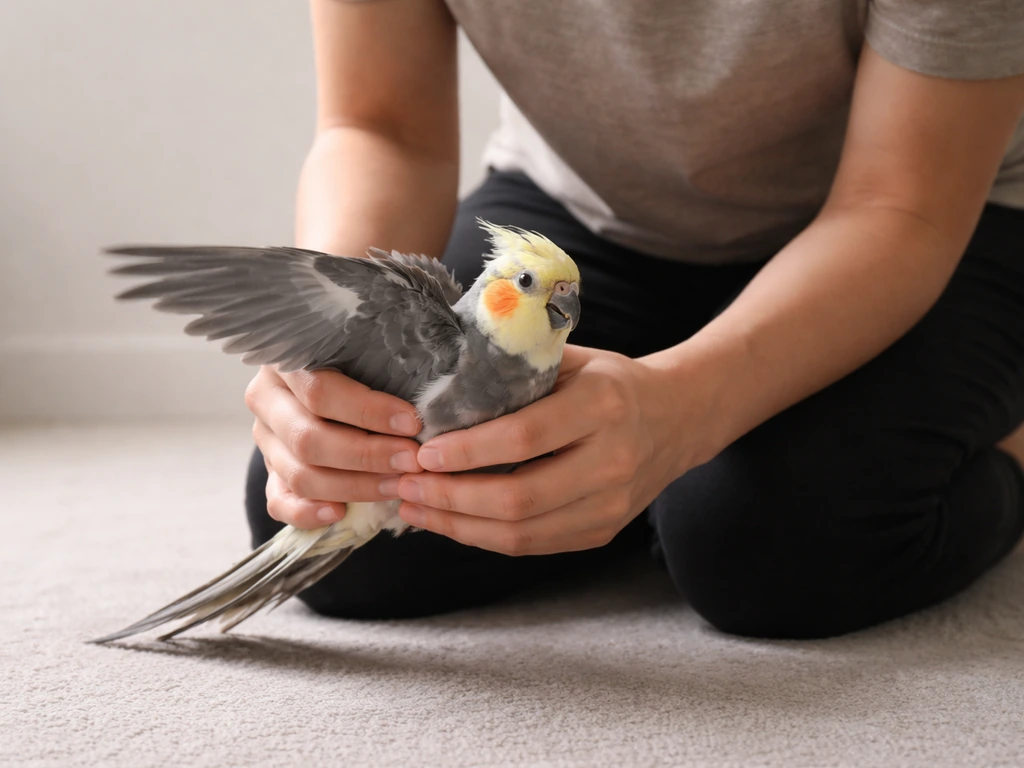
Carrying larger parrots and bite-risk birds
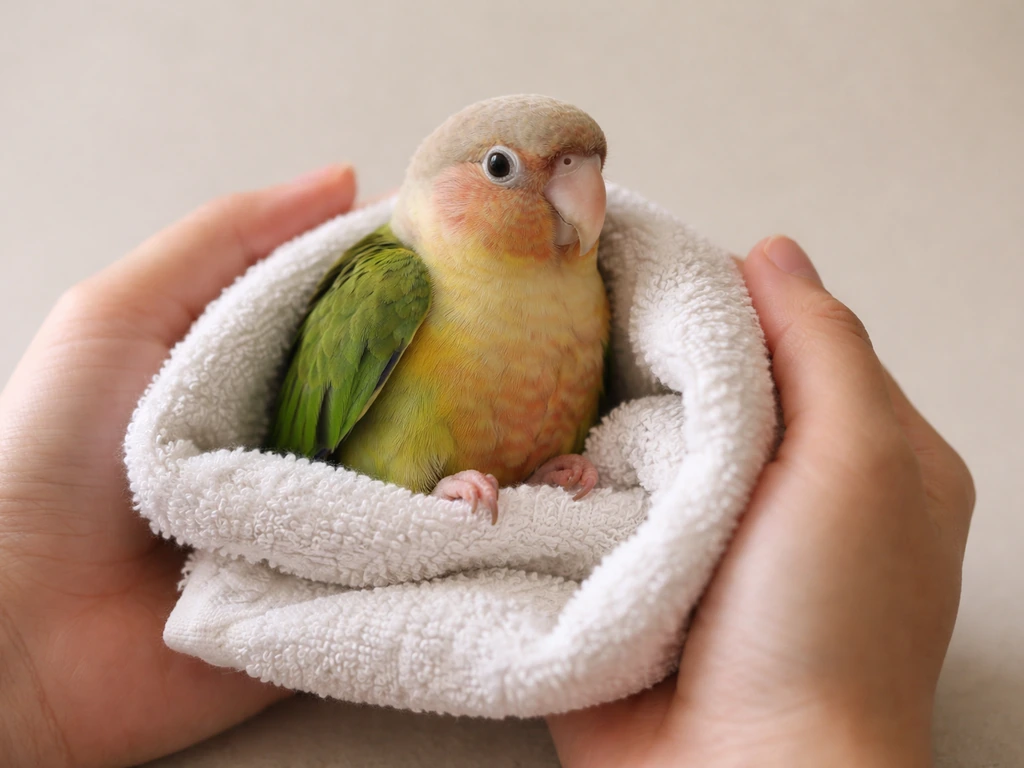
Larger parrots, including African greys, amazons, cockatoos, macaws, and large conures, require a more deliberate technique because a bite from any of these birds can cause real injury, and the birds themselves are strong enough to fracture a wing or leg if they struggle against an improper hold. The Psittacine Disaster Team is explicit: never grab a parrot by its legs or wings. Both carry fracture risk if the bird pulls against the grip. Instead, the towel wrap is the standard approach.
Use a medium to large bath towel. Drape it over the bird or approach from the back and sides to bring the towel around it. The Avian Welfare Coalition describes rolling the bird gently in the towel like wrapping a baby, with one hand holding the bird's head (thumb and fingers on either side of the lower jaw, not the throat) and the towel securing the wings against the body. The bird's feet should rest on your palm or on the towel folds below, giving it something to grip. The chest must remain uncompressed so breathing is unrestricted. This is a non-negotiable point: birds don't have a diaphragm and breathe using chest wall movement, so any pressure across the keel bone or sternum can compromise breathing quickly.
Walk smoothly and minimize how long the bird stays in the wrapped hold. If you're moving the parrot to a new cage or carrier, have everything set up and ready before you even start the carry. For parrots that reliably step up and are comfortable with handling, a confident step-up onto a handheld perch is always preferable to towel restraint. The towel approach is for birds that aren't trained to step up, that are frightened, or that need to be moved for a vet visit. For building the kind of trust that makes carries easy, check out the related guidance on how to hold a bird and how to handle a bird.
Carrying wild birds in your yard
If you find a wild bird in your yard that appears injured, sick, or grounded and can't fly away from you, the first call you need to make is to a licensed wildlife rehabilitator, not to your hands. Contact your local wildlife rehabilitation center, a state wildlife agency (in the US), or an RSPCA/wildlife rescue in the UK before picking the bird up if at all possible. The legal framework in the US, UK, and EU all point in the same direction: carrying a wild bird is permitted only as an immediate step to get it to professional help, not as a DIY relocation or temporary care situation.
That said, if the bird is in immediate danger (in a road, being attacked by a cat, caught in netting), here is how to pick it up safely. For step-by-step tips on how to safely pick up and hold a wild bird, follow the guidance on this page how to hold a wild bird. Use gloves or a folded towel between your hands and the bird. Approach from behind, move slowly, and cover the bird gently with the towel. Wrap it loosely but securely, wing tips tucked in, and support the body weight from below. For birds with long sharp beaks (herons, kingfishers, woodpeckers), point the beak away from your face and wear eye protection if you have it. Wisconsin Humane Society recommends eye protection specifically for long-billed species. Place the bird in a ventilated box lined with paper towels (not terry cloth, which can snag toenails), put it somewhere quiet and dark, and transport it to a rehabilitator within the hour. Best Friends Animal Society notes that the faster you make that handoff, the better the outcome.
A common question is what to do with a bird that has just hit a window and is stunned but seems otherwise healthy. Often, these birds just need 30 to 60 minutes in a quiet, dark box to recover, and then they fly away on their own. Best Friends Animal Society also emphasizes allowing window-collision birds time to recover in a quiet, low-stress setting before attempting another handoff 30 to 60 minutes in a quiet, dark box to recover. Keep the box somewhere safe from cats and dogs, don't add food or water (a stunned bird can aspirate), and check after an hour. If it's not alert and able to fly then, call a rehabilitator. For a fledgling that can't fly but hops around looking healthy, the right call is almost always to leave it alone. Fledglings spend days on the ground while their parents continue feeding them. Carrying a healthy fledgling into your house is not a rescue.
Tools and gear that make the carry easier
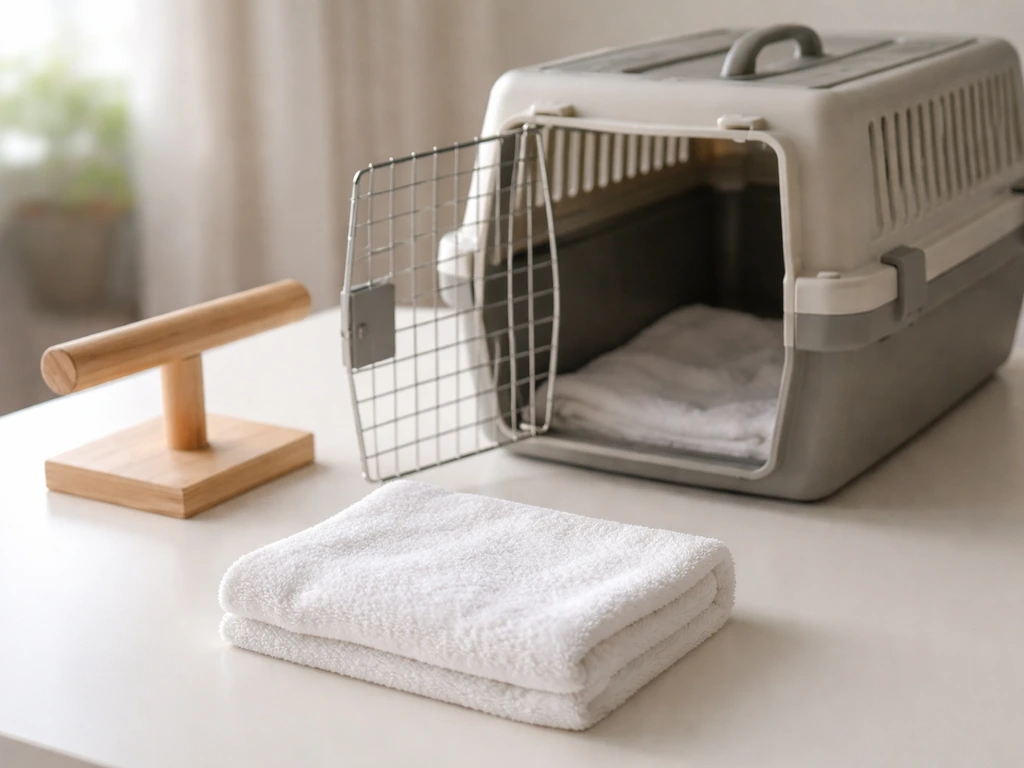
Having the right equipment ready before you attempt a carry reduces stress for both you and the bird significantly. Scrambling for a box while holding a flapping bird is how accidents happen.
| Tool | Best for | Notes |
|---|---|---|
| Hand towel (small) | Cockatiels, small conures, medium parrots | Light enough not to overheat the bird; machine washable |
| Bath towel (medium/large) | Large parrots, macaws, cockatoos | Thick enough to protect from bites; use a clean one each time |
| Thin cotton gloves | Wild birds, biting birds | Reduce grip sensitivity; use only when bare-hand carry isn't safe |
| Plastic travel carrier (bird-specific) | All pet birds for transport | Size-matched to species; ventilated; RSPCA recommends suitably sized carriers |
| Ventilated cardboard box | Wild birds, emergency transport | Line with paper towels; no food/water during short transport |
| Handheld perch (dowel or T-perch) | Trained parrots that step up reliably | Keeps hands at a distance from the beak; good for cage-to-cage moves |
| Large towel or sheet (for transfers) | Budgies, finches, any flighted bird | Cover both cages during door-to-door transfers to block flight |
Carrier choice matters. The carrier should be big enough for the bird to stand upright and turn around, but not so large that it's thrown around during movement. The Hagen Avicultural Research Institute recommends matching carrier size to species and ensuring appropriate ventilation. In hot weather, never leave a bird in a parked car, even briefly. VCA Animal Hospitals warns that cars heat up fast and birds can overheat and die in minutes. Watch for panting and wings held away from the body as early signs of heat stress.
Step-by-step carry workflow
- Set up your destination first. Carrier door open, perch in place, towel ready, box prepped. Do this before approaching the bird.
- Observe for 15 to 30 seconds. Check breathing, posture, and stress signals. If the bird shows respiratory distress, stop and seek vet help.
- Approach slowly from the front (pet birds) or from behind (wild or stressed birds), staying at the bird's level, talking calmly.
- Make contact using the appropriate method for the species: bare-hand cup for small tame birds, towel wrap for larger or untame birds.
- Secure the wings against the body without compressing the chest. Support the body weight underneath. Hold the head gently between thumb and forefinger only if needed to prevent biting.
- Move smoothly and directly to the destination. No detours, no showing the bird off, no stopping. The faster the carry, the less stress.
- Release the bird into the carrier or cage, lower your hands to perch level, and allow it to step off rather than dropping it.
- Close the door immediately. Cover the carrier with a light cloth to reduce visual stimulation during transport.
- After the carry, give the bird quiet time to settle. Check in after 15 minutes for normal perching, eating, and breathing.
Troubleshooting: when things go wrong mid-carry
The bird panics and flaps hard
Don't let go, but don't squeeze harder either. Keep the wings gently tucked and lower yourself to a sitting position on the floor if possible so there's less distance to fall if you do lose grip. Take a breath, slow your movements to almost nothing, and wait for the flapping to stop before continuing. If the bird has clipped wings, the Merck Veterinary Manual notes that a towel is especially helpful to prevent flapping during restraint.
The bird slips free
Close the room first if you haven't already. A bird loose in a small room is much easier to recapture than one that's made it to an open window. Don't chase it. Let it land, wait for it to settle, then approach again slowly with your towel. Turn off ceiling fans before any carry attempt. This is worth repeating: ceiling fans kill pet birds every year during exactly these kinds of escapes.
You get bitten
Don't pull away sharply. A bird biting down will grip harder if you pull, and you'll end up tearing your skin worse and potentially injuring the bird's beak. Instead, push your hand gently toward the bird (counterintuitive but effective), which releases the bite pressure. Once free, wash the bite with soap and water. Bird bites can introduce bacteria. If you're handling a wild bird, note that some species can carry salmonella and other pathogens. Wear gloves with wild birds whenever possible.
Blood or stress feathers are shed during the carry
A few dropped feathers during a carry is normal stress behavior. If a blood feather (a new feather still with a blood supply at the base) breaks and is bleeding, apply gentle pressure with a clean gauze pad. The Merck Veterinary Manual first-aid guidance notes that most bleeding skin wounds will clot. If the feather shaft itself is broken and still in the follicle and bleeding steadily, contact a vet, as a broken blood feather sometimes needs to be removed. Don't panic at the sight of blood, but don't ignore sustained bleeding either.
The bird seems exhausted or unwell after the carry
Birds can develop a measurable stress response from handling, including elevated white blood cell counts (a stress leukogram, documented in the Merck Veterinary Manual). A bird that is sitting fluffed at the cage bottom, not eating, or breathing with effort after a carry needs veterinary attention. Stress from handling is real and physiological, which is why every carry should be as short and calm as possible. If you're seeing repeated distress after routine carries, that's a signal to invest time in step-up training so future carries can happen with perch-assisted step-ups instead of restraint.
Building trust so the next carry goes better
Every carry that goes calmly is a small trust deposit. Every carry that turns into a chase or a struggle is a withdrawal. If you need to carry your bird regularly (for vet visits, out-of-cage time, or cage cleaning), the single best investment you can make is training a solid step-up response. A bird that reliably steps onto your hand or a perch on cue needs almost no restraint for a routine carry. That kind of trust takes anywhere from a few days with a young hand-tame budgie to several weeks with a rescue parrot that's had poor handling experiences. The timeline varies, but the method is the same: short positive sessions, no forced contact, and a lot of patience.
How you hold a bird during a carry, how you approach small birds without frightening them, and how to handle a bird across different situations are all skills that build on each other. Getting the carry right is part of a larger pattern of building a relationship where the bird chooses to engage with you rather than trying to escape. That's the goal worth working toward.
FAQ
Can I carry a bird while wearing gloves, and does it change the grip I should use?
Yes, but you should only do it if the bird is fully supported and calm. For most birds, the safest option is to have a towel wrap ready and place the carrier nearby, so you can move straight from your hands into the carrier without letting the bird hang or twist. If the bird shows any stress signs (open-mouth breathing, panting, tail bobbing, severe reluctance), stop and switch to containment plus a timely handoff to a vet or rehabilitator.
What’s the safest way to carry a pet bird that won’t step up yet?
For pet birds that are used to handling, aim for a “perch-first” carry where possible. Offer a finger or handheld perch and wait for a step-up, then support the body with a loose, non-squeezing hand. Gloves can reduce your ability to feel early wing flares, so if you use them, compensate by moving even more slowly and making sure you never restrict the chest while tucking wings gently.
What should I do if the bird starts panicking halfway through the carry?
Don’t carry a bird if it is flapping wildly, struggling to breathe, or unable to keep feet stable. Those are the situations where towel restraint or an immediate transport plan matters more than “getting it over with.” Also avoid carrying through doorways or tight spaces where you might bump the bird’s head or your hands might slip, set up the route first and keep the carrier within arm’s reach.
What’s the best way to prevent a fall, and what if the bird slips from my hands?
If you need to lower a bird, lower yourself rather than dropping your grip. Go to a sitting position or kneel, keep wings gently secured, and pause until flapping stops before you continue moving. If the bird escapes your grasp, do not chase immediately, contain the area and recapture calmly, because panic-chasing greatly increases the risk of further injury.
How do I recognize heat stress during carrying, and what should I do right away?
If you suspect overheating, stop immediately and cool the environment rather than continuing the carry. Move the bird to a cooler, shaded area with ventilation and keep the body supported without compressing the chest. Signs like panting or wings held away from the body are early heat-stress indicators, and a parked-car situation is an emergency even if it seems like a short time has passed.
After a window hit, is it always safe to pick the bird up and carry it to a different spot?
Not always. A bird that “isn’t wounded” can still be in severe stress or may have a respiratory issue, especially after window strikes or cold exposure. If breathing looks labored, the bird is not alert after recovery time, or it cannot stand or perch normally, the next step is professional care rather than another attempt to carry it home.
How long is it okay to keep a bird wrapped in a towel?
No. Don’t keep a captive bird in a thick towel wrap longer than necessary, because prolonged restraint can increase stress and interfere with breathing. Use restraint only to complete a specific, short task (for example, moving directly into a ventilated carrier), then release and allow calm recovery in a quiet, safe container.
What should I do if the bird starts bleeding during the carry?
If the bird is bleeding, protect yourself first and keep the bird supported and calm. Apply gentle pressure with clean gauze to stop bleeding from skin wounds, but if you see an actively bleeding blood feather or sustained bleeding that does not slow, switch to veterinary assistance. Also avoid attempting to remove feathers yourself, that can worsen injury or cause additional bleeding.
If I’m unsure whether a wild bird is legal to move, what’s the safest decision in the moment?
For wild birds, you should not try to treat the injury at home or keep the bird as a pet. The practical exception described in guidance is brief pickup solely to get to a licensed rehabilitator, and that urgency matters most when the bird cannot fly, is grounded, or is in immediate danger. If it is safe to wait, contact the rehabilitator first and follow their instructions before handling.
Is there a “cool down” step after carrying that I should always do?
Yes, even for normal pet carries, plan for recovery. After the carry, place the bird somewhere quiet and stable, avoid loud noises and sudden rehandling, and monitor breathing and posture for a short period. If you consistently see fluffed sitting, loss of appetite, or breathing effort after routine carries, treat it as a training and welfare issue and reduce handling time or shift to perch-assisted step-ups.
What are the most common mistakes that make bird carries go wrong?
Many people fail because they try to improvise with grip pressure, loose wings, or an uncovered carrier. Improve your odds by pre-staging the carrier, matching towel size for parrots so the chest stays free, and rehearsing the route without the bird in your hands. If the bird is not familiar with step-up behavior, rely on a planned towel transfer or cage-to-cage transfer instead of a panic hand carry.
Next Article
How to Handle a Bird Safely and Humanely Step by Step
Step-by-step safe, humane bird handling for pets and wild birds, with restraint, training, taming timelines, and escape